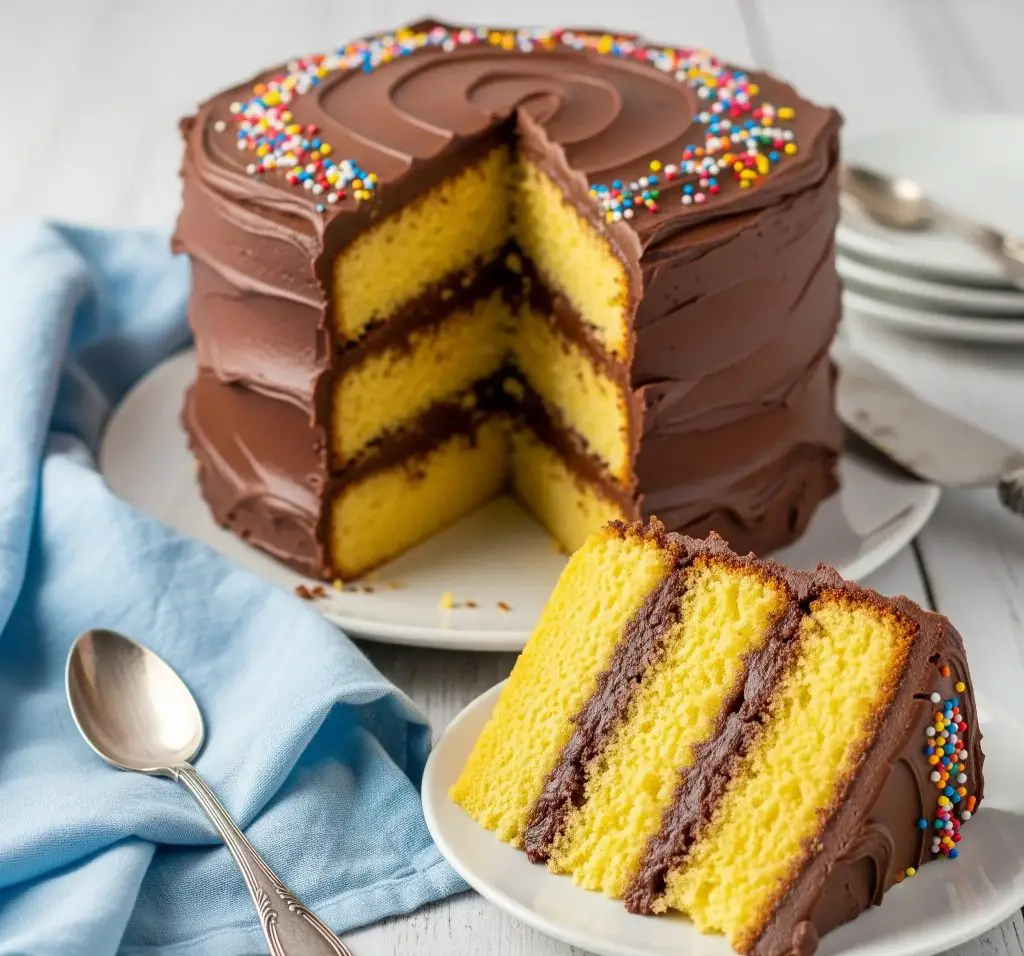
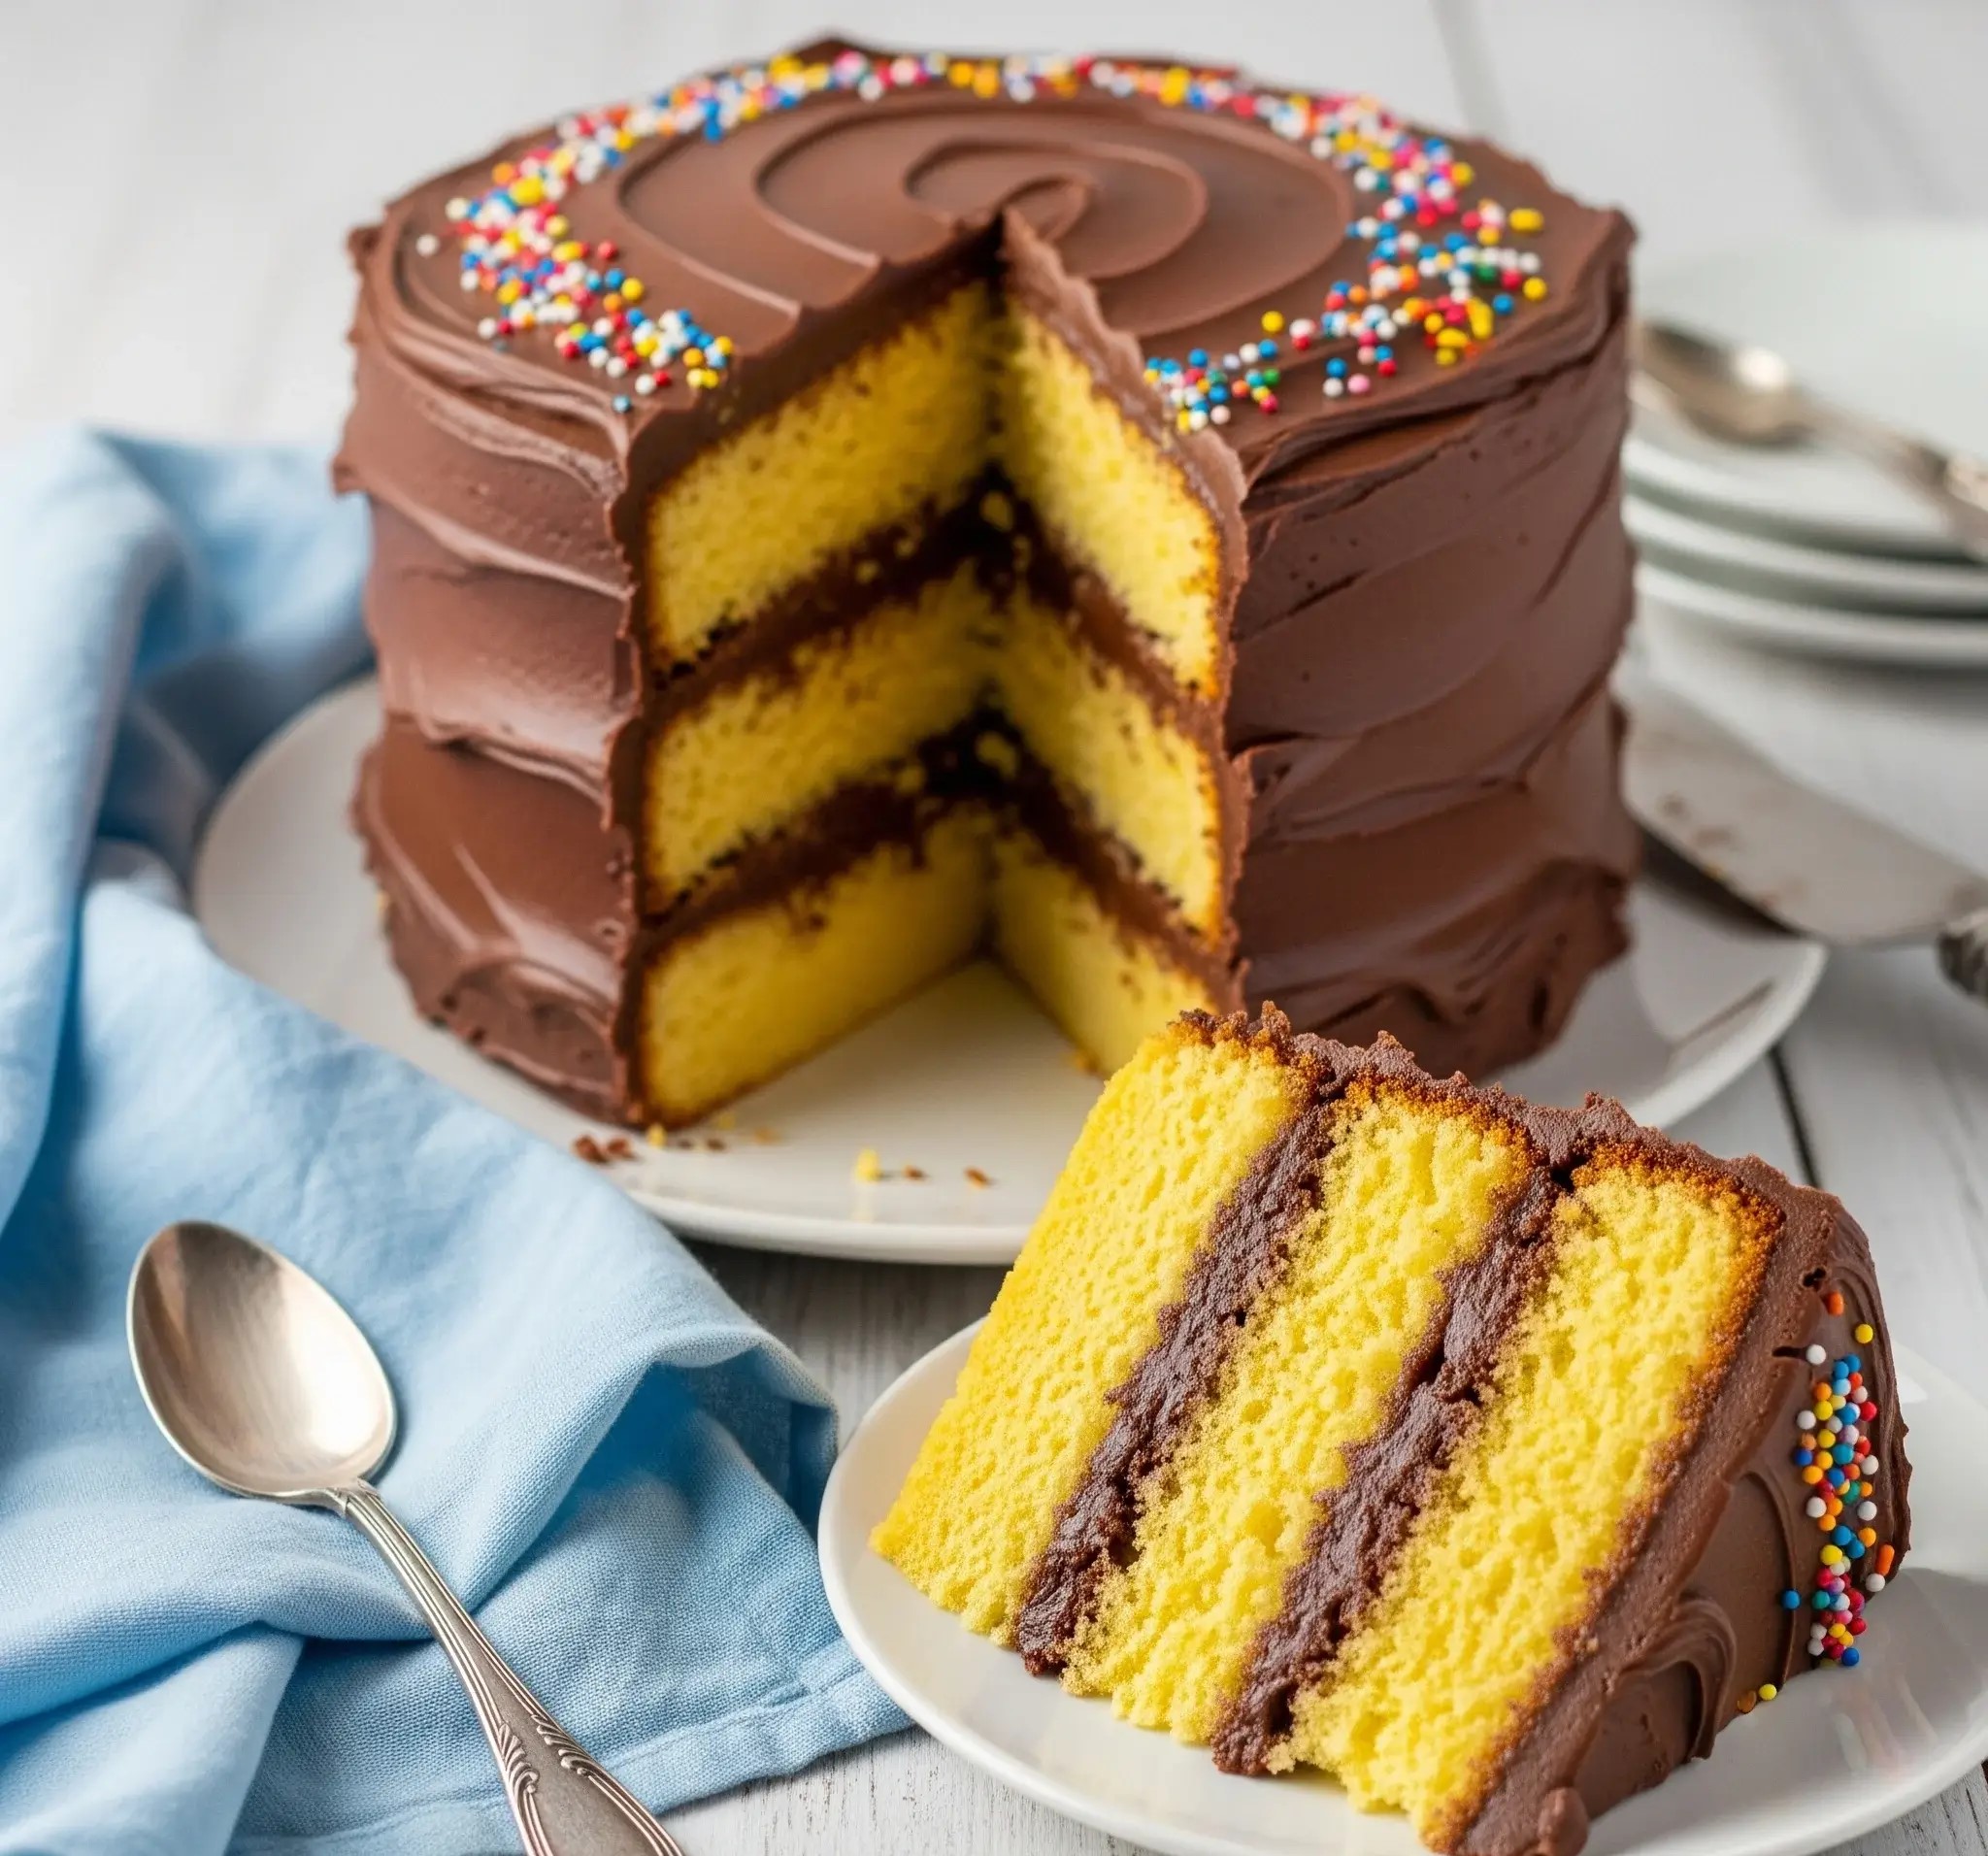
You know that cake your mom or aunt used to make — the one that showed up at every birthday, every big Sunday dinner, every little celebration that didn’t need a reason?
That yellow cake with thick, homemade chocolate frosting? Yeah. That’s the one I’m talking about.
For me, it’s the cake that reminds me of childhood. Big, tall slices with that golden yellow crumb, layers stacked with chocolate that wasn’t too sweet or too dark — just right.
You didn’t need a second slice because the first one was already that satisfying. But you had one anyway.
This isn’t some over-the-top, complicated recipe with ten kinds of flour or a frosting that takes an hour to whip.
It’s real cake — the kind you make in your own kitchen, with simple ingredients and your favorite mixing bowl.
The kind that fills the house with that buttery, bakery smell that has everyone peeking into the oven way too early.
I’ve made this cake more times than I can count — for birthdays, sure, but also on random Wednesdays when I just felt like baking.
And every time, without fail, someone asks for the recipe. Not because it’s fancy, but because it tastes right. Like it’s supposed to. Like cake should.
So I’m sharing it with you, the exact way I make it. No weird shortcuts. No complicated steps. Just real-deal yellow cake with smooth, rich chocolate frosting that actually tastes like chocolate.
If you’ve never baked from scratch before — trust me, you got this. And if you have, this just might become your go-to.
Yellow Cake With Chocolate Frosting Recipe
Ingredients:
For the Yellow Cake (Three 8-inch layers):
- 3 ¼ cups (390g) all-purpose flour
- 2 ½ tsp baking powder
- ½ tsp baking soda
- ¾ tsp fine sea salt
- 1 cup (226g) unsalted butter, softened to room temperature
- 2 cups (400g) granulated sugar
- 4 large whole eggs, room temperature
- 2 large egg yolks, room temperature
- 1 tbsp pure vanilla extract
- 1 cup (240ml) whole milk, room temperature
- ½ cup (120ml) sour cream, room temperature
For the Chocolate Frosting:
- 1 ½ cups (340g) unsalted butter, softened
- 5 cups (600g) powdered sugar, sifted
- 1 cup (85g) unsweetened cocoa powder, sifted
- ¾ tsp fine sea salt
- 1 tbsp pure vanilla extract
- ½ cup (120ml) whole milk, room temperature (more if needed for consistency)
To Decorate:
-
Multicolored nonpareil sprinkles
Instructions
- Preheat your oven to 350°F (175°C). Grease and line three 8-inch round cake pans with parchment paper on the bottom. Lightly dust the sides with flour and tap out the excess.
- Sift the dry ingredients into a medium bowl: flour, baking powder, baking soda, and salt. Set aside.
- In a large mixing bowl, cream the butter and sugar together on medium-high speed using a stand mixer with a paddle attachment (or a hand mixer) until light and fluffy — about 3-4 minutes.
- Add the eggs one at a time, mixing well between each addition. Scrape the sides and bottom of the bowl. Then add the two yolks and beat again until fully combined.
- Mix in the vanilla extract.
- In a separate small bowl, whisk together the milk and sour cream until smooth.
- Alternate adding the dry and wet ingredients to the butter mixture: start and end with the dry. Add one-third of the flour mixture, mix on low until just combined, then add half of the milk mixture, mix again, and repeat. Do not overmix.
- Divide the batter evenly between the prepared pans. Use a digital scale for precision (each pan should get about 620g of batter). Smooth the tops gently with a spatula.
- Bake for 26–30 minutes, or until a toothpick inserted into the center comes out clean and the tops spring back lightly when touched.
- Cool in the pans for 10 minutes, then transfer the cakes to a wire rack and let them cool completely.
- In a large bowl, beat the butter on medium-high speed until smooth and creamy — about 2-3 minutes.
- Add the sifted powdered sugar and cocoa powder in small increments, mixing on low until incorporated (to avoid a sugar cloud), then on medium until smooth.
- Add salt, vanilla extract, and milk. Beat on high for 2-3 minutes, or until fluffy and spreadable. Add more milk, 1 tbsp at a time, if needed for a smoother texture.
- Level each cake layer if needed using a serrated knife.
- Place one layer on a cake board or serving plate. Spread about ¾ cup of frosting evenly over the top. Repeat with the second and third layers.
- Apply a thin crumb coat of frosting around the entire cake and chill for 20 minutes to set.
- Frost the entire cake generously with the remaining chocolate frosting, using an offset spatula to create the same spiral swirl pattern on the top.
- Decorate the top edge with multicolored nonpareil sprinkles, creating a ring close to the edge for the same festive look.
- Chill the cake for 15–20 minutes before slicing for cleaner cuts.
- Serve at room temperature. Store leftovers covered at room temperature for up to 2 days, or refrigerate for up to 5 days. Let come to room temperature before serving if chilled.

How Do I Make Yellow Cake Moist And Fluffy?
A soft, fluffy yellow cake is all about balance — of ingredients and mixing.
- Use room temperature ingredients: This helps everything mix smoothly and trap air for a fluffy texture.
- Cream butter and sugar properly: Beat them for 3–4 minutes until light and fluffy — this builds the base for a light cake.
- Don’t skip sour cream: It adds moisture and helps soften the cake’s crumb.
- Alternate dry and wet ingredients: This keeps the batter stable and smooth.
- Bake immediately: Don’t let the batter sit too long before going into the oven.
How Do I Get Bright Yellow Color In The Cake Naturally?
Getting that warm yellow color without food coloring is easy if you use the right ingredients.
- Use egg yolks: More yolks = richer color.
- Use real butter: Good-quality butter adds natural golden tones.
- Add a pinch of turmeric: Just a tiny pinch won’t affect the taste but gives a deeper yellow color.
- Use fresh, rich eggs: Farm-fresh or organic eggs often have darker yolks.
What’s The Best Cocoa Powder For Chocolate Frosting?
Not all cocoa powders work the same in frosting.
- Natural unsweetened cocoa powder: Gives a light, slightly tangy chocolate taste.
- Dutch-processed cocoa powder: Smoother, deeper chocolate flavor.
- High-fat cocoa: Adds richness and a more luxurious texture.
Can I Make Yellow Cake With Chocolate Frosting Ahead Of Time?
Yes, you can bake and frost ahead — just store it properly.
- Bake the layers a day before: Wrap them in plastic and keep them at room temp.
- Frost the day you serve: Fresh frosting has better texture.
- Fully assembled cake: Can be made a day early and stored in the fridge. Bring to room temp before serving.
Why Is My Yellow Cake Dry Or Crumbly?
If your yellow cake turns out dry or breaks apart easily, a few things might be going wrong.
- Too much flour: Always measure flour using the spoon-and-level method, not by scooping directly with the cup.
- Overbaking: Even a few extra minutes in the oven can dry out your cake. Keep an eye on it in the last 5 minutes.
- Not enough fat or liquid: Butter, eggs, milk, and sour cream keep the cake moist. Cutting any of these short affects the texture.
- Overmixing the batter: Mix until just combined — overmixing makes the cake dense and crumbly.
- Incorrect oven temperature: Always preheat your oven and use an oven thermometer if needed.
Can I Make This Recipe In a 9×13 Pan Instead Of Layers?
Yes, absolutely — it’s a great option for simple serving.
- Use the same batter: Just pour it into a greased 9×13-inch pan.
- Adjust baking time: It may take 30–35 minutes. Start checking at 28 minutes.
- Cool completely before frosting: Or the frosting will melt.

Why Does My Chocolate Frosting Split Or Curdle?
Frosting can split if ingredients don’t mix well or temperatures are off.
- Use room temperature ingredients: Cold milk or butter can cause curdling.
- Don’t overbeat: Too much mixing can break the frosting.
- Add milk slowly: Mix in a little at a time, not all at once.
- Too warm? Chill and remix: If it starts to melt, put it in the fridge for 10 minutes and try again.
Can I Use Dutch-Processed Cocoa For The Frosting?
Yes, and it’s a great option for a deeper, smoother chocolate flavor.
- Less acidic: Smoother and less bitter taste.
- Darker color: Makes the frosting look richer.
- Creamier result: Works very well in butter-based frostings.
How Do I Keep The Cake Layers From Sticking To The Pans?
Removing clean layers starts with prepping the pan the right way.
- Grease and flour the pans: Use butter or oil + a light dusting of flour.
- Use parchment paper rounds: Cut to fit the bottom of each pan.
- Let the cake cool slightly before removing: 10 minutes is usually enough.
- Run a knife around the edge: Loosen it before flipping.
How Do I Make a Gluten-Free Version Of Yellow Cake With Chocolate Frosting?
You can make a delicious gluten-free version with a few simple swaps.
- Yellow cake: Use a gluten-free all-purpose flour blend with xanthan gum.
- Chocolate frosting: Use cornstarch-based powdered sugar and cocoa with no added wheat or starch.
- Parchment paper: Prevents sticking without using flour.
- Vanilla extract, milk, butter, eggs: All naturally gluten-free.
How Should I Store Yellow Cake With Chocolate Frosting?
Storage depends on how long you want to keep the cake fresh.
- Short-term (1–2 days): Cover the cake with a lid or plastic wrap and keep it at room temperature.
- Longer (3–5 days): Store it in the fridge in an airtight container. Let it sit out 30–60 mins before serving.
- Don’t leave uncovered: It will dry out quickly.
Can I Freeze Yellow Cake With Chocolate Frosting?
Yes, you can freeze the whole cake or individual slices.
- Let the cake cool completely first: Never freeze a warm cake.
- Wrap tightly: Use plastic wrap, then foil, to avoid freezer burn.
- Use a freezer-safe container: Especially for frosted cakes.
- Thaw in the fridge overnight: Then let it come to room temp before serving.

