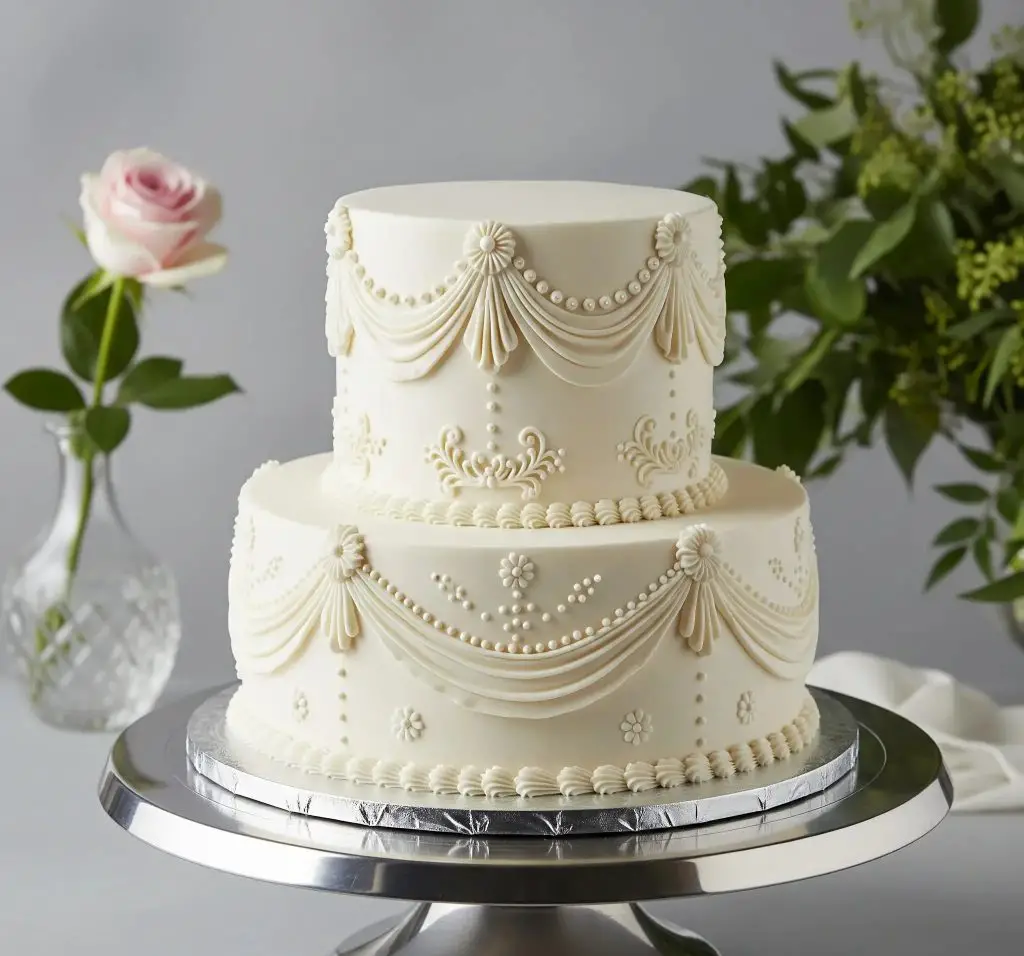
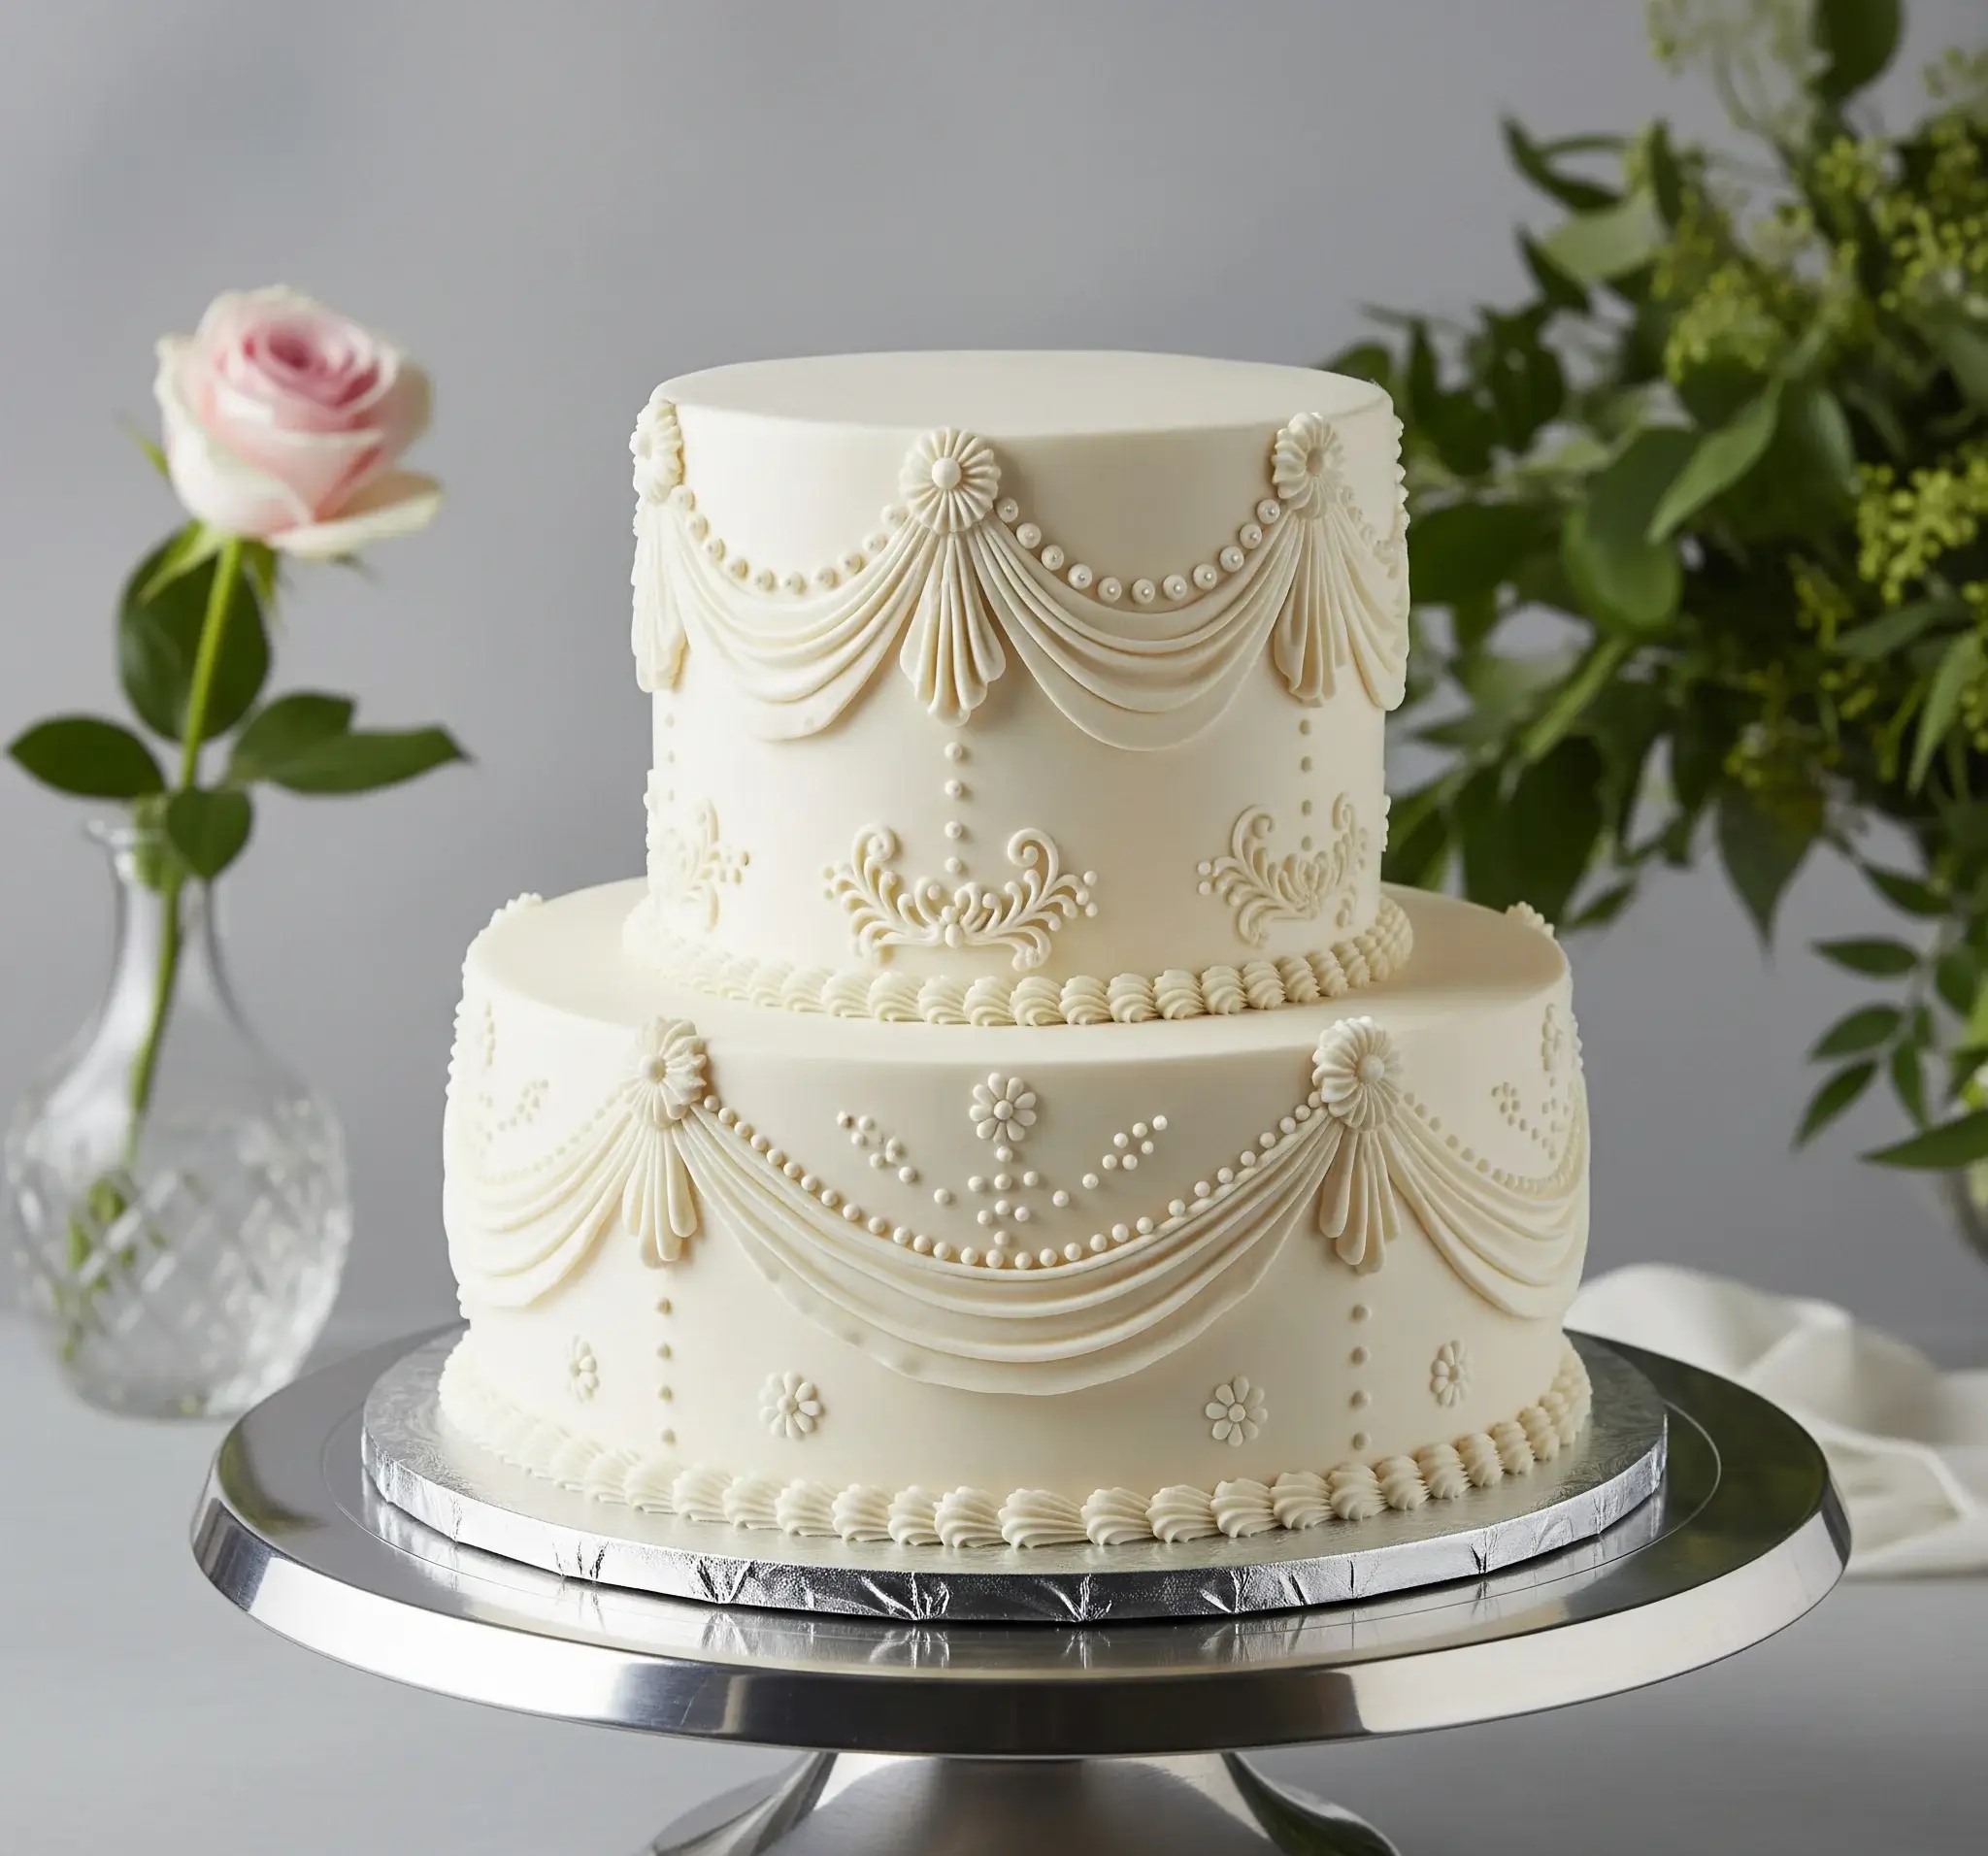
No glitter. No gold dust. Just quiet beauty—honest and real.
I still remember the first time I saw a vintage wedding cake like this. It wasn’t in some grand bakery window or on a magazine cover.
It was in my grandmother’s kitchen, on a rainy afternoon. She stood at the table, hands steady, piping tiny pearls and icing swags like she’d done it a hundred times. And maybe she had. But to me, it felt like magic.
This cake doesn’t shout for attention. It doesn’t need to. Everything about it—the soft ivory color, the delicate drapes, the tiny piped flowers—feels calm and graceful, like it belongs to another time.
And honestly, that’s what I love most about it. It’s not trying too hard. It’s just… enough.
Making it isn’t hard, but it does ask for patience. You won’t be rushing through this one.
You’ll slow down, smooth the buttercream, focus on the tiny details—and somehow, that quiet rhythm becomes part of the cake itself.
I’ve written this recipe exactly the way I’d tell a friend, step by step, so you can make a cake that feels just as lovely as the one my grandmother made all those years ago. Not flashy. Just pure, gentle beauty that never goes out of style.
Vintage Wedding Cake (2-Tier – Serves 40–45)
Cake Layers (Two Tiers: 8-inch & 6-inch – 2 layers each)
Vanilla Butter Cake – Ingredients for One 8-inch Layer (Double for Two, Adjust for 6-inch):
- 2 ¼ cups cake flour (sifted)
- 2 ½ tsp baking powder
- ½ tsp fine salt
- ¾ cup unsalted butter, softened
- 1 ½ cups fine white sugar
- 4 large eggs, room temperature
- 1 tbsp pure vanilla extract
- ¾ cup whole milk, room temperature
Instructions
- Preheat oven to 175°C (350°F). Grease and line two 8-inch and two 6-inch round cake pans.
- In a bowl, whisk cake flour, baking powder, and salt.
- In a stand mixer, beat the butter until creamy (about 2 minutes).
- Add sugar gradually and cream until fluffy and pale.
- Add eggs one at a time, mixing well after each. Stir in vanilla.
- Alternately add flour mixture and milk in three additions, starting and ending with flour. Mix just until combined.
- Divide batter evenly into pans. Tap to release bubbles.
- Bake 8-inch layers for 35–38 mins; 6-inch layers for 28–30 mins. A skewer should come out clean.
- Cool completely in pans for 10 minutes, then turn out onto racks.
Classic American Buttercream
This frosting gives the smooth, pipeable finish and creamy texture.
Ingredients:
- 2 cups unsalted butter, softened
- 8 cups powdered sugar, sifted
- 3–5 tbsp milk or cream (as needed)
- 2 tsp vanilla extract
Instructions:
- Beat butter on medium-high speed for 3 minutes until pale and fluffy.
- Gradually add sifted powdered sugar, one cup at a time.
- Add vanilla and 3 tbsp milk. Beat until smooth.
- Add more milk if needed for piping consistency.
- Mix for 5 minutes on low to remove air bubbles.
Assembling and Stacking
- Trim & Level: Once all layers are cool, level them flat with a serrated knife or cake leveler.
Filling & Stacking:
- Place one 8-inch layer on a cake board. Spread a thick layer of buttercream.
- Top with the second 8-inch layer. Repeat with the 6-inch layers separately on a 6-inch board.
Crumb Coat:
- Spread a thin layer of buttercream over each tier to trap crumbs.
- Chill for 30 minutes.
Final Frosting:
- Apply a smooth, even coat of buttercream using a bench scraper.
- Chill again before stacking.
Stacking:
- Insert 4 bubble tea straws/dowels into the center of the 8-inch base cake to support the top tier.
- Gently place the 6-inch tier on top.
Vintage Royal Icing Decorations
This is what gives the cake its signature vintage piped look with drapes, dots, and pearls.
Royal Icing – Ingredients:
- 3 tbsp meringue powder
- 4 cups powdered sugar, sifted
- 5–6 tbsp warm water (add slowly)
- 1 tsp vanilla extract
Instructions:
- Beat all ingredients in a mixer for 5–7 minutes until thick, white, and glossy.
- The icing should hold stiff peaks for piped decorations. Add a touch more sugar if too soft.
Decoration Guide (Piping Work)
Tools Needed:
- Piping bags
- Small round tips (Wilton #1, #2, #3)
- Petal tip (for drapes – Wilton #104 or similar)
- Star tip for small rosettes (Wilton #18)
- Flower nail (optional)
Piping Details:
- Drapes: Use the petal tip to create curtain-style drapes across both tiers. Start and end each drape at small piped rosettes using a star tip.
- Pearl Garlands: Use a small round tip to pipe dotted pearl chains along the top and bottom of each tier and in between drapes.
- Mini Daisies: Use a star tip or daisy press to add small floral accents evenly around the sides.
- Crown Flourishes: Pipe intricate curved flourishes under each swag on the top tier using a small round tip. This gives that elegant embroidered look.
- Top Center Flower: Pipe a large round daisy or place a hand-crafted fondant flower (optional for exact visual match).
Finishing Touches:
- Chill the cake again for 30 minutes once decorated.
- Use a silver cake base and a mirrored stand to reflect the vintage styling.
- Optionally, display beside soft greenery and a single pastel rose in a crystal vase for a timeless photo-ready setup.

Can I Make a Vintage Wedding Cake At Home Without Fondant?
Yes, you definitely can. Fondant is not required to get that vintage look. A smooth buttercream base with delicate piping gives the same soft, old-style charm.
- Smooth Buttercream Finish: Use a bench scraper for sharp edges and clean sides.
- Royal Icing Details: Pipe delicate designs like drapes, dots, and pearls directly over buttercream.
- Piping Work: Use classic piping tips like round, petal, and star to create scrolls and flowers.
- Soft Colors: Stick to shades like ivory, blush, and pale peach for a gentle, vintage feel.
- Simple Structure: Use 2 or 3 tiers stacked with support inside each layer.
How Long Does It Take To Decorate a Vintage Wedding Cake?
It depends on the size and amount of detail, but it usually takes a few hours or more—this style needs time and patience.
Estimated decoration time:
- 2-tier cake with basic piping: 2 to 3 hours.
- 3-tier cake with heavy piping and lace detail: 4 to 6 hours.
- Additional time for chilling between layers: 30 minutes to 1 hour between each major step.
Tips to save time:
- Prep icing and piping bags in advance.
- Chill the crumb-coated cake before final decoration.
- Sketch your piping design before starting.
What Kind Of Flowers Go With a Vintage Wedding Cake?
Vintage cakes look beautiful with soft and romantic flowers. Stick with gentle colors and classic shapes.
- Roses: Soft pink, ivory, or white.
- Peonies: Full and fluffy, great for a romantic feel.
- Baby’s Breath: For filling small spaces.
- Hydrangeas: Add fullness and texture.
- Carnations: Ruffled edges look delicate and pretty.
Can I Use Royal Icing For Vintage Wedding Cake Details?
Yes, royal icing is perfect for this style. It dries firm, so your piped work stays clean and sharp.
- Holds shape: Great for scrolls, lace, and pearls.
- Dries hard: Keeps fine details from smudging.
- Works on buttercream: Can be piped over chilled buttercream smoothly.
- Easy to color: Add soft food coloring for pastel tones.
How Far In Advance Can I Make a Vintage Wedding Cake?
You can make it a few days in advance if stored properly. Just follow proper steps for freshness and decoration timing.
- Cake layers: Bake up to 3 days ahead. Wrap in plastic and refrigerate or freeze.
- Buttercream: Can be made 4–5 days ahead. Keep in an airtight container in the fridge.
- Royal icing piping: Can be done 1–2 days before serving.
- Final assembly: Do it 1 day before the event and keep the cake refrigerated.

What Colors Work Best For a Vintage Wedding Cake?
Vintage cakes usually use soft and muted tones. Avoid anything too bright or neon.
- Ivory: Soft and timeless base.
- Blush Pink: Adds a gentle, romantic touch.
- Pale Blue: Light and classic.
- Dusty Rose: Slightly deeper pink with a vintage vibe.
- Soft Lavender: For a dreamy, calm look.
- Muted Peach or Beige: Elegant and warm.
Can I Add Lace Patterns To a Vintage Wedding Cake?
Yes, lace designs are one of the most iconic parts of a vintage wedding cake. They add softness and class.
- Royal icing piping: Use a small round tip to pipe lace-style swirls and loops.
- Stencils: Gently press a food-safe stencil on the buttercream and fill it with royal icing or dusting powder.
- Sugar lace: If you’re comfortable using edible lace sheets, they can be added once dried.
How Do I Transport a Tiered Vintage Wedding Cake Safely?
Transporting a decorated cake needs extra care. One small shake can damage detailed piping.
- Use dowels inside: Each tier should have support rods or straws for strength.
- Chill the cake: A cold cake is more stable and doesn’t slide easily.
- Cake box with grip: Use a snug cake box to stop the cake from shifting.
- Flat car surface: Place on a flat surface in your car—not the seat.
- Drive slowly: Avoid sharp turns and sudden stops.
- Final touches later: If possible, add delicate piping or flowers after reaching the venue.
What Tips Do I Need For Piping Scrolls And Pearls?
Piping scrolls and pearls takes a little practice, but it’s easy once your hands are steady.
- Use the right tip: For scrolls, use a small round tip (#1 or #2). For pearls, use a round tip (#2 or #3).
- Even pressure: Keep your hand steady and apply even pressure for smooth curves.
- Practice on paper: Test your designs on parchment before piping on the cake.
- Don’t rush: Take your time—smooth scrolls need slow movement.
- Chill before piping: A slightly firm cake surface makes piping easier and cleaner.
- Wipe tip often: Keep a damp cloth nearby to clean your piping tip as you go.
You May Also Like To Check Out These Recipes:
- Black Forest Cake
- Black And White Wedding Cake
- Bluey Birthday Cake
- Chocolate Cake Pops
- Chocolate Zucchini Cake
- Gluten Free Chocolate Cake
- No Bake Eclair Cake
- Dirt Cake With Gummy Worms
- Peanut Butter Chocolate Cake
- Single Tier Wedding Cake
- White Wedding Cake
- Flower Cake Design
- 16th Birthday Cake
- Flamingo Cake
- Yogurt Cake
- Sugar Cookie Cake
- Pecan Pie Dump Cake
- Butterfinger Poke Cake

