Weddings are a big deal in my world — not just for the love and all the emotions flying around, but for the cake. I’ll be honest: I care about the cake more than the centerpieces or even the dress sometimes.
Because that cake? That’s the one thing everyone gathers around. Everyone stops to admire it. And let’s face it — it shows up in almost every photo after the vows.
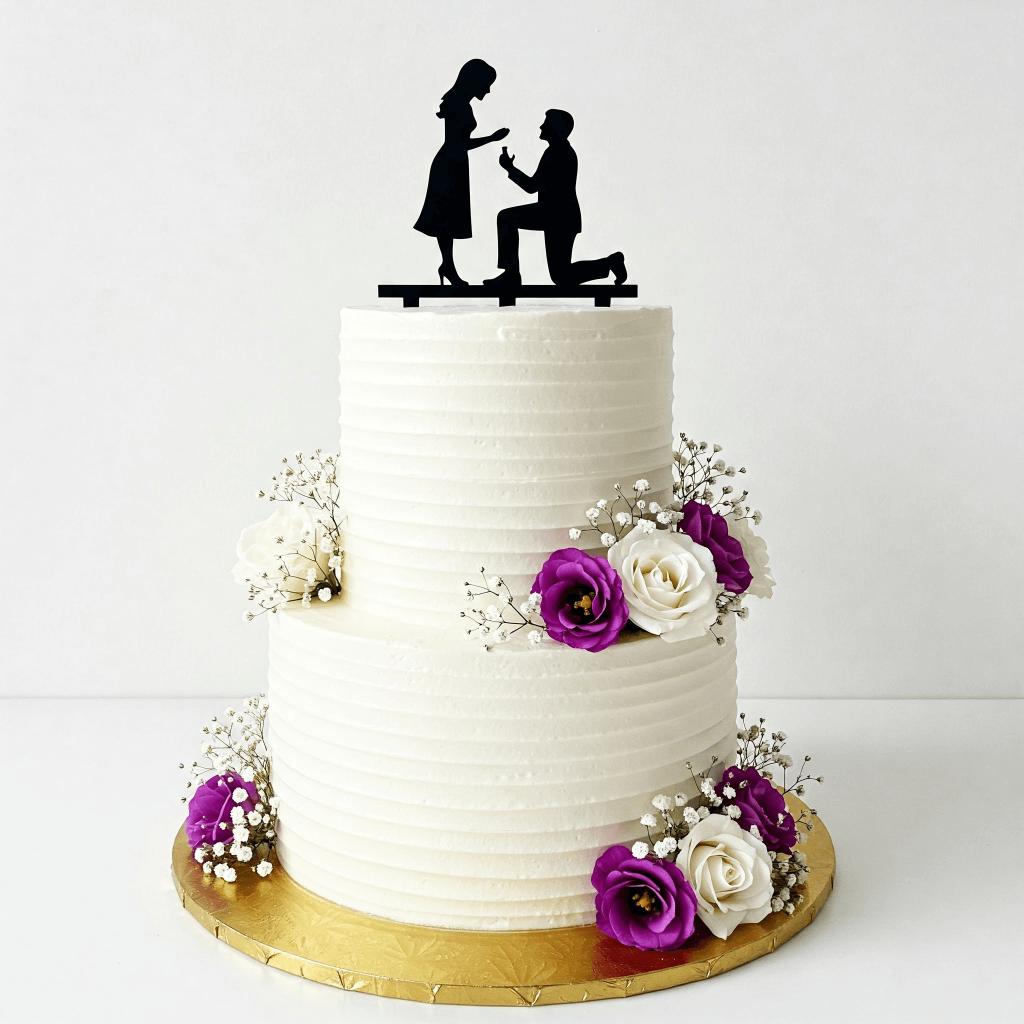
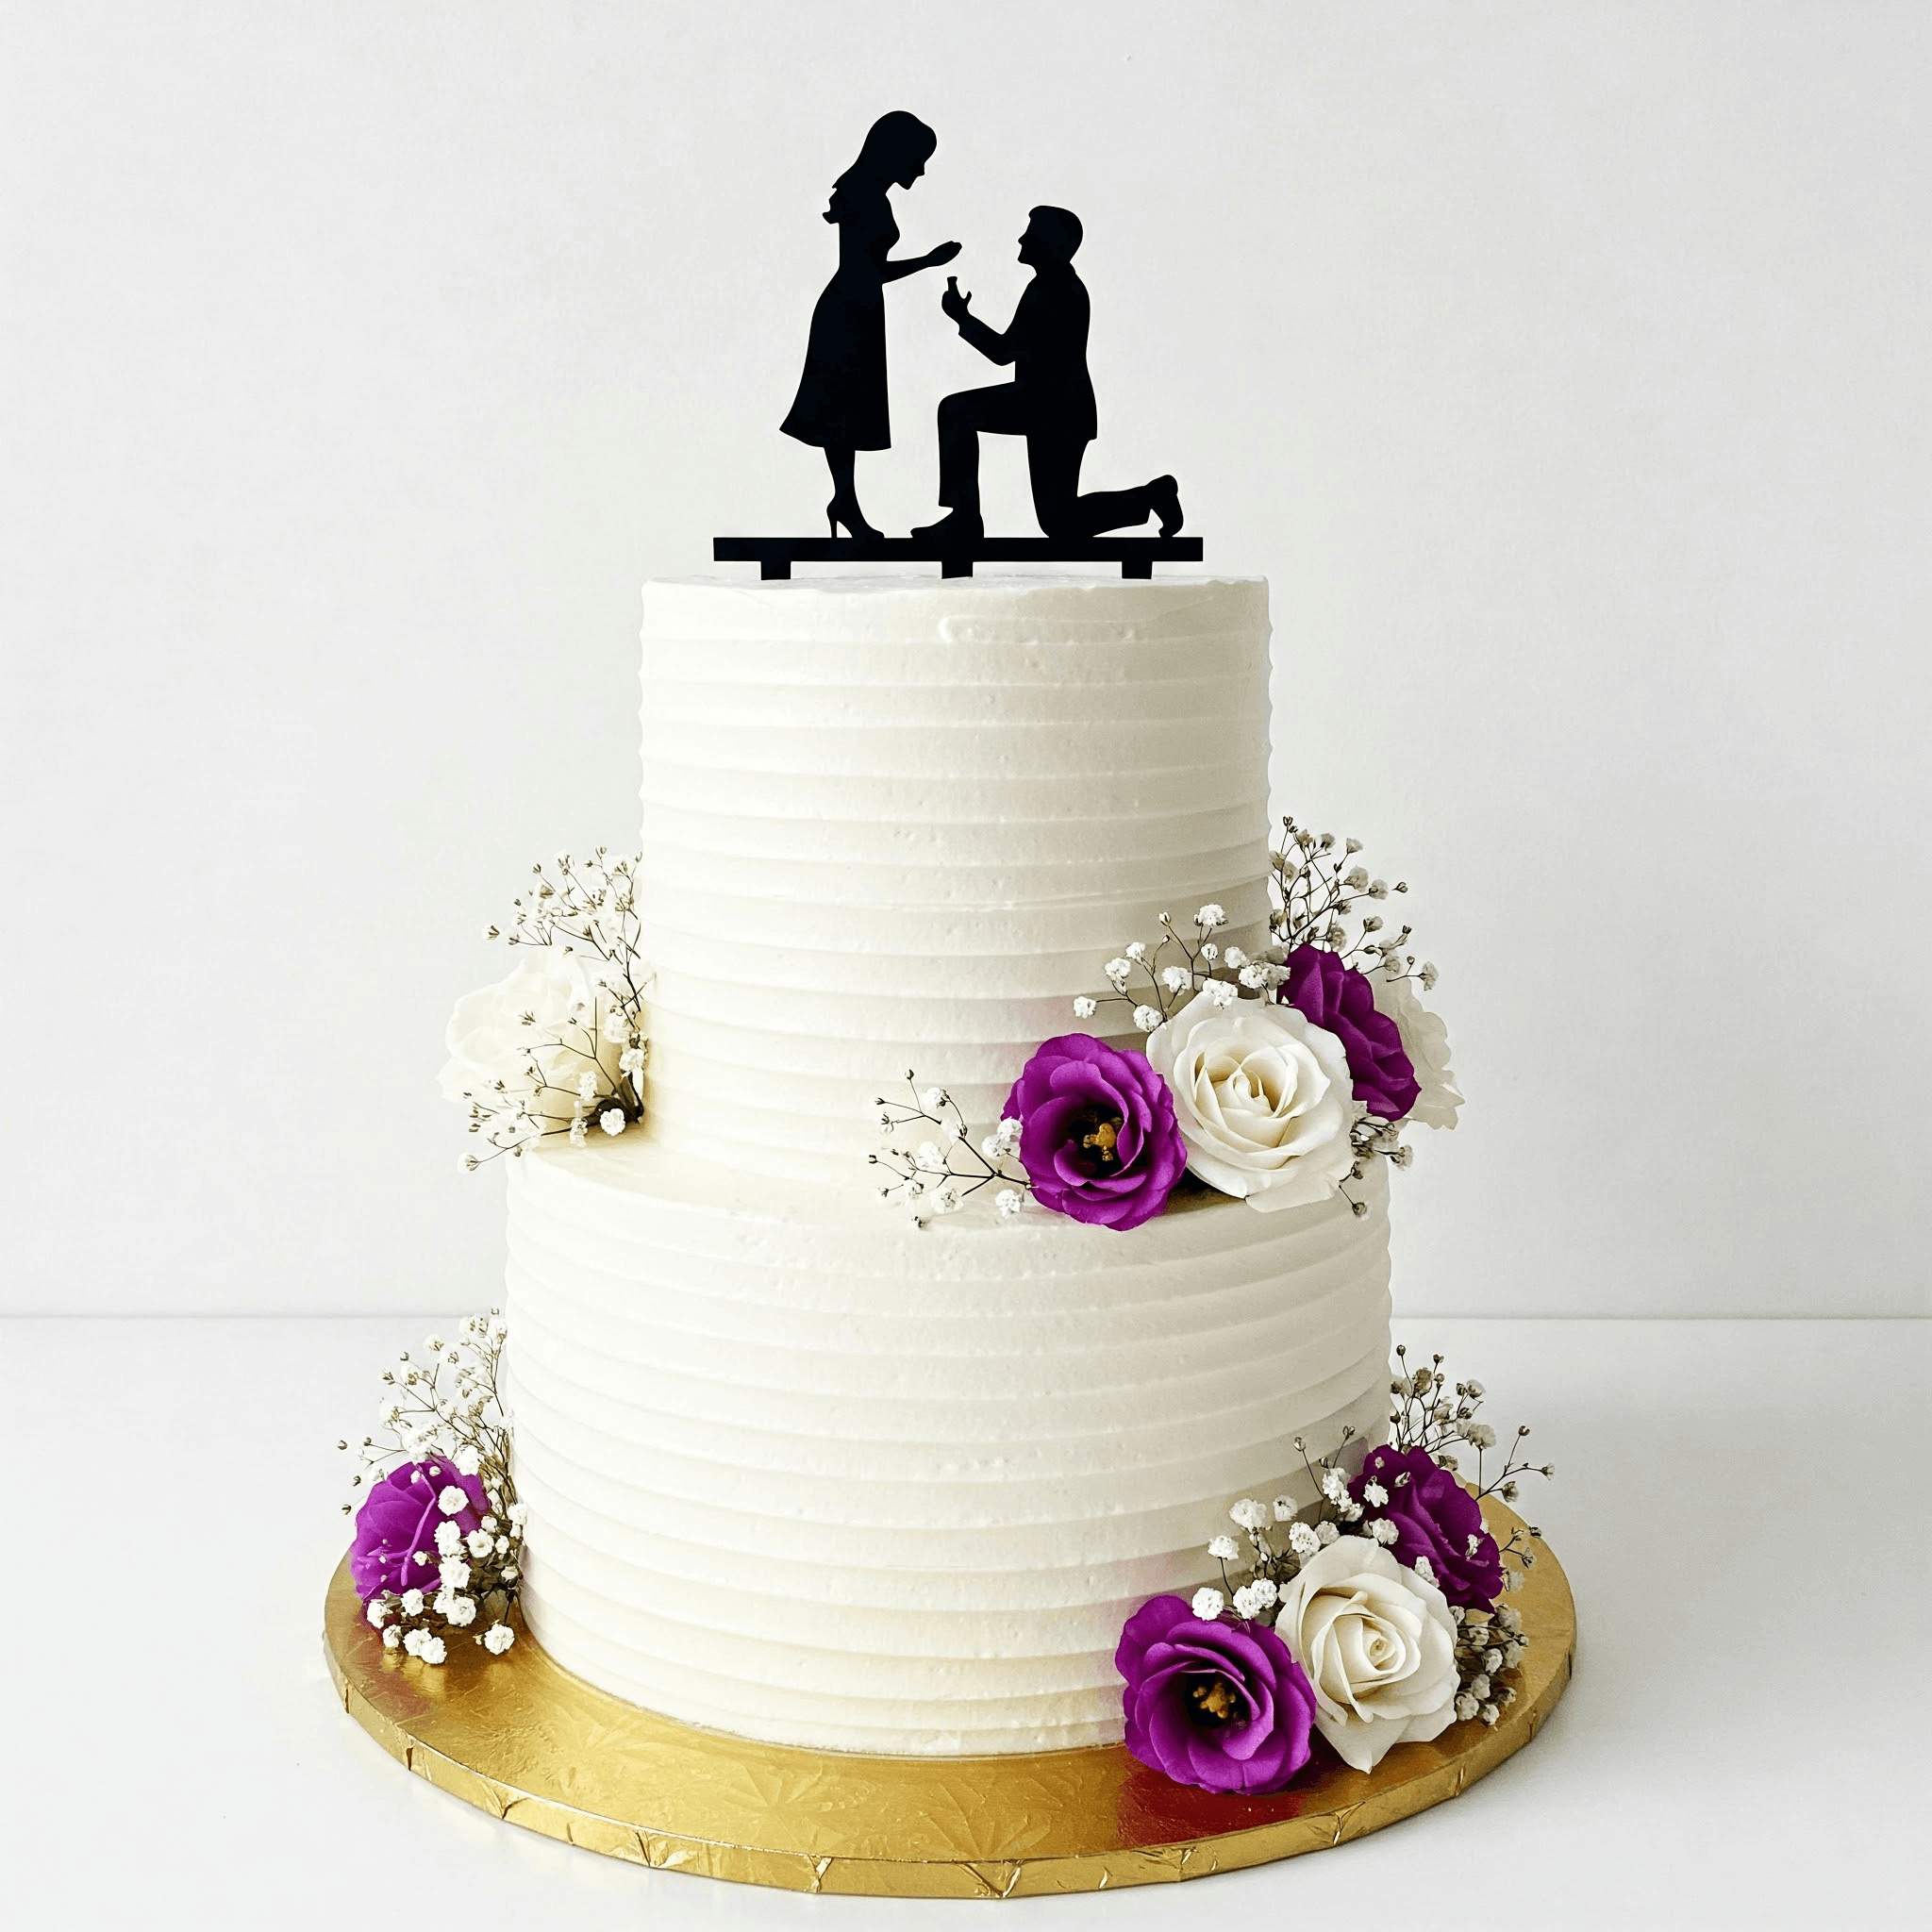
That’s exactly why I fell in love with this two-tier wedding cake design. It’s simple but stunning. Clean lines, soft white buttercream, fresh flowers that don’t scream for attention but still make people pause.
And the topper? It tells a story without a single word. A little moment frozen in time — just like the whole day is supposed to be.
I wanted to share this recipe not because it’s trendy or over-the-top fancy, but because it’s the kind of cake that feels real.
It’s made with care, every detail thought through — and if you follow along, you’ll end up with something that feels just as meaningful as the day it’s meant for.
Let me walk you through exactly how to make it. No fluff, no complicated chef talk — just clear steps that actually work.
Two-Tier Elegant Wedding Cake (Vanilla with White Buttercream And Fresh Florals)
Ingredients
For Each 8-Inch Cake Layer (Bottom Tier – Bake 3)*
(Multiply below batch x3 for the bottom tier)
- 2½ cups all-purpose flour (sifted)
- 2½ tsp baking powder
- ½ tsp baking soda
- ½ tsp salt
- ¾ cup unsalted butter, softened
- 1½ cups granulated sugar
- 3 large eggs (room temp)
- 1 tbsp pure vanilla extract
- 1¼ cups whole milk (room temp)
- 1 tbsp white vinegar (mixed into the milk for homemade buttermilk)
For Each 6-Inch Cake Layer (Top Tier – Bake 3)*
(Multiply below batch x3 for the top tier)
- 1½ cups all-purpose flour (sifted)
- 1½ tsp baking powder
- ¼ tsp baking soda
- ¼ tsp salt
- ½ cup unsalted butter, softened
- 1 cup granulated sugar
- 2 large eggs (room temp)
- 2 tsp pure vanilla extract
- ¾ cup whole milk (room temp)
- 1½ tsp white vinegar (mixed into the milk)
Vanilla Swiss Meringue Buttercream (for both tiers and piping detail)
- 10 large egg whites
- 2½ cups granulated sugar
- 4 cups unsalted butter (softened and cubed)
- 1 tbsp pure vanilla extract
- Pinch of salt
Decoration & Assembly Supplies:
- 8-inch and 6-inch round cake pans
- Cake boards (one 8-inch gold board for base, one 6-inch board for top tier)
- Dowels or bubble tea straws for support
- Bench scraper & turntable
- Offset spatula
- Piping bag with a small round tip (optional for filling)
- Fresh white lisianthus or roses
- Fresh purple lisianthus or roses
- Fresh baby’s breath (gypsophila)
- Food-safe floral tape and toothpicks
- Acrylic cake topper (proposal silhouette style)
- Gold foil base board (as shown)
Instructions
- Preheat oven to 325°F (163°C). Grease and line the cake pans with parchment paper. Prepare three layers each of 8-inch and 6-inch cakes using the respective batters.
- Cream butter and sugar until pale and fluffy (3–4 minutes). Add eggs one at a time, beating well. Mix in vanilla. Alternate adding dry ingredients and buttermilk in three additions, starting and ending with flour. Mix until just combined.
- Divide the batter evenly into prepared pans and smooth tops. Bake 8-inch layers for 35–40 minutes and 6-inch layers for 28–33 minutes. Cakes are done when a toothpick comes out clean.
- Cool in pans 10 minutes, then turn onto wire racks. Once completely cool, level the tops with a serrated knife for flat stacking.
- In a heatproof mixing bowl (stand mixer preferred), combine egg whites and sugar. Whisk over a saucepan of simmering water (double boiler method) until mixture reaches 160°F (70°C) and sugar is fully dissolved.
- Transfer bowl to mixer. Whisk on high speed until stiff, glossy peaks form and bowl is cool (about 10 minutes). Switch to paddle attachment and gradually add butter, a few tablespoons at a time. Don’t worry if it curdles—it will come together. Beat until smooth, then add vanilla and a pinch of salt.
- Place an 8-inch cake layer on the gold board. Spread a layer of buttercream between layers. Repeat for all three 8-inch layers. Apply a thin crumb coat and chill for 30 minutes. Repeat the same for the 6-inch layers on their own board.
- Use a turntable and bench scraper to apply a final thick coat. Use a cake comb with fine horizontal lines to create the elegant ridged pattern. Smooth the top with an offset spatula.
- Insert 4–5 dowels evenly spaced in the center of the bottom tier. Trim them level with the surface. Carefully center and place the 6-inch tier on top.
- Wash and pat dry flowers. Wrap stems with floral tape. Insert them gently between cake layers, securing them at angles similar to the image. Alternate white and purple blooms with touches of baby’s breath.
- Insert a black acrylic proposal-themed topper centered on the top tier.
- Store cake in a cool environment until serving. Avoid refrigeration if possible to prevent condensation.
- Add fresh flowers the day of the event for optimal appearance and freshness.
- Serve at room temperature for the best flavor and texture.
- Slice the top tier first using a serrated knife, then move to the bottom.

What Is The Best Frosting For a Wedding Cake?
For weddings, you want frosting that looks clean, holds its shape, and tastes amazing. Here are the top choices:
- Swiss Meringue Buttercream: Smooth, less sweet, and perfect for sharp edges.
- Italian Meringue Buttercream: Stable in warmer settings, very silky.
- American Buttercream: Sweet, easy to make, great for simple cakes.
- Ganache (white or dark): Glossy and rich, but best for cooler venues.
How Do You Stack a Two Tier Cake Safely?
Stacking a two tier cake the right way keeps it from leaning or collapsing. These tips will help you build a stable and secure cake:
- Use a solid base board: Place the bottom tier on a thick, sturdy cake board that’s at least 2 inches larger than the cake.
- Chill the cakes first: Cold cakes are firmer and easier to stack without messing up the frosting.
- Use a smaller board under the top tier: Cut a cake board the exact size of the top tier and place it underneath before stacking.
- Add support inside the bottom tier: Insert dowels or thick bubble tea straws in a circle inside the bottom tier to hold the weight of the top tier.
- Level the layers properly: Use a serrated knife to level the cake layers so they sit flat on top of each other.
- Stack gently and center carefully: When placing the top tier, lower it slowly and make sure it’s right in the center.
- Use a small amount of buttercream between tiers: It acts like glue and helps the top tier stick.
- Transport after stacking: Stack both tiers before transporting, but always carry it on a flat surface — like the car floor, not a seat.
Do I Need Dowels For a Two Tier Cake?
Yes — dowels are important, even for just two tiers. They keep the top tier from sinking into the bottom one.
- Dowels give support: They hold up the weight of the upper tier so nothing collapses.
- Helps with transportation: Cakes stay stable while moving them from one place to another.
- Straws can also work: Thick, sturdy bubble tea straws are a great substitute if you don’t have wooden or plastic dowels.
- Always cut level: Make sure all dowels are cut the same height so the top tier sits flat.
What Flowers Are Safe To Put On a Wedding Cake?
Only use fresh flowers that are known to be safe and free from harmful pesticides. Below are common safe picks:
- Roses
- Lisianthus
- Orchids
- Marigolds
- Calendula
- Lavender
- Chamomile
- Thyme and rosemary (for greenery)
- Baby’s breath (use carefully and wrap stems)

Should Each Tier Of a Wedding Cake Be a Different Flavor?
It’s not required, but it’s a fun way to give guests more choice. Here’s what to consider:
- Variety makes guests happy: Offering two different flavors means people get to pick what they like.
- Great for picky eaters: Some love chocolate, some don’t — multiple flavors fix that.
- You can match your theme: Go for classic vanilla in one tier and something bold like lemon or pistachio in the other.
- Just keep the textures similar: So both tiers cut and stack evenly without crumbling.
Can I Use Buttercream Instead Of Fondant For a Wedding Cake?
Yes, you absolutely can. Buttercream is often chosen for its soft texture and rich flavor. Here’s why many couples prefer it:
- Tastes better to most people: It’s soft, creamy, and melts in your mouth.
- Easier to work with: You don’t need special tools or skills like you do with fondant.
- Gives a natural look: Especially great for semi-naked or smooth finishes.
- Can still look clean and elegant: When applied properly with a scraper, it gives a polished look.
How Do I Keep a Wedding Cake Fresh Overnight?
If you’re prepping the cake a day early, here’s how to make sure it stays fresh and perfect:
- Frost the entire cake: The buttercream acts like a seal and keeps the cake from drying out.
- Keep it in a cake box: Place the cake inside a large, clean box to protect it from dust and smells.
- Store in a cool room: Avoid heat and sunlight. A cool room (not fridge, unless it’s hot) works best.
- Refrigerate only if needed: If using perishable fillings or it’s very warm, store it in the fridge. Let it come back to room temp before serving.
- Add flowers the next day: Fresh flowers look best when added just before display.
What Type Of Board Should I Use For a Tiered Cake?
Use sturdy boards that can handle the weight of each tier. Here’s what works best:
- Masonite cake boards
- Drum cake boards
- Thick cardboard rounds (greaseproof covered)
- Foam core boards (food-safe covered)
- Acrylic cake boards
You May Also Like To Check Out These Recipes:
- Fruit Cake
- American Flag Cake
- Chocolate Wedding Cake
- Earl Grey Cake
- Beach Wedding Cake
- Olive Oil Cake
- Raspberry Cake
- Italian Cream Cake
- Peach Coffee Cake
- Peach Sheet Cake
- Molten Lava Cake
- Blue Velvet Cake
- Raspberry Ripple Cake
- Birthday Cake For Women
- White Chocolate Raspberry Cake
- Berry First Birthday Cake

