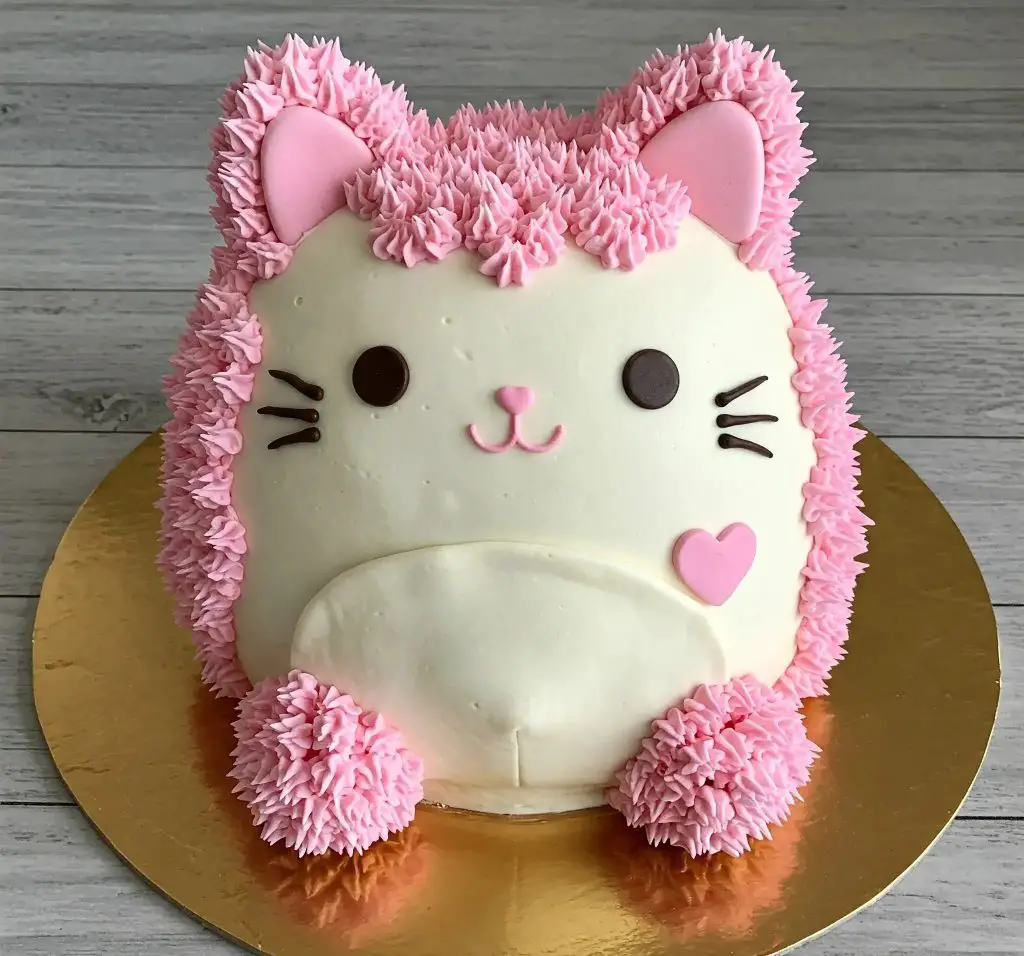
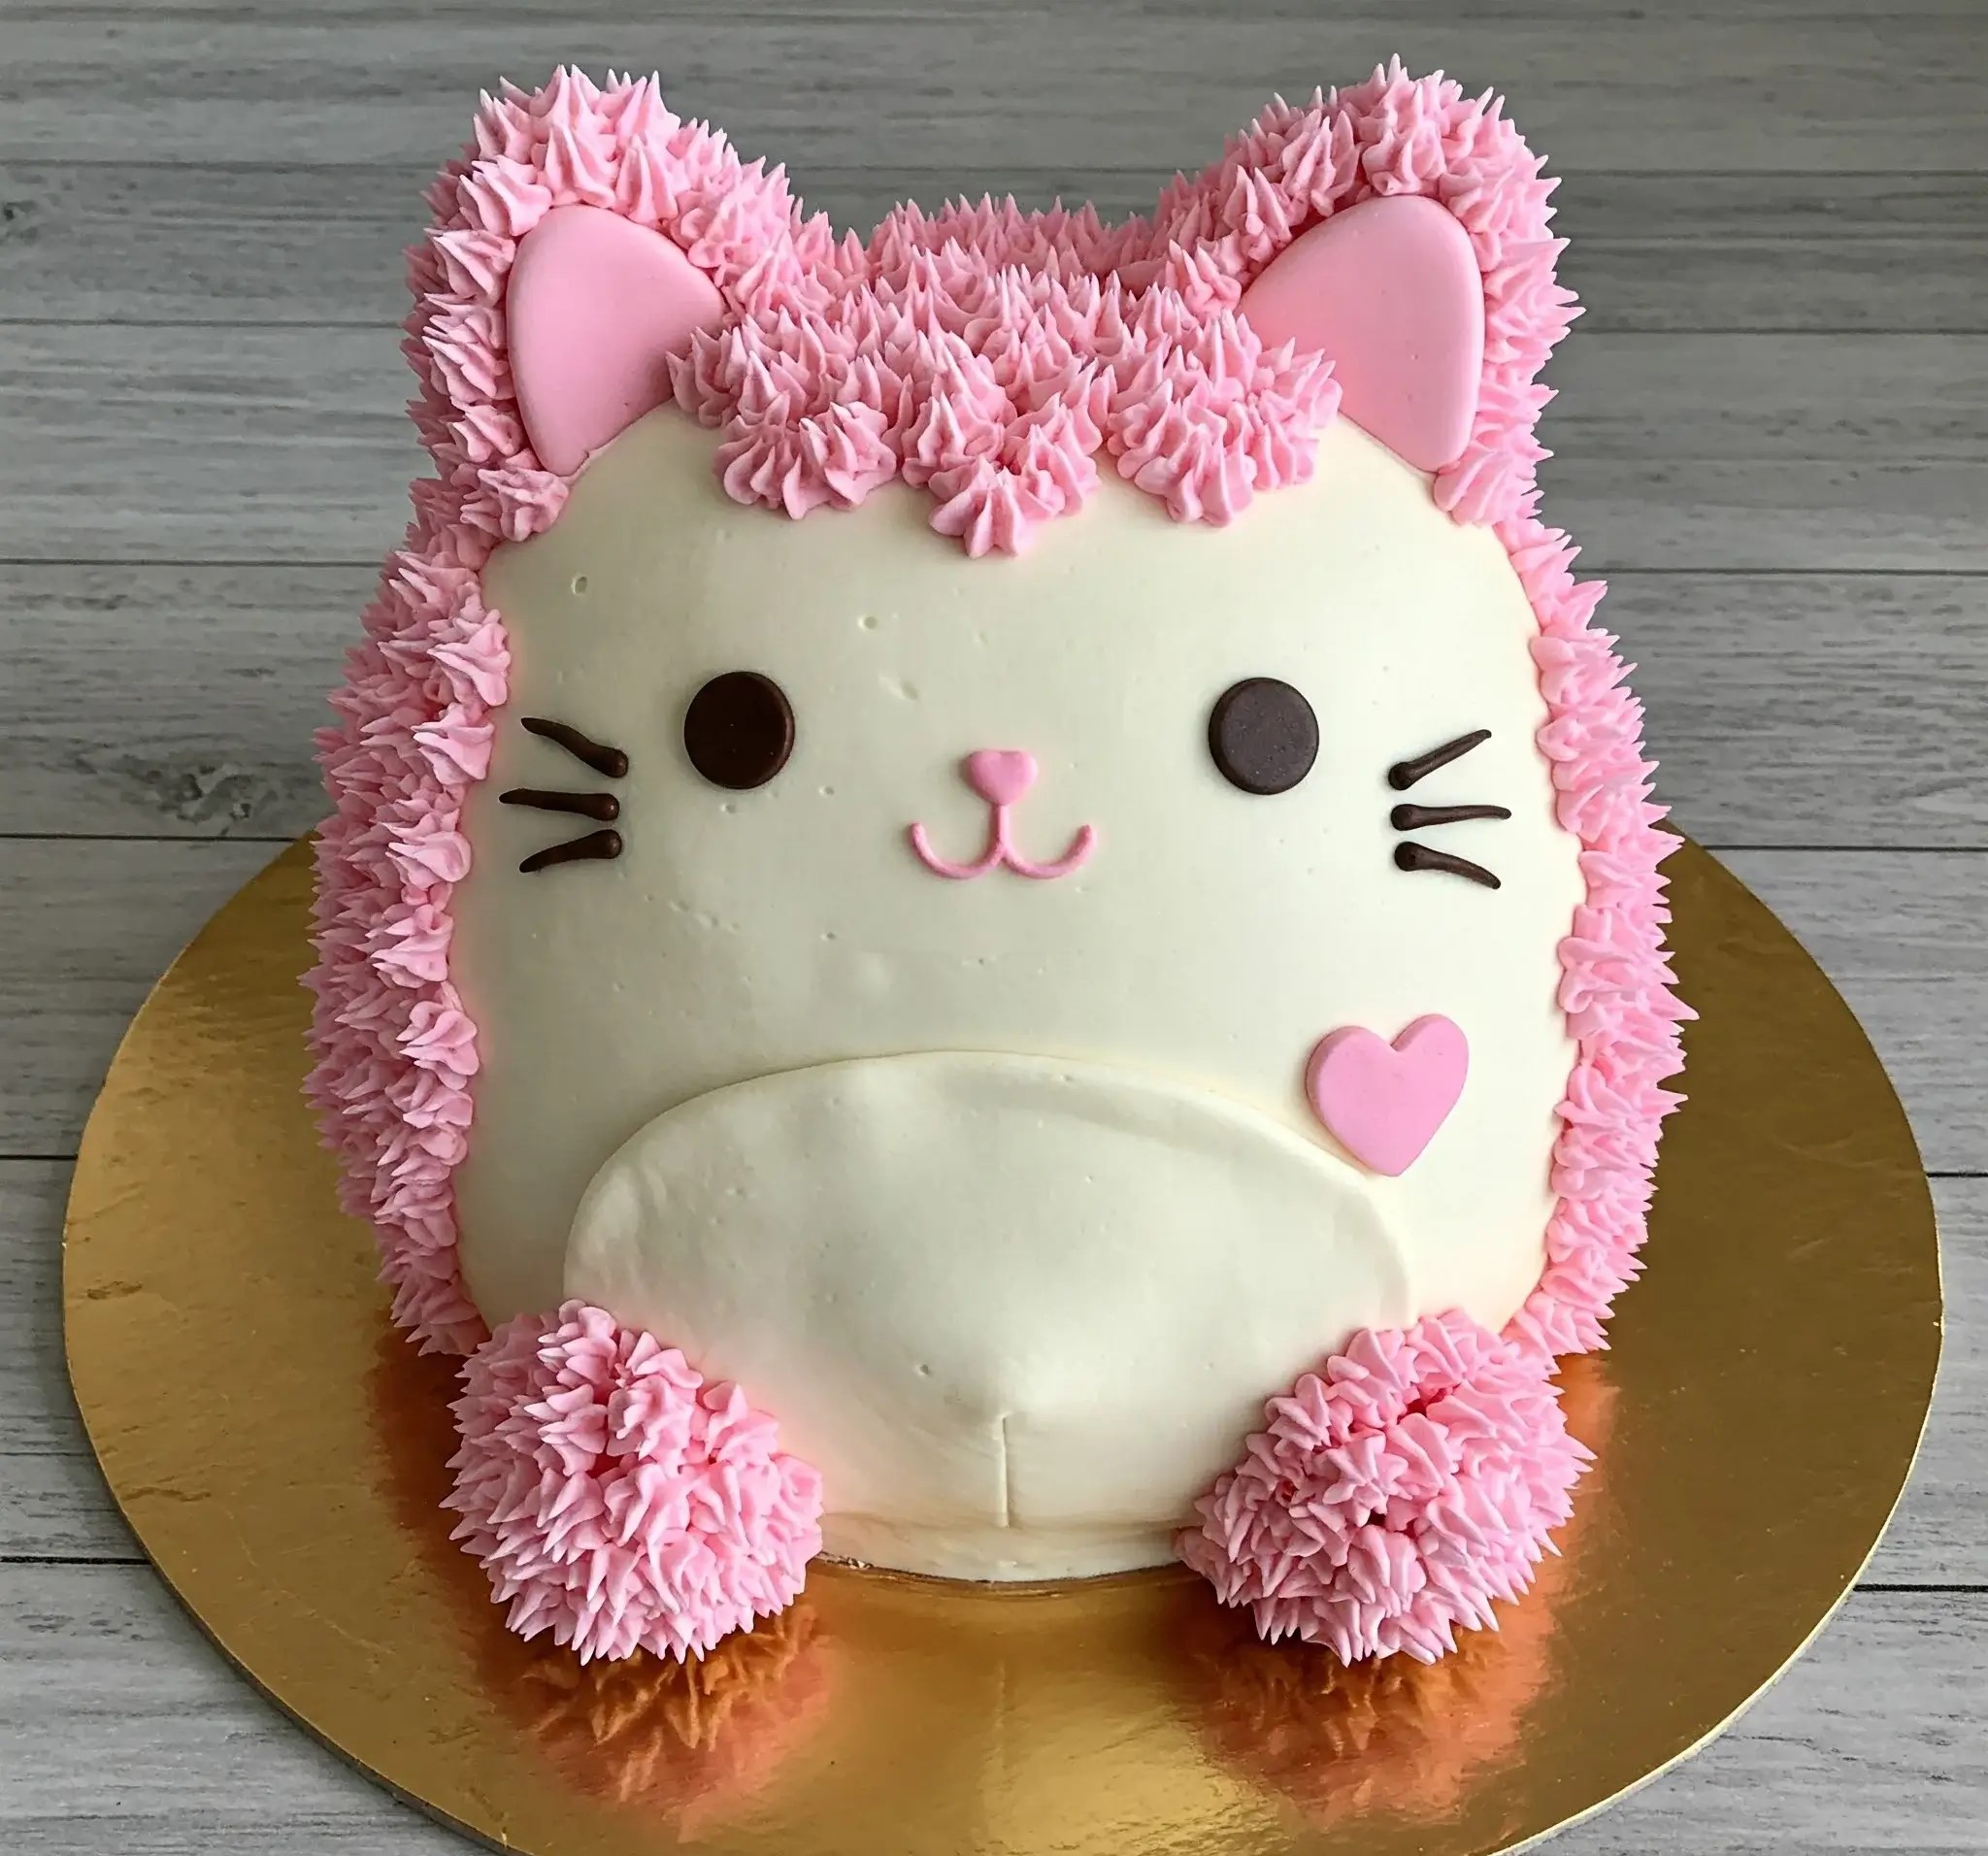
I still remember the first time I held a Squishmallow plush—how its soft, rounded shape and tiny smile made my heart melt.
So, I decided to bake that same cozy feeling into a cake: a kitty-shaped, buttercream-covered delight that looks like you could hug it.
When I first experimented with this design, I was amazed at how simple ingredients—flour, eggs, butter, and a splash of vanilla—could become something so playful.
I’m not a pastry chef, but following a few straightforward steps, I transformed my kitchen into a miniature bakery.
Smooth layers of sponge, a silky pink-and-white frosting, and just a touch of fondant turn an ordinary afternoon into a celebration.
You’ll hear me cheer you on as you pipe those little buttercream stars for fur and press on fondant ears that stand proud.
By the end, you’ll be holding a cake that’s both adorable and delicious—an edible cuddly friend you made yourself. Trust me, once you see that cute kitty face, you’ll feel a rush of joy that’s hard to beat.
Squishmallow-Inspired Kitty Cake Recipe
Serves: 12–14 | Prep & Bake Time: 1¾ hours | Skill Level: Intermediate
Ingredients
For the Vanilla Sponge Layers:
- 320 g (2 ½ cups) all-purpose flour, sifted
- 1 tsp baking powder
- ½ tsp baking soda
- ¼ tsp fine sea salt
- 240 g (1 cup) granulated sugar
- 120 g (½ cup) superfine sugar
- 240 ml (1 cup) whole milk, room temperature
- 240 g unsalted butter, softened to room temperature
- 4 large eggs, room temperature
- 2 tsp pure vanilla extract
For the Swiss Meringue Buttercream:
- 5 large egg whites (≈160 g)
- 300 g granulated sugar
- 450 g unsalted butter, diced and at room temperature
- 2 tsp vanilla extract
- Pinch of fine sea salt
- A few drops bright pink gel food coloring
For Decorations & Assembly:
- White rolled fondant, 300 g
- Pink fondant, 100 g
- Dark brown fondant, 30 g
- Edible pink pearl dust (optional)
- Piping bags fitted with a small star tip and a round tip
Equipment:
- Two 6″ round cake pans
- One 5″ tall dome cake pan (or deep 6″ pan)
- Stand mixer or hand mixer
- Offset spatula and bench scraper
- Parchment paper rounds
- Cake board (8″)
- Cake turntable (optional but helpful)
Instructions
1. Prepare & Bake Cake Layers:
- Preheat oven to 175 °C (350 °F). Grease and line all pans with parchment.
- In a medium bowl, whisk flour, baking powder, baking soda, and salt—set aside.
- In the mixer bowl, cream butter and both sugars on medium speed until light and fluffy (≈4 min). Scrape down sides.
- Add eggs one at a time, mixing well after each addition; stir in vanilla.
- With mixer on low, alternate adding dry mix and milk in three additions (dry → wet → dry), mixing just until combined.
- Divide batter: fill two 6″ pans ⅔ full (≈400 g batter each) and the dome pan ¾ full (≈500 g). Smooth tops.
- Bake 6″ layers for 25–28 min, dome layer for 35–40 min, or until toothpick comes out clean.
- Cool in pans 10 min, then invert onto wire racks to cool completely.
2. Make Swiss Meringue Buttercream:
- In heatproof bowl over gently simmering water, whisk egg whites and sugar until smooth and 60 °C (140 °F) (no sugar grit).
- Transfer to mixer and whip on high until stiff, glossy peaks form and bowl feels room temperature (≈8 min).
- Reduce to low speed and add butter cubes, one by one, incorporating fully. Add vanilla, salt, then color until pale pink and silky.
3. Stack & Carve the Cake:
- Level 6″ sponges to create two 1.5 cm flat layers. Cut the dome into three equal horizontal slabs.
- Place the first 6″ layer on your cake board; pipe a ring of buttercream at edge to trap filling. Fill with ¾ cm buttercream, top with second layer.
- Stack dome slabs in order, using thin buttercream layers as glue, to form kitty head height (≈12 cm tall).
4. Crumb Coat & Chill:
- Apply a thin “crumb coat” of buttercream over entire cake, smoothing roughly.
- Chill in fridge 20 min until firm to touch.
5. Final Coat & Shaping:
- Apply a second even layer of buttercream all around, using an offset spatula and bench scraper for smooth sides.
- On top, use the offset spatula to gently round front face and define two ear mounds at back edges.
6. Fondant & Piping Decorations:
- Roll out white fondant to 2 mm thickness; cut an oval for the tummy and apply to front with a dab of buttercream.
- Shape two ear pieces from pink fondant (≈4 cm tall triangles with curved base); adhere to top of head.
- Roll brown fondant into two 1.5 cm discs for eyes and three 3 cm tapered sticks for whiskers—position on face.
- Form a tiny pink heart from pink fondant for the cheek ornament.
- Fit piping bag with round tip, fill with pink buttercream, and pipe a small nose and smile.
7. Fur Texture & Final Touches:
- Tint remaining buttercream bright pink if needed.
- Using the star tip, pipe short, dense stars all around the cake’s sides, base, and along the ear edges to imitate fluffy fur.
- Pipe two clusters at base for the kitty’s “paws” on the board.
8. Serve & Store:
- Let cake rest at room temperature 30 min before slicing to soften buttercream.
- Store covered in a cool spot (15–18 °C) for up to 48 hr; refrigerate if warmer, returning to room temperature before serving.

How Do I Get Smooth Buttercream For a Squishmallow Cake?
Smooth buttercream gives the cake a clean and polished look. Here’s how to do it easily:
- Use softened butter: Room temperature butter blends better and creates smooth frosting.
- Sift your sugar: This removes lumps that make buttercream grainy.
- Add a little milk or cream: It helps make the buttercream more spreadable.
- Beat for 5-7 minutes: Whipping it longer makes it fluffier and smoother.
- Use a bench scraper: Glide it around the cake to smooth out the frosting.
What Piping Tip Is Best For Making “Fur” On a Squishmallow Cake?
To make soft, spiky fur like the one in the picture, you need the right tip.
- Use a grass tip (like Wilton #233): This creates small, pointy textures.
- Or try a star tip (like Wilton #22 or #32): These also make spiky frosting that mimics fur.
- Hold piping bag straight: Press and pull up quickly to create texture.
How Can I Color Buttercream Pastel Pink And White?
Soft pastel colors are great for Squishmallow cakes. Here’s how to get them just right:
- Start with white buttercream: Always begin with a clean, white base.
- Use gel food coloring: Add the tiniest amount with a toothpick. Gel colors are strong, so go slow.
- Mix in a white gel color: This helps brighten and lighten pink if it turns too dark.
- Let it sit 10 minutes: Colors deepen slightly after resting, so don’t over-color at first.
What Fondant Shapes Do I Need To Decorate a Squishmallow Cake?
Fondant helps add all the cute details to your cake. You’ll need:
- Circles: For the eyes and cheeks.
- Hearts: For decoration or blushing cheeks.
- Triangles: For ears or noses, depending on the character.
- Thin strips: For whiskers or smiles.
- Ovals: For belly patches or paws.
How Long Does a Squishmallow Cake Stay Fresh?
You can keep the cake soft and tasty with these tips:
- Keep it covered in a cake box: This stops it from drying out.
- Store at room temperature for 1–2 days: If your kitchen is cool.
- Refrigerate up to 4 days: But let it sit out 30 minutes before serving.
- Freeze slices up to 1 month: Wrap tightly in plastic and foil.
How Do I Assemble And Stack Layers For a Squishmallow Cake?
Stacking and shaping the cake properly helps it look like a real Squishmallow.
- Level your cakes: Slice off the domed tops for even layers.
- Add buttercream between layers: This holds them together.
- Use 3–4 layers: The more height, the better the shape.
- Carve gently with a serrated knife: Round off the edges and sides for a soft look.
- Chill before frosting: Cold cake is easier to decorate.

Can I Make a Squishmallow Cake Without a Special Dome Pan?
Yes! You can still make the shape using regular pans.
- Use 6-inch or 7-inch round pans: Stack and carve to get the dome shape.
- Carve the top layer into a rounded shape: This mimics a dome without a special pan.
- Freeze layers briefly before carving: It makes shaping easier.
How Do I Carve a Simple Kitty Shape From Round Cakes?
You don’t need fancy tools to carve a cute cat shape.
- Stack 3–4 round cakes: Secure with buttercream in between.
- Trim the top edges into a dome: Use a serrated knife slowly.
- Cut ear shapes from scraps: Attach with skewers or buttercream.
- Add cheeks and paws: Shape frosting or cake trimmings into bumps.
How Do I Fix Common Mistakes When Decorating a Squishmallow Cake?
Messed up the frosting or face? Don’t worry—these tricks can help:
- Too much color?: Add more white frosting to lighten it.
- Buttercream tearing?: Smooth it with a warm spatula.
- Uneven eyes or mouth?: Gently remove fondant and reposition it.
- Fondant cracking?: Rub a tiny bit of shortening over the crack.
- Smudges on smooth buttercream?: Use a clean paper towel to gently blot.
Are There Vegan or Dairy-Free Versions of Squishmallow Cake?
Yes! You can make a delicious version without milk or eggs. Try:
- Vegan vanilla cake
- Dairy-free chocolate cake
- Coconut or almond milk buttercream
- Plant-based food coloring
- Vegan fondant
What’s The Best Way To Store Leftover Squishmallow Cake?
Keep extra cake fresh for later with these options:
- Cake slices in airtight containers
- Wrapped slices in plastic wrap + foil
- Whole cake in a cake box in the fridge
- Freeze cake slices in zip-top bags
- Avoid direct sunlight or heat
What’s The Easiest Way To Transport a Squishmallow Cake?
Moving a tall, decorated cake can be tricky. Here’s how to keep it safe:
- Use a sturdy cake board: One that’s bigger than the base.
- Chill the cake before transport: Cold frosting holds better.
- Place in a tall cake box: So nothing touches the decorations.
- Put a non-slip mat under the box: This keeps it from sliding in the car.
- Drive slowly and avoid bumps: Hold the box on a flat surface.

