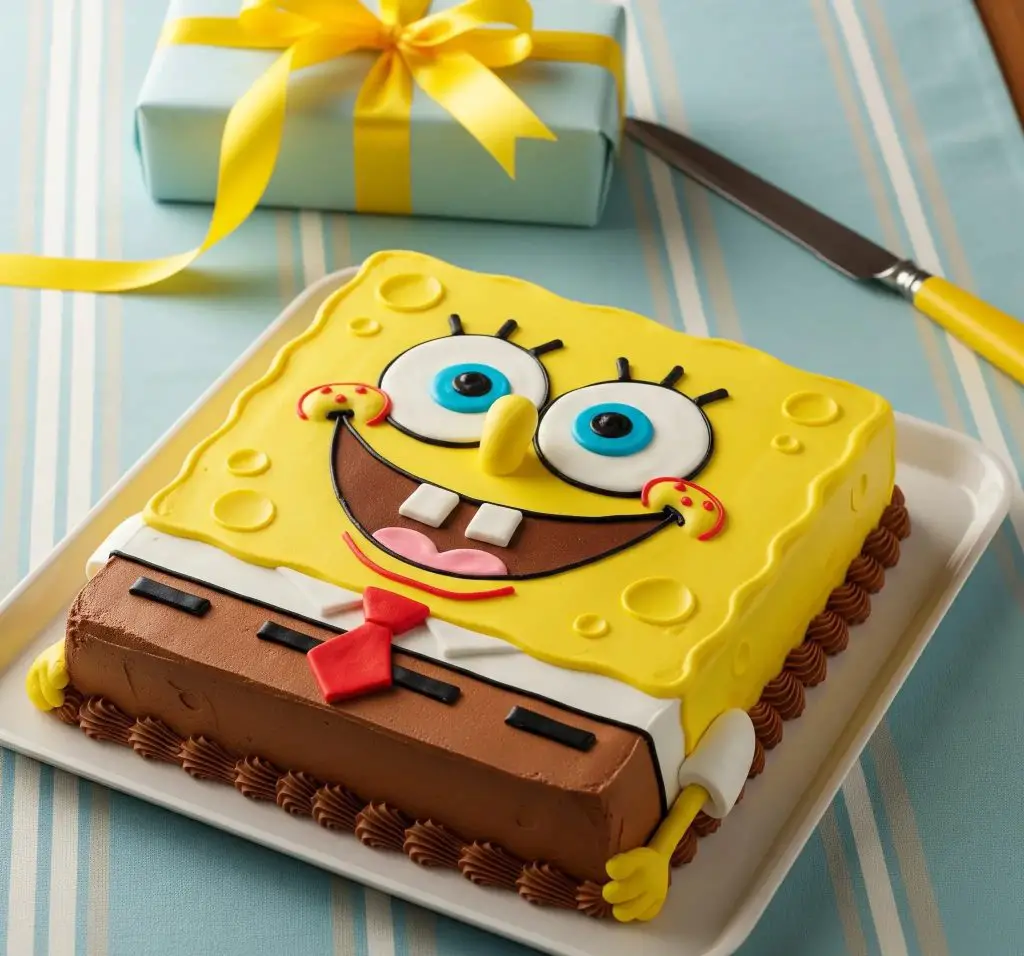
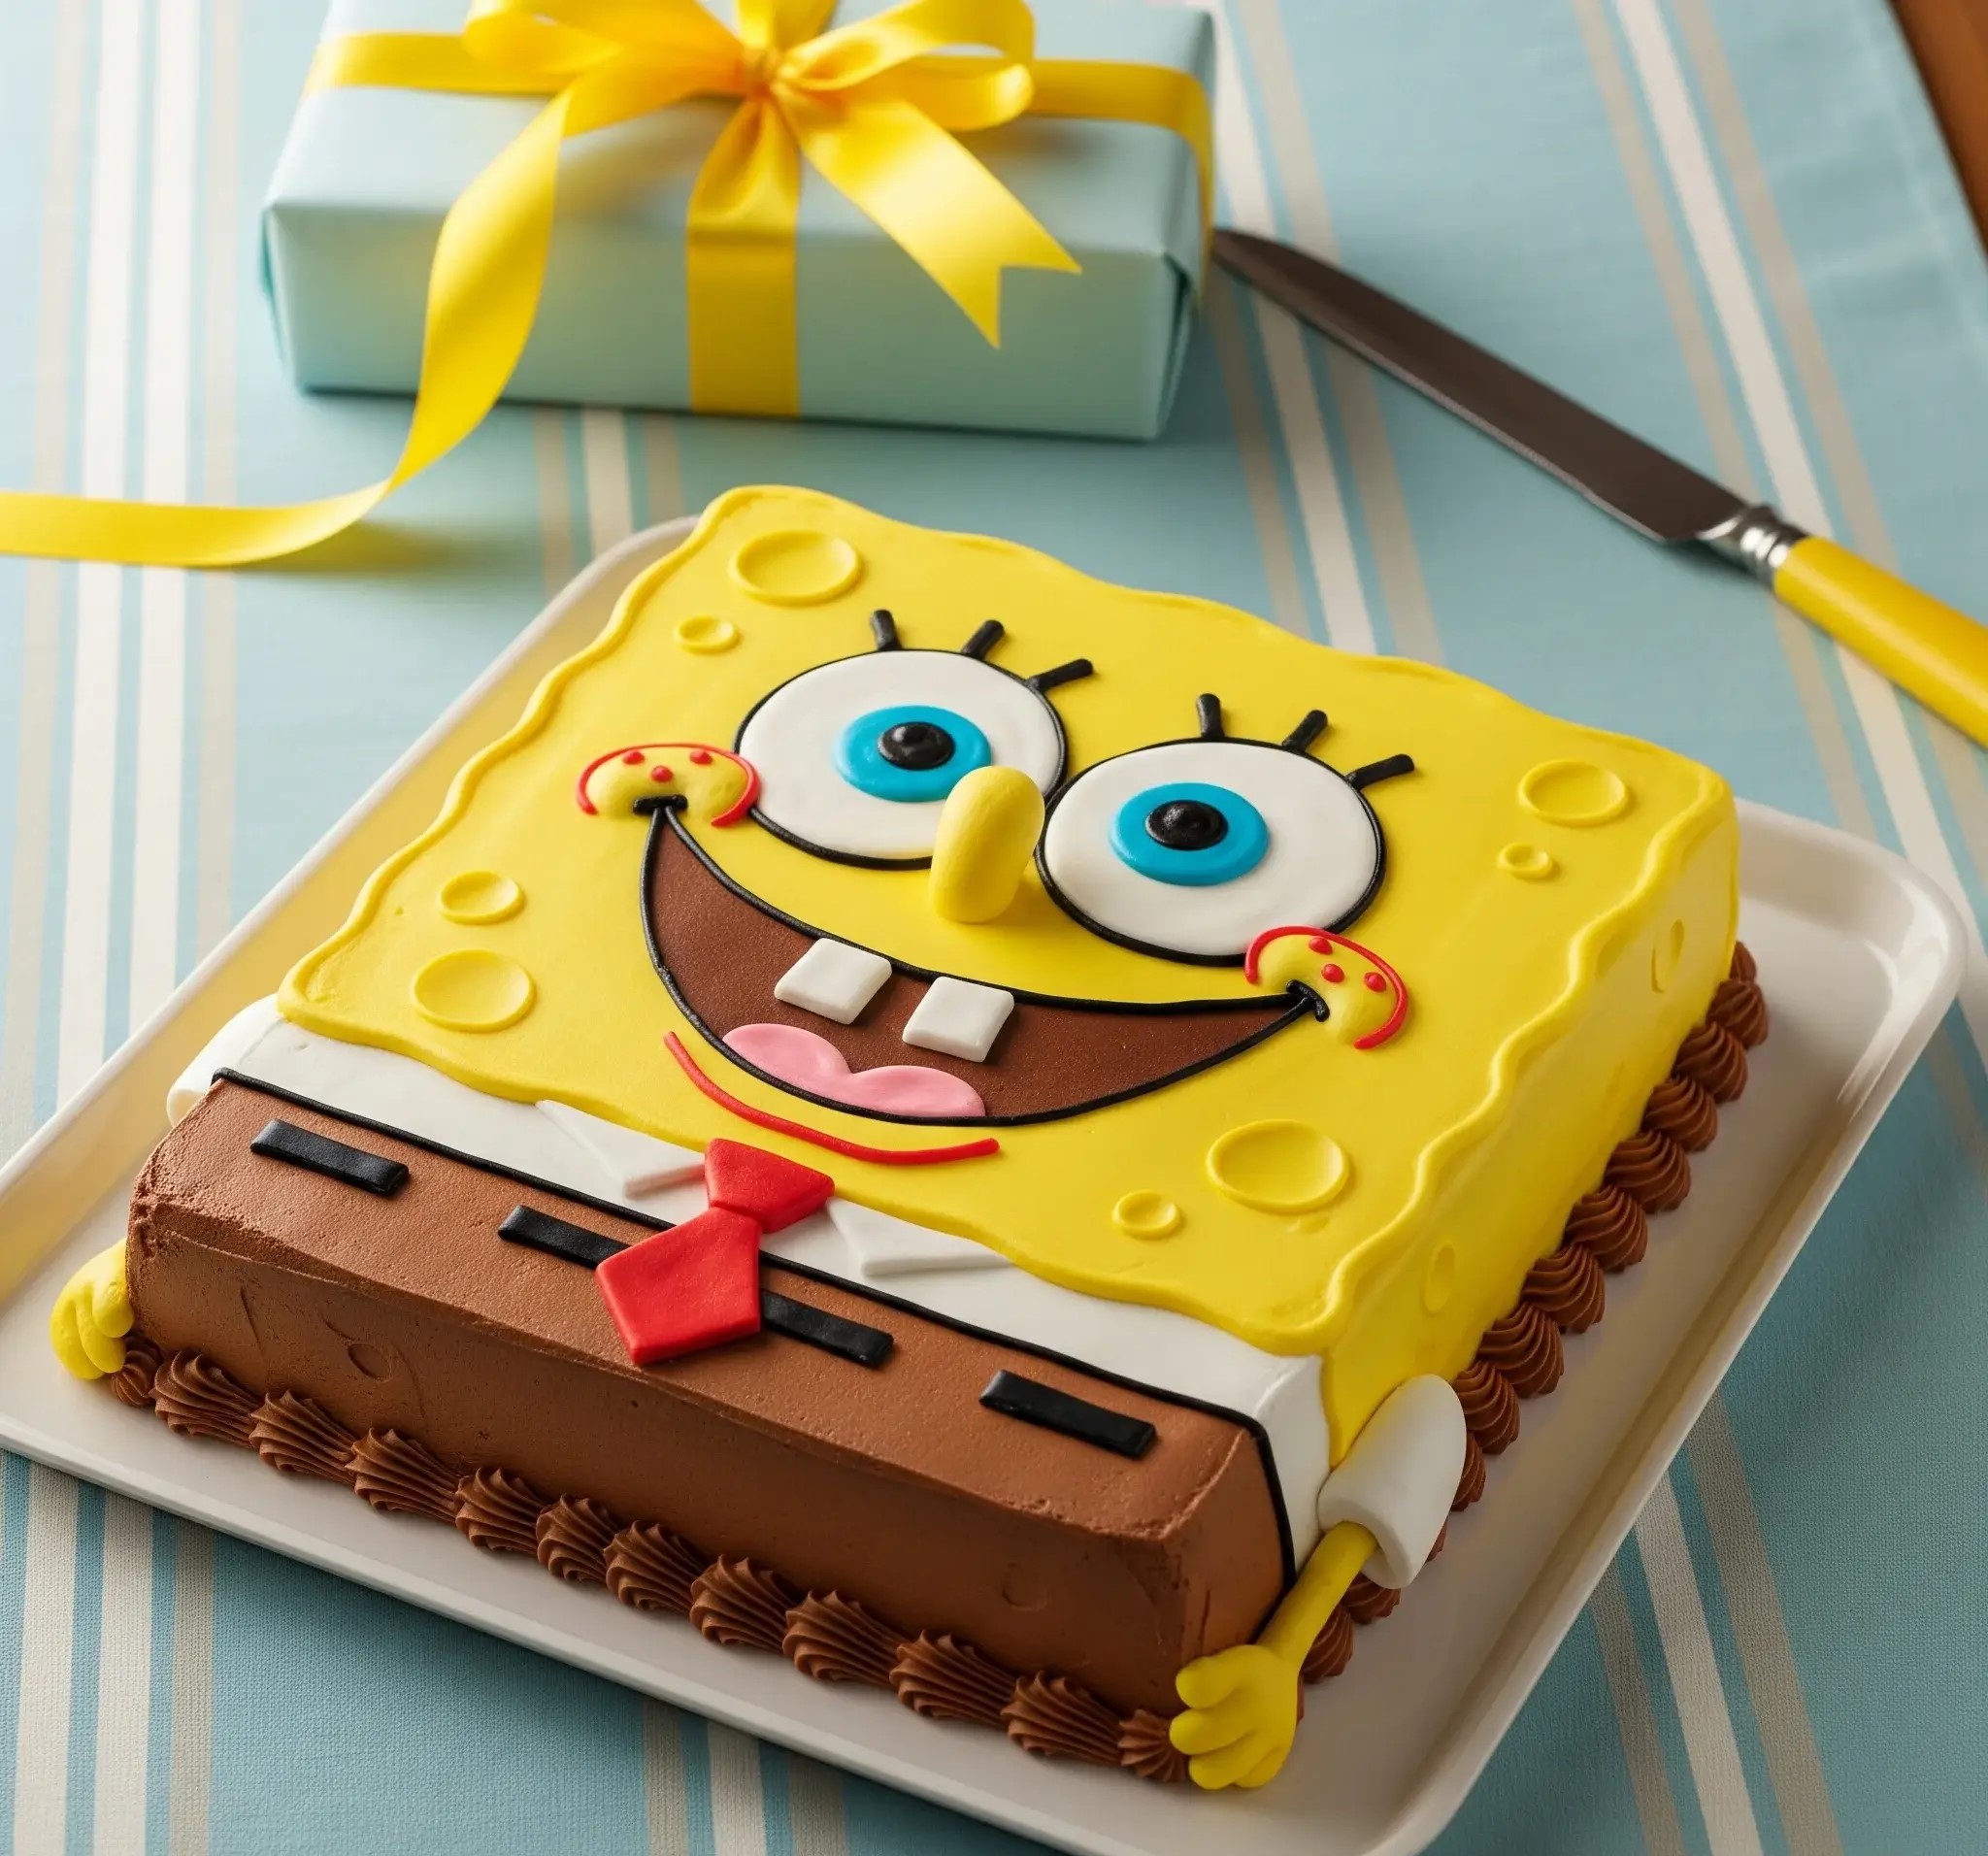
When my nephew turned six, he didn’t ask for a superhero cake or a racing car. He wanted SpongeBob.
Not just a cake with a face on it — he wanted the whole spongey guy, with the tie, the pants, the eyes that practically pop off the cake.
And honestly, I was a little nervous. Making a cartoon character out of cake? That’s no joke.
But once I broke it down step by step, it actually came together way easier than I expected. No fancy tools, no bakery-level skills — just good cake, buttercream, fondant, and a lot of giggling along the way.
And when we brought it to the table? Total silence, followed by the loudest “WHOA!” I’ve ever heard from a room full of kids.
So if you’re baking this for your kid, niece, nephew, or honestly just because SpongeBob is awesome, I’ve got you covered.
This recipe walks you through exactly how I made it, down to every tiny detail — the chocolate pants, the yellow spongey top, those funny teeth, and even the little fondant hands on the sides.
And no, you don’t need to be an artist. If I can pull this off, you definitely can too. Let’s do this together — it’ll be fun, messy, and totally worth it.
SpongeBob Birthday Cake Recipe
Ingredients
For the Yellow Sponge Cake (makes 2 rectangular layers, 9×13 inches):
- 2½ cups all-purpose flour
- 2½ tsp baking powder
- ½ tsp baking soda
- ½ tsp salt
- ¾ cup unsalted butter, softened
- 1¾ cups granulated sugar
- 4 large eggs
- 2 tsp vanilla extract
- 1 cup plain yogurt
- ½ cup milk
- Yellow gel food coloring
For the Chocolate Cake Base (makes 1 rectangular layer, 9×13 inches):
- 1½ cups all-purpose flour
- ½ cup unsweetened cocoa powder
- 1½ tsp baking powder
- ½ tsp baking soda
- ¼ tsp salt
- ¾ cup unsalted butter, softened
- 1½ cups brown sugar
- 3 large eggs
- 1 tsp vanilla extract
- ¾ cup yogurt
- ½ cup milk
For Vanilla Buttercream (used as filling & crumb coat):
- 1 cup unsalted butter, room temperature
- 3 cups powdered sugar, sifted
- 2–3 tbsp milk
- 1½ tsp vanilla extract
For Chocolate Buttercream (used for bottom half and border):
- ¾ cup unsalted butter
- 2½ cups powdered sugar
- ⅓ cup cocoa powder
- 2–3 tbsp milk
- 1 tsp vanilla extract
For Decorating (fondant details):
- Yellow fondant (SpongeBob’s top half)
- White fondant (shirt, teeth, eyes)
- Brown fondant (pants)
- Red fondant (tie and cheeks)
- Black fondant (eyelashes, belt, smile outline)
- Pink fondant (tongue)
- Blue fondant (irises)
- Light yellow modeling chocolate or fondant (nose and arms)
- Edible glue or a mixture of water and cornstarch
Instructions
- Preheat oven to 350°F (175°C). Grease and line two 9×13 inch pans.
- In a bowl, whisk together flour, baking powder, baking soda, and salt.
- In another large bowl, beat butter and sugar until fluffy. Add eggs one at a time, then vanilla.
- Mix in yogurt and milk.
- Gradually mix in the dry ingredients.
- Add yellow gel food coloring until the batter is bright yellow.
- Divide between two pans and bake for 28–32 minutes, or until a toothpick comes out clean.
- Let cool completely.
- Preheat oven to 350°F (175°C). Grease and line another 9×13 inch pan.
- Combine dry ingredients: flour, cocoa, baking powder, baking soda, salt.
- Cream butter and brown sugar until fluffy. Add eggs, one at a time, then vanilla.
- Stir in yogurt and milk.
- Mix in dry ingredients.
- Pour into the pan and bake for 30–35 minutes.
- Cool completely.
- Vanilla: Beat butter until creamy. Slowly add powdered sugar. Add milk and vanilla. Beat until fluffy.
- Chocolate: Beat butter until creamy. Mix in powdered sugar and cocoa. Add milk and vanilla. Beat until smooth.
- Stack: Bottom chocolate layer first, then a yellow sponge layer. Add a thin layer of vanilla buttercream between.
- Place the second yellow sponge on top.
- Trim the sides so they’re even and straight. Trim the top edges to slightly round them for a sponge-like curve.
- Apply a thin layer of vanilla buttercream all over to trap crumbs.
- Chill the cake in the fridge for 30 minutes.
- Roll out yellow fondant and cover the top ⅔ of the cake (SpongeBob’s sponge body).
- Roll out brown fondant to cover the bottom ⅓ (his pants). Use chocolate buttercream for the seam between the two.
- Use chocolate buttercream with a star tip to pipe a decorative border around the base.
- Eyes: Two white circles, smaller blue ones, and tiny black dots for pupils. Add black fondant lashes.
- Nose: Shape a 3D nose from light yellow fondant and attach it between the eyes.
- Mouth: Roll black fondant into a smile. Add a red tongue, white square teeth, and draw cheek lines with red fondant.
- Shirt & Tie: Use white fondant to create the shirt collar. Cut a small red tie and place it at the center.
- Belt: Thin black fondant strips for the pants’ belt.
- Arms & Hands: Roll yellow fondant or modeling chocolate into thin arms and cartoon hands. Attach to sides.
- Add round indents into the yellow fondant using a ball tool or clean spoon to mimic sponge holes.
- Use edible glue to secure all parts.
- Chill for 10–15 minutes to help details firm up.
- Chill the cake before applying fondant to prevent sliding.
- Use gel food coloring to avoid altering fondant texture.
- Always use clean, dry hands when shaping fondant.
- Use gloves when working with black or red fondant to avoid color transfer.

Can I Make a Spongebob Cake Without Fondant?
Yes, you can make a SpongeBob cake using only buttercream and a few simple decorations — no fondant at all. Here’s how to make it work smoothly:
- Use thick yellow buttercream: This becomes SpongeBob’s sponge body and gives it that bold cartoon color.
- Pipe facial details: Use a small round piping tip to create eyes, smile, and other details using colored buttercream.
- Chocolate cake for the pants: Use a separate layer of chocolate cake at the bottom to mimic his brown pants.
- Use candy or edible eyes: If piping is hard, you can use candy pieces or chocolate buttons for the eyes.
- Toothpick and knife detailing: Use a toothpick to outline before piping to keep your design neat.
What Size Cake Do I Need For a Spongebob Design?
To get the right SpongeBob look, starting with the correct size cake is important.
- Use a 9×13 inch rectangular pan: This shape matches SpongeBob’s body and gives enough room for detail.
- For taller cakes: Stack two yellow sponge layers with chocolate at the bottom for the pants.
- Serving size: This cake size gives you around 20-25 pieces depending on how you cut it.
- Need a bigger cake? Just double the recipe and stack two 9×13 layers side-by-side.
Can I Make a Spongebob Cake a Day In Advance?
Yes, making the cake a day early is actually a great idea! It gives you more time and less stress on the party day.
- Bake the cake one day early: Wrap cooled cakes in plastic and store at room temp.
- Apply crumb coat: Do a thin buttercream layer the night before and refrigerate.
- Fondant decorations: Add them fresh on party day or the night before if your room is cool.
- Avoid fridge for fondant: Keep it in a cool room so fondant doesn’t sweat.
- Final touches in the morning: Add the face details or borders on the party day so everything looks fresh.

How Do I Make a 3D Spongebob Cake Stand Upright?
A standing SpongeBob cake is fun, but it needs solid support. Here’s how to do it safely and easily:
- Use dense cake layers: Yellow pound cake or firm sponge layers hold shape better.
- Support structure: Place a sturdy cake board between each layer with dowels underneath.
- Central dowel or skewer: Run one long wooden dowel from top to bottom through the middle to keep it from leaning.
- Chill the cake: Cold cake is easier to stack and won’t collapse.
- Build on a board or cake drum: Something strong enough to move the cake without breaking it.
What Tools Do I Need To Decorate a Spongebob Cake?
You don’t need a bakery full of tools — just a few basics to pull off a great SpongeBob design.
- Offset spatula: For spreading buttercream smoothly.
- Piping bags and tips: Use round and star tips for details and borders.
- Small fondant roller: Helps roll thin layers for SpongeBob’s face, tie, and pants.
- Knife or X-Acto blade: For cutting clean fondant shapes.
- Toothpicks or skewers: Useful for marking outlines or giving support to arms or nose.
- Cake board: Strong base to decorate and carry the cake.
- Food coloring gel: Needed for those bold colors like yellow, red, and blue.
Can I Use Buttercream Instead Of Fondant For Spongebob Cake?
Absolutely, and a lot of people actually prefer it. Buttercream makes decorating easier and still looks amazing.
- Use thick, smooth buttercream: It should hold its shape well for piping and layering.
- Color the buttercream: Use yellow, red, blue, black, and white food gel colors for different parts.
- Pipe features instead of cutting shapes: Eyes, mouth, pants, tie — all can be done with piping bags.
- Use small tips for clean details: A #3 or #4 round tip works well for facial outlines.
- Chill between steps: If your buttercream gets too soft, chill the cake briefly to keep things sharp.
You May Also Like To Check Out These Recipes:
- Blue Cake
- Divorce Cake
- Softball Cake
- Fortnite Birthday Cake
- Brownie Ice Cream Cake
- Chocolate Bundt Cake
- Engagement Cake
- Hummingbird Cake
- Max And Ruby Cake
- Fathers Day Cake
- Squishmallow Cake
- Sweet Potato Cake
- Lunch Box Cake
- Chocolate Tres Leches Cake
- Yellow Cake With Chocolate Frosting
- Orange Pound Cake With Orange Glaze
- Lemon Cream Cheese Pound Cake

