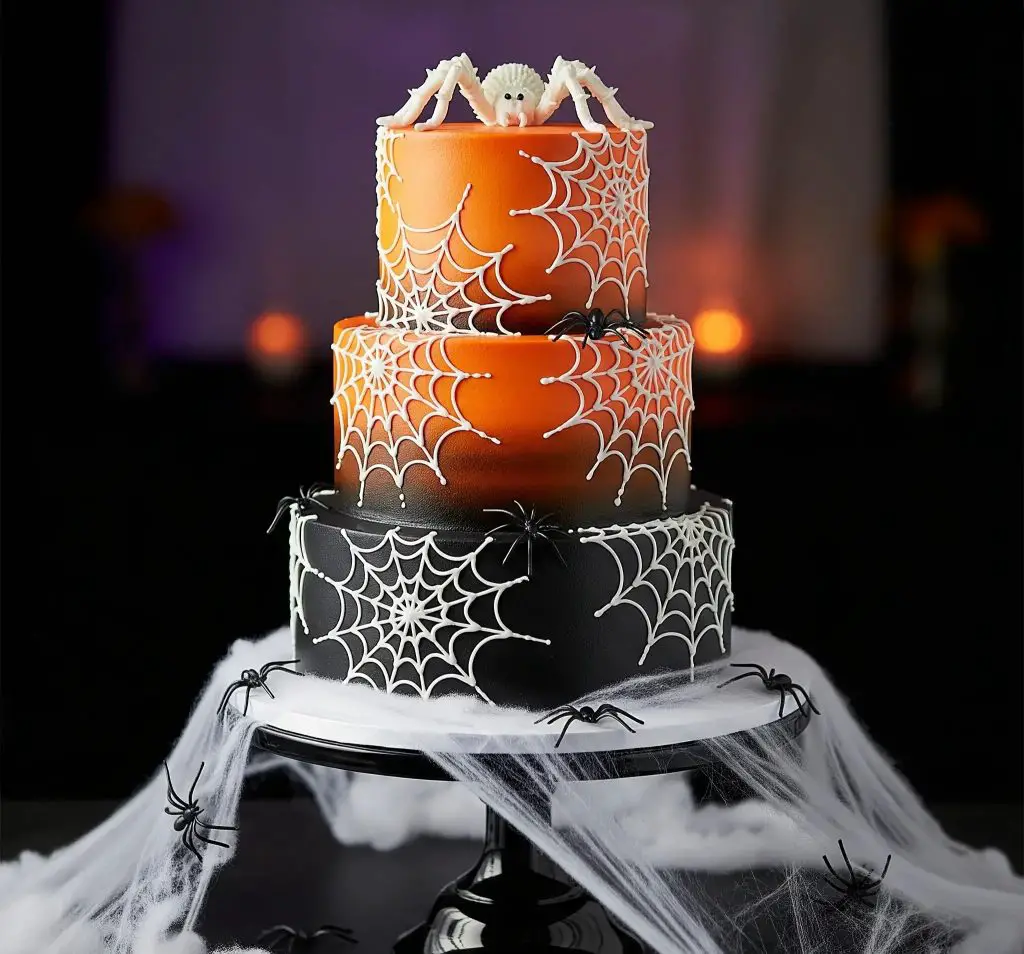
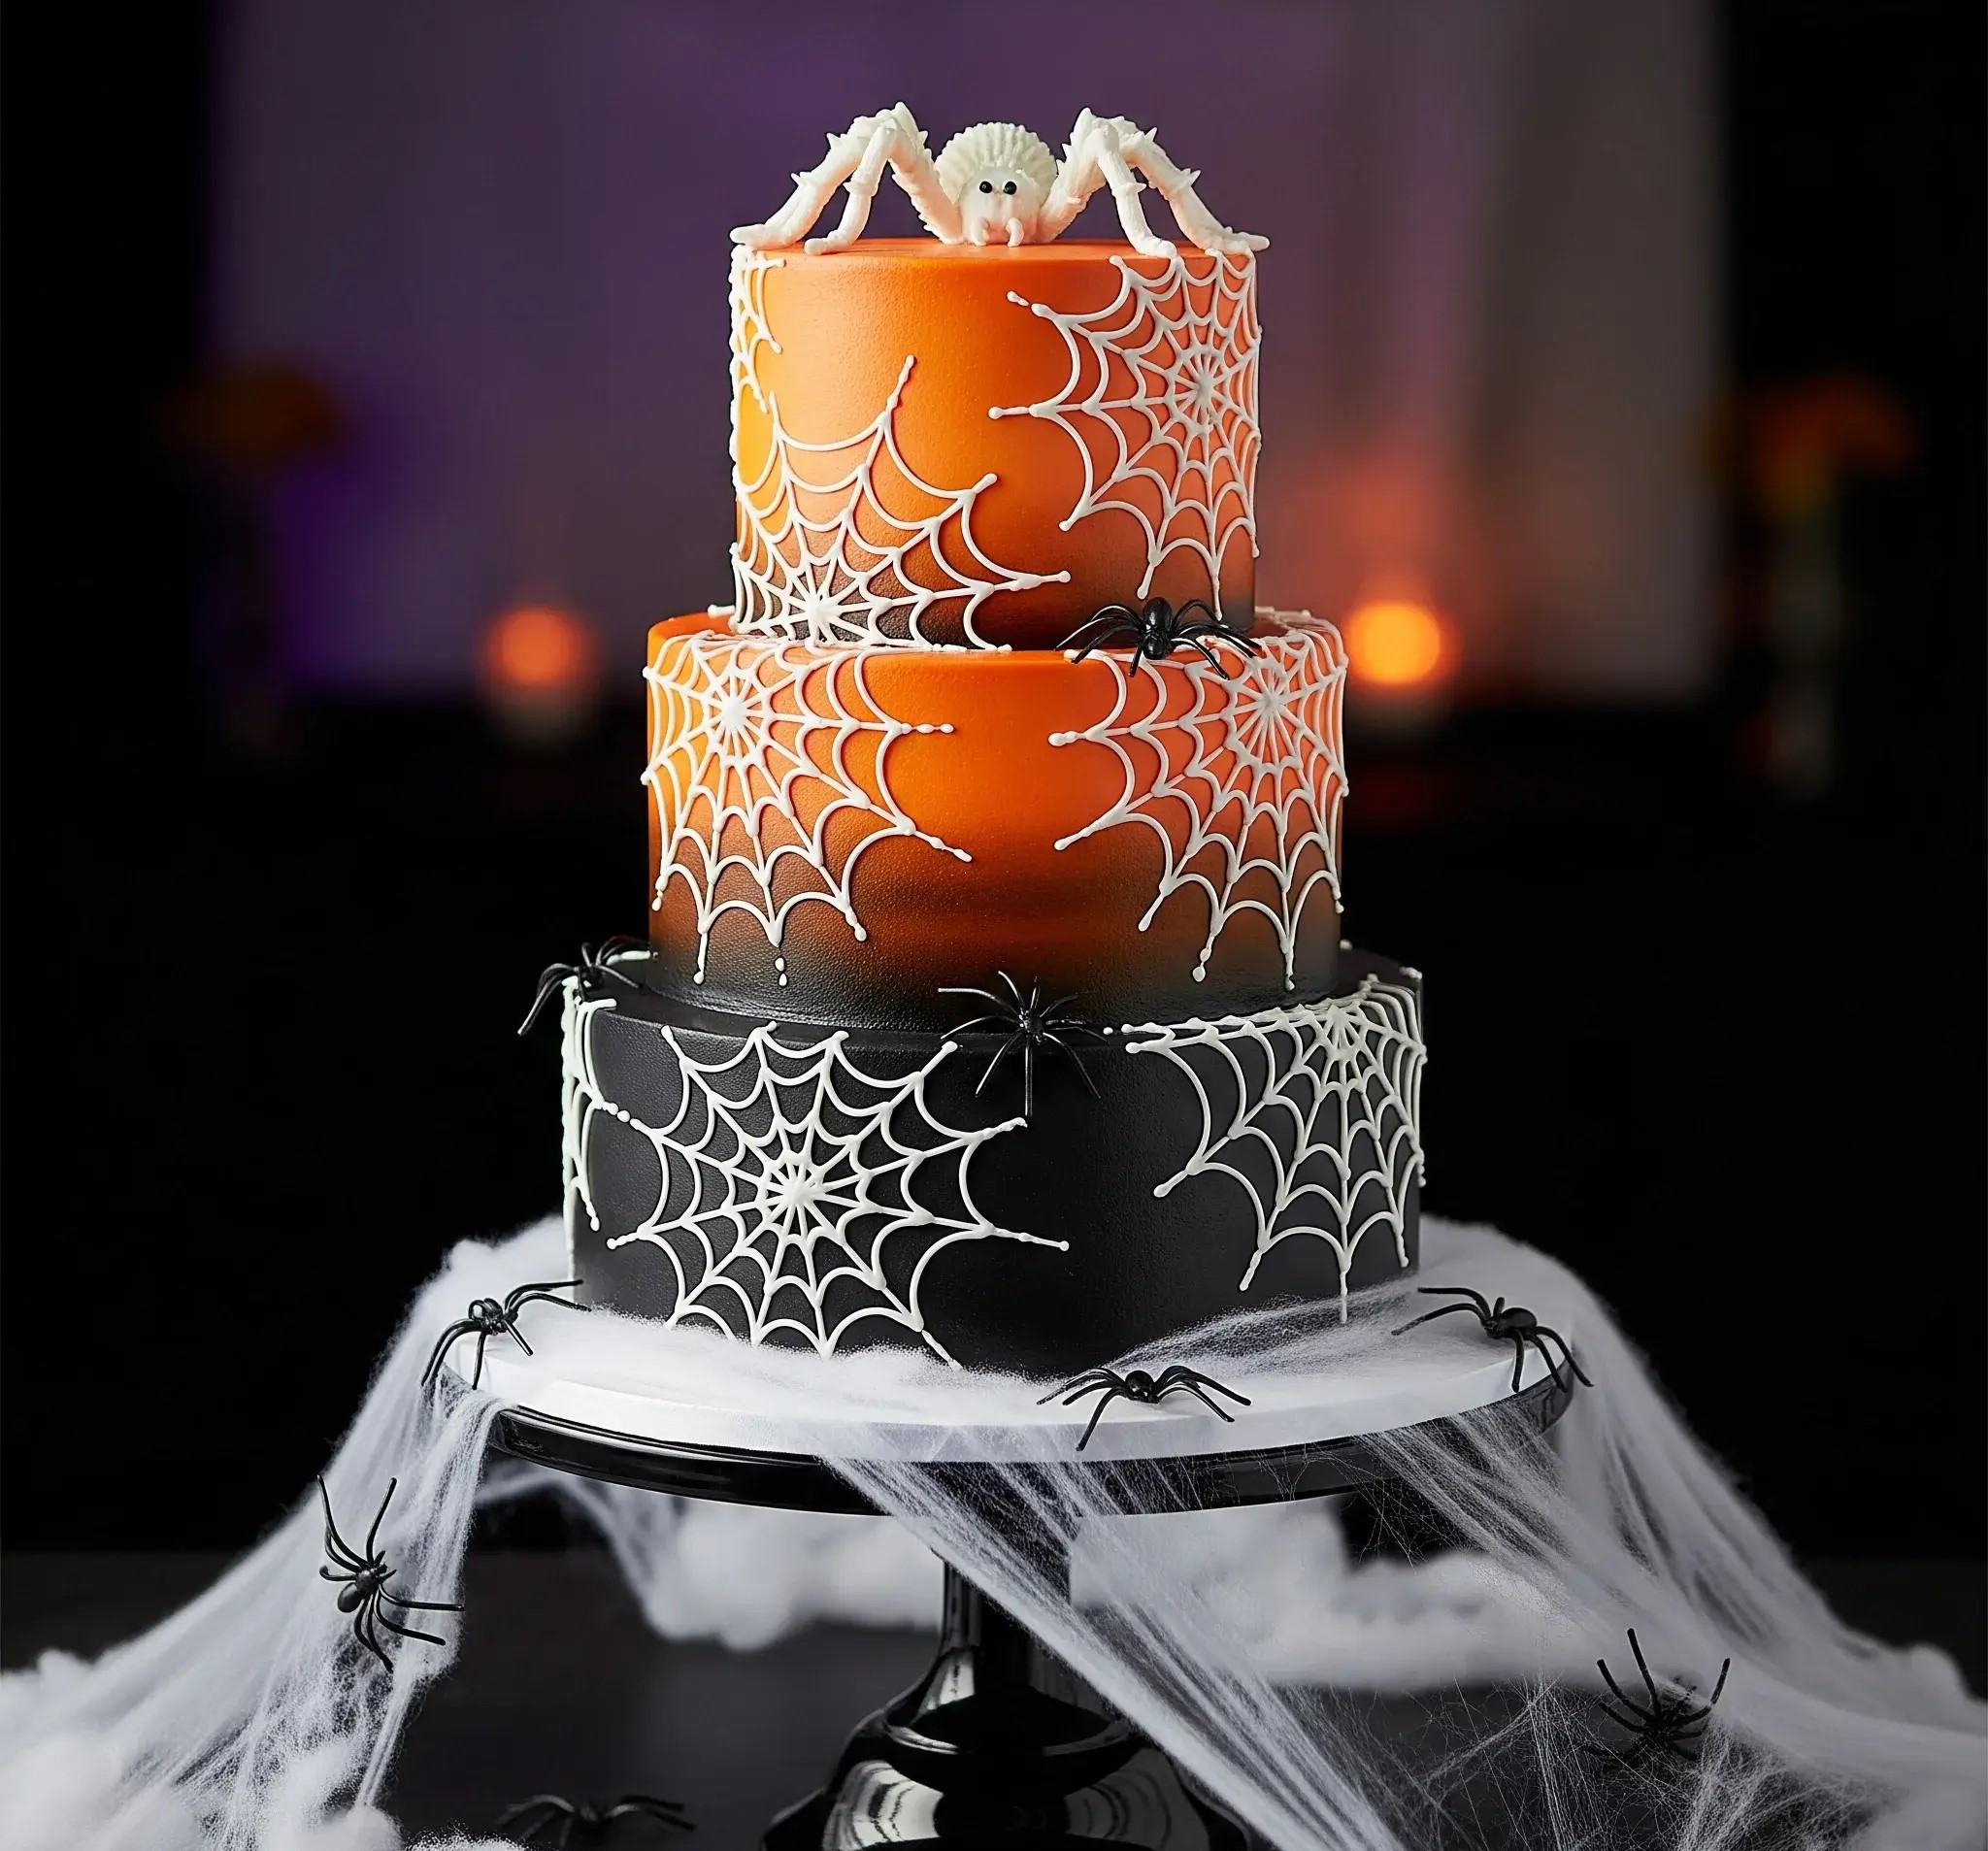
I’ve always loved the kind of Halloween dessert that makes everyone stop in their tracks, and this Spiderweb Cake does exactly that.
The first time I made it, the kids were half fascinated and half freaked out by the giant spider on top, but they couldn’t wait to cut into it.
That’s the magic of this cake—it’s fun, a little creepy, and it instantly becomes the centerpiece of the table.
The bright orange and deep black frosting set the stage, while the delicate white webs look like they were carefully spun overnight.
It’s dramatic without being too hard to pull off, and the inside tastes just as good as the outside looks. I promise, once you serve this, people will be talking about it long after the party is over.
Spiderweb Cake Recipe
Ingredients
For the Cake Layers (3 tiers):
- 6 cups all-purpose flour
- 2 ½ cups granulated sugar
- 2 cups unsalted butter, softened
- 12 large eggs, room temperature
- 1 ½ cups whole milk
- 1 cup sour cream
- 2 tbsp vanilla extract
- 1 tbsp baking powder
- 1 tsp baking soda
- ½ tsp salt
For the Buttercream Frosting:
- 3 cups unsalted butter, softened
- 12 cups powdered sugar, sifted
- 1 cup heavy cream
- 2 tbsp vanilla extract
- Gel food coloring: orange, black, and white
For Decoration:
- Black fondant (optional for covering board)
- White royal icing (for spiderwebs)
- Edible gel colors (orange and black gradient effect)
- Plastic or edible spiders (choose non-toxic if using plastic)
- Cotton candy or white edible fluff (for cobweb effect around the cake stand)
Instructions
- Grease and line three sets of round pans: 6-inch, 8-inch, and 10-inch.
- Preheat the oven to 350°F (175°C).
- In a large mixing bowl, cream butter and sugar until fluffy (about 4 minutes).
- Add eggs one at a time, mixing well after each addition.
- Mix in sour cream and vanilla.
- In a separate bowl, whisk flour, baking powder, baking soda, and salt.
- Alternate adding dry ingredients and milk into the butter mixture, starting and ending with dry ingredients. Mix just until combined.
- Divide batter evenly into prepared pans.
- Bake for 30–40 minutes, depending on size (check with a toothpick).
- Cool completely on wire racks before assembling.
- Beat butter until smooth and pale.
- Add sifted powdered sugar gradually.
- Mix in vanilla and cream until fluffy.
- Divide frosting: leave some white, color one portion orange, and another portion black using gel food coloring.
- Level cakes with a serrated knife.
- Stack each tier with buttercream in between.
- Crumb coat all tiers and refrigerate for 20 minutes.
- Apply a smooth layer of buttercream:
- Bottom tier: black.
- Middle tier: orange fading into black (use a spatula or sponge for gradient effect).
- Top tier: bright orange.
- Fill a piping bag with white royal icing.
- Pipe spiderweb patterns across each tier (start with lines from the center outward, then connect with curved lines).
- Keep spacing similar to the design in the image.
- Place a large spider figure on top (plastic or edible fondant).
- Attach small spiders around the webs.
- Spread cotton candy or edible fluff around the cake base for a cobweb effect.
- Place the cake on a black stand for the same dramatic look.

What Icing Is Best For Drawing Spiderwebs On Cake?
For neat spiderwebs, you need icing that holds its shape but is still easy to pipe. The best choice is royal icing because it dries firm and doesn’t spread too much. You can also use buttercream if you want softer lines, but it won’t give the same sharp look.
- Royal icing: Dries hard and keeps web lines clean.
- Piping gel: Works well if you want shiny spiderwebs.
- Buttercream: Softer finish but less crisp than royal icing.
Can I Make a Spiderweb Cake Ahead Of Time?
Yes, you can prepare it in advance, but timing matters so the design stays fresh. Bake the cake and prepare the frosting one or two days before. Add the spiderweb design only on the day you plan to serve it.
- Bake layers ahead: Store in airtight wrap at room temperature for 2 days or refrigerate.
- Frost the cake: Apply buttercream the day before and keep it chilled.
- Add web design: Pipe spiderwebs on the same day of serving.
- Store safely: Keep decorated cake in a cool place away from moisture.
What Tools Do I Need To Decorate a Spiderweb Cake?
Decorating this cake is easier if you have the right tools. Most items are simple and easy to find.
- Piping bags: To pipe spiderwebs and add details.
- Small round piping tip: For clean web lines.
- Offset spatula: For smooth buttercream layers.
- Gel food colors: For orange and black buttercream shades.
- Cake turntable: Helps to frost and decorate evenly.
Can I Use Chocolate Instead Of Icing For Spiderwebs?
Yes, chocolate works beautifully and adds a rich taste. Melted white chocolate or dark chocolate can be piped just like icing.
- Melt carefully: Use microwave or double boiler so it doesn’t burn.
- Use a piping bag: Pour melted chocolate in a bag and snip a tiny hole.
- Work quickly: Pipe webs before chocolate starts to harden.
- Chill cake: Cold frosting helps chocolate webs set neatly.

How Do I Keep The Spiderweb Design From Smudging?
Smudging usually happens if the frosting is too soft or if the cake is handled too soon. To avoid this, make sure the base is set before you add the web.
- Chill cake first: Refrigerate frosted cake before piping.
- Use thick icing: Avoid runny icing that spreads.
- Pipe lightly: Don’t press too hard on the piping bag.
- Let it set: Give webs a few minutes to dry before touching or moving the cake.
Can I Make a Spiderweb Cake Without Fondant?
Yes, you don’t need fondant at all. Buttercream and icing alone can give the same effect.
- Smooth buttercream: Use an offset spatula to create a clean base.
- Gel colors: Mix into buttercream for orange and black shades.
- Royal icing: Pipe spiderwebs directly over buttercream.
- Simple toppers: Add plastic or edible spiders for the final touch.
What Piping Tips Should I Use For Spiderweb Details?
For fine web lines, a small round tip works best. The size of the tip decides how delicate your design looks.
- Tip #1: Creates very thin, delicate lines.
- Tip #2: Slightly thicker, easier for beginners.
- Tip #3: Good balance of control and visibility.
- Toothpick option: If you don’t have tips, fill a bag and snip a very tiny hole.
How Do I Get The Ombre Effect With Orange And Black Buttercream?
The ombre look makes the cake stand out, and it’s not as tricky as it seems. The key is blending two colors while frosting.
- Separate frosting: Color one part orange and another part black.
- Apply in sections: Spread orange on the top, black at the bottom.
- Overlap colors: Where they meet, use a spatula to blend slightly.
- Smooth edges: Spin the cake on a turntable while smoothing to get a natural fade.
You May Also Like To Check Out These Recipes:
- Black Cat Cake
- Poison Apple Cake
- Eclair Cake
- Crockpot Lava Cake
- Sagittarius Birthday Cake
- Italian Love Cake
- Halloween Crunch Cake
- Halloween Poke Cake
- Turkey Cake
- 7Up Pound Cake
- Halloween Dirt Cake
- Pumpkin Tres Leches Cake
- Pumpkin Spice Cake
- Pumpkin Sheet Cake
- Pumpkin Coffee Cake
- Pumpkin Cake Pops
- Pumpkin Bundt Cake
- Apple Coffee Cake

