I’ll be honest with you — I didn’t plan to go all out for my kid’s 2nd birthday. I thought, “We’ll keep it simple. Maybe some balloons, a small cake, nothing too fancy.”
But then my toddler started obsessing over that shark song (you know the one), and suddenly everything had to be shark-themed — the plates, the toys, even the napkins. So of course, the cake had to match.
I spent hours scrolling, trying to find the right one. Most looked either too boring or way too complicated. But then it hit me: why not make a cake that actually feels like part of the party?
Not just a sweet treat, but something that would light up my child’s whole face. That’s how this Shark Birthday Cake happened. And wow — it did exactly that.
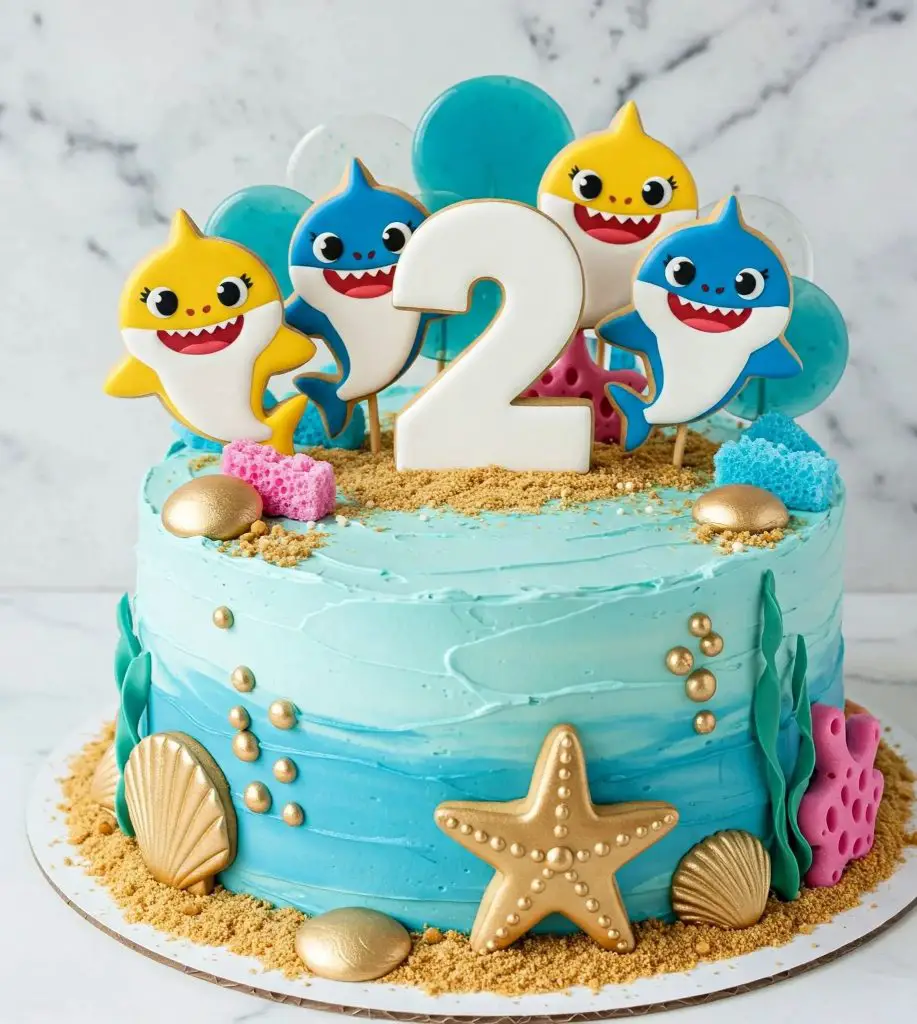
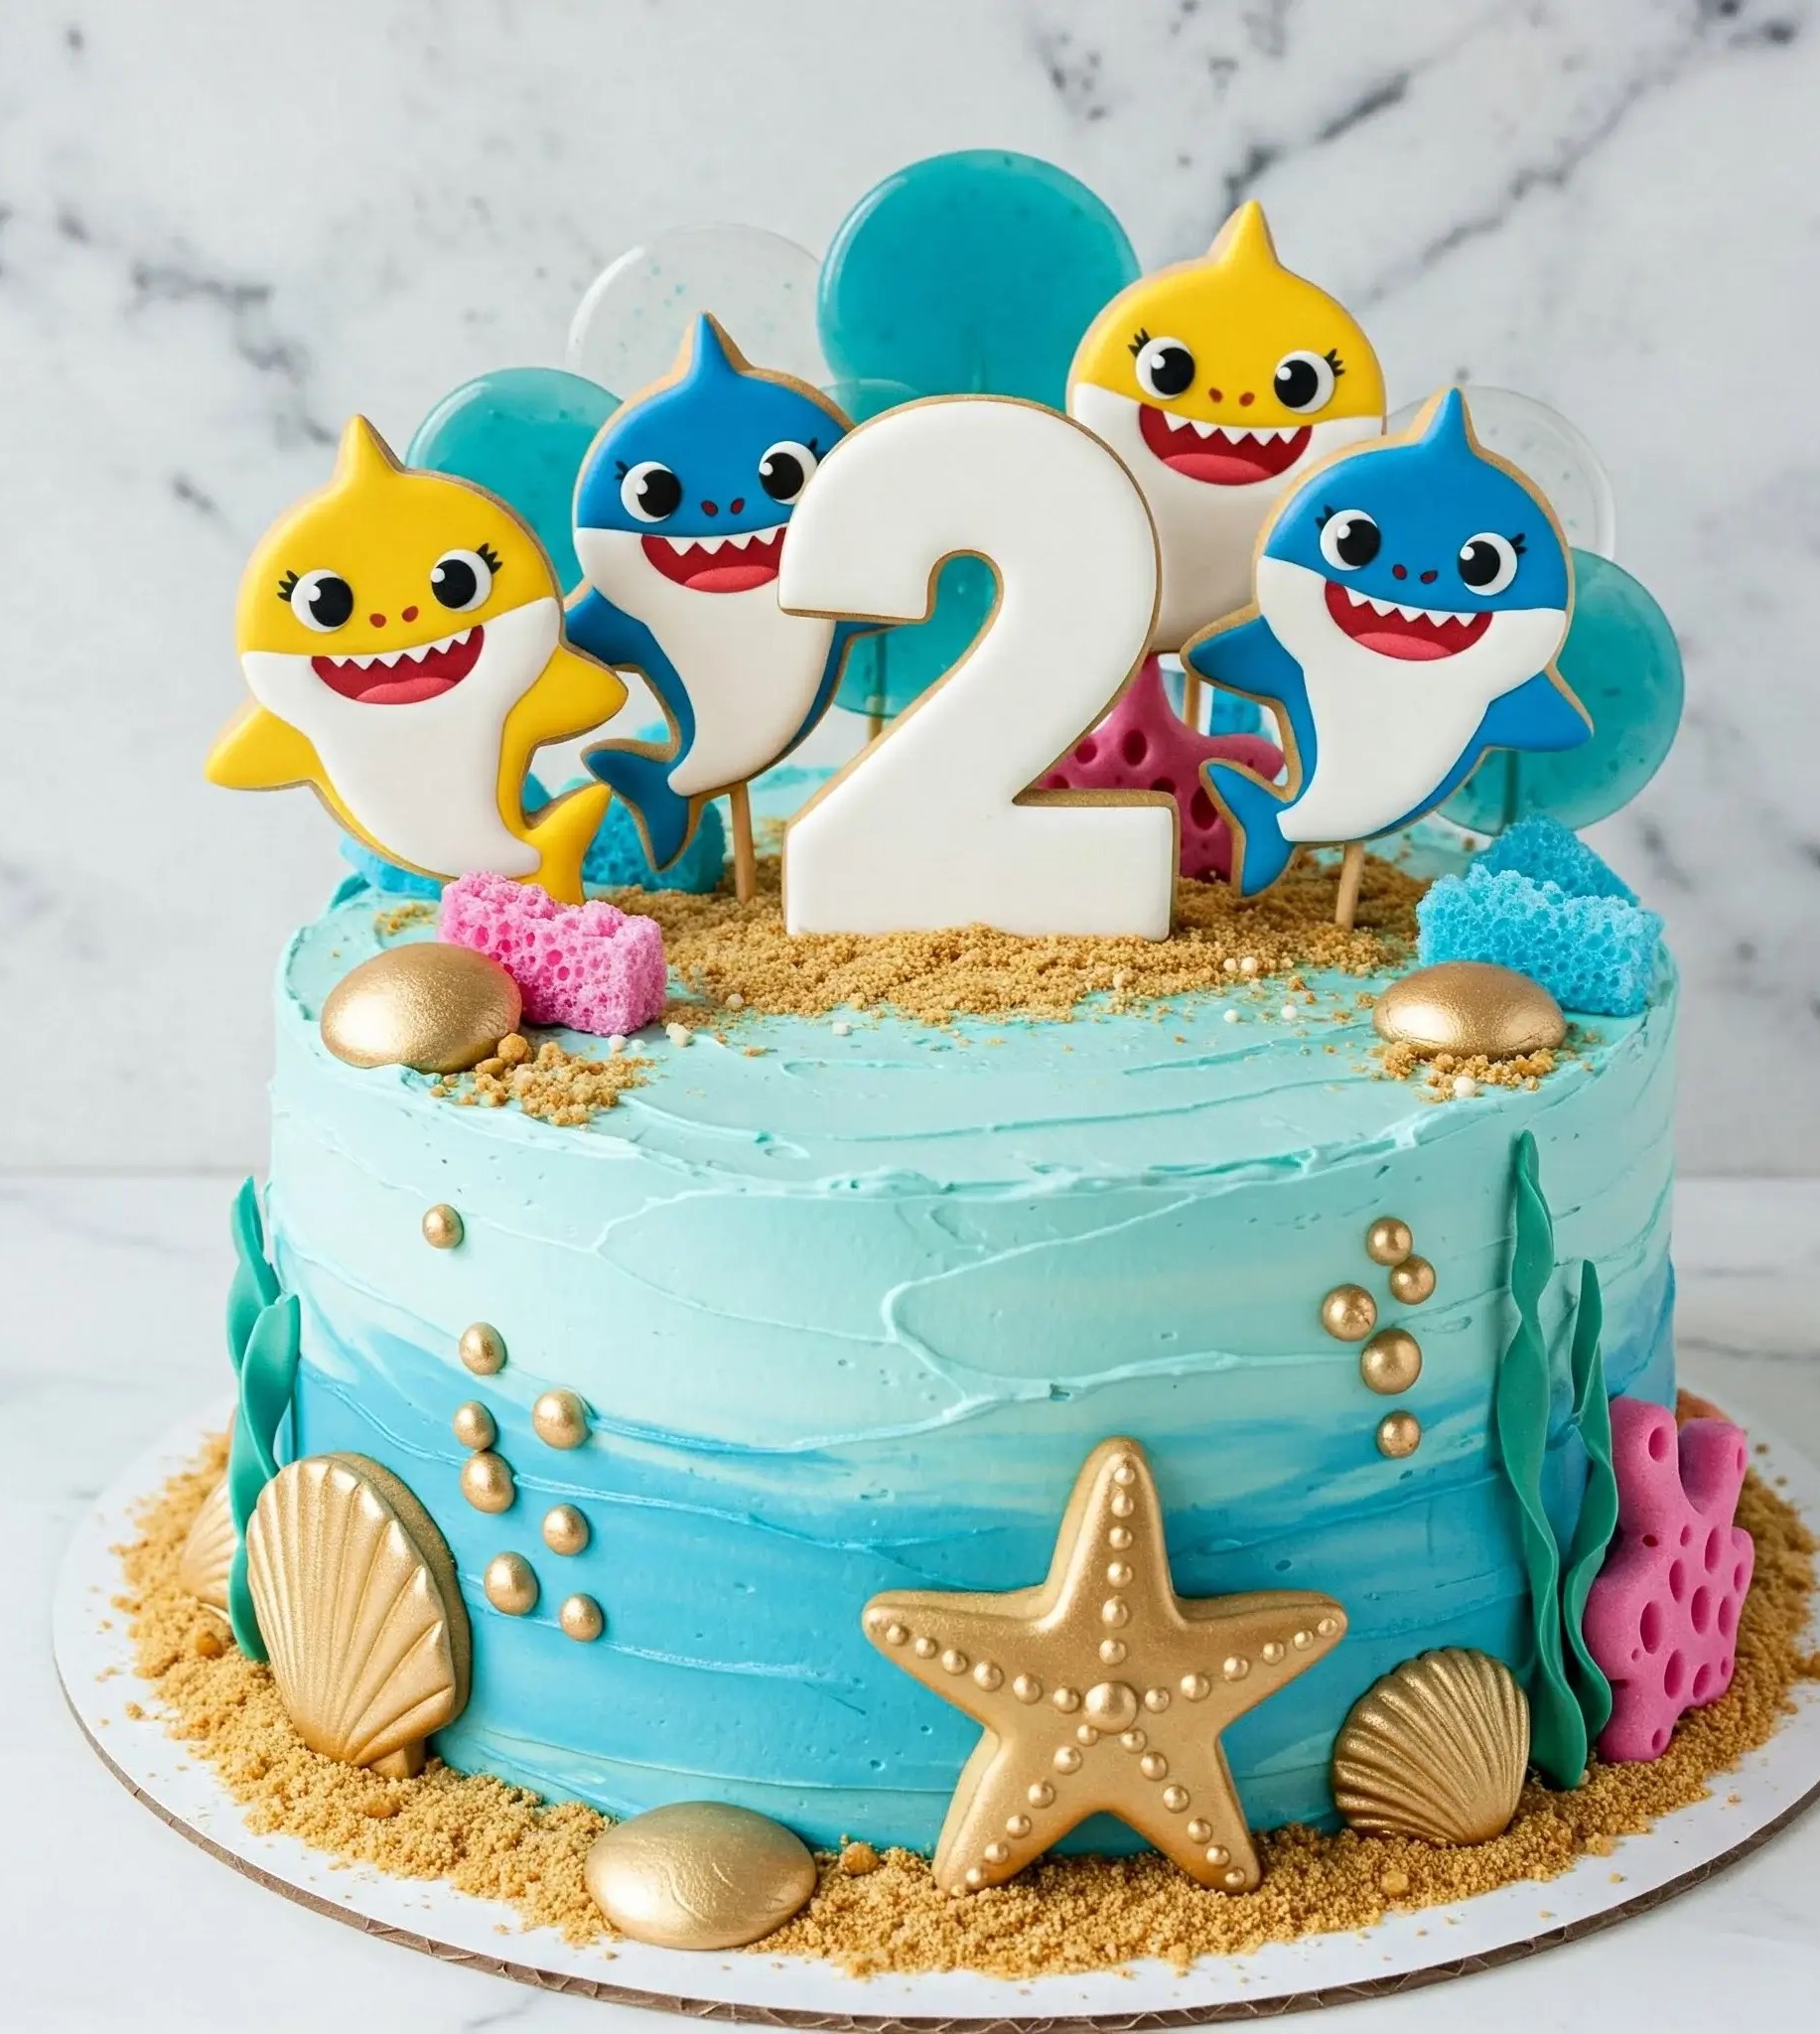
This cake became the centerpiece of the day. It had bright ocean colors, golden “sand,” coral details, and those adorable shark faces smiling from the top.
The second my little one saw it, they gasped. Not exaggerated, not made up — an actual gasp. And I knew right then, this was worth every minute in the kitchen.
I’m sharing this recipe because I want you to feel that moment too — when your kid sees something made just for them, and you realize you totally nailed it.
It’s easier than it looks (promise), and I’ll walk you through every single step. Let’s make some magic — shark-style.
Shark Birthday Cake Recipe
Ingredients
For the Vanilla Cake (3 layers, 8-inch round):
- 3½ cups all-purpose flour
- 2½ tsp baking powder
- ½ tsp baking soda
- 1 tsp salt
- 1 cup unsalted butter, softened
- 2 cups granulated sugar
- 4 large eggs
- 1 tbsp vanilla extract
- 1½ cups buttermilk (room temperature)
For the Ocean Buttercream Frosting:
- 2 cups unsalted butter, softened
- 7–8 cups powdered sugar, sifted
- ¼ cup whole milk
- 2 tsp vanilla extract
- Gel food coloring: sky blue, turquoise, white
For the Shark Toppers (Royal Icing Cookies):
- 1 cup unsalted butter, softened
- 1 cup granulated sugar
- 1 large egg
- 1½ tsp vanilla extract
- 2¾ cups all-purpose flour
- ½ tsp baking powder
- ¼ tsp salt
Royal Icing:
- 3 tbsp meringue powder
- 4 cups powdered sugar
- 5–6 tbsp warm water
- Gel colors: yellow, white, black, red, blue
- Fine black edible marker (for eyes)
- Lollipop sticks
For the Number “2” Topper:
- White fondant
- Tylose powder (for hardening)
- Large number 2 cookie cutter
- Edible gold paint (for optional outline)
For the Sand & Coral Details:
- Golden brown sugar (for edible sand)
- Gold fondant seashells, starfish, and rocks
- Coral decorations:
- Pink & blue candy melts
- Bubble wrap
For the Decorative Elements:
- Gold pearl sprinkles
- Edible gold dust (optional accenting)
- Green fondant (for seaweed)
- White chocolate or sugar lollipops (for translucent bubbles)
Instructions
- Preheat oven to 350°F (175°C). Grease and line three 8-inch round cake pans with parchment paper.
- Whisk together flour, baking powder, baking soda, and salt.
- In a large bowl, cream butter and sugar until light and fluffy (about 3–4 minutes).
- Beat in eggs one at a time, then add vanilla.
- Alternate adding dry ingredients and buttermilk, starting and ending with flour. Mix just until combined.
- Divide batter evenly among pans. Bake for 25–28 minutes, or until a toothpick comes out clean.
- Cool for 10 minutes in pans, then transfer to wire racks to cool completely.
- Beat butter until pale and fluffy. Gradually add powdered sugar.
- Add milk and vanilla, beat for 3–5 minutes until smooth.
- Divide frosting: color one part sky blue, one part turquoise, and leave one part white.
- For the watercolor effect, apply dollops of each color randomly while frosting the cake sides, then blend lightly with an offset spatula.
- Level each cake layer. Spread a layer of buttercream between each.
- Apply a crumb coat and chill for 15 minutes.
- Add final layer of blue/turquoise/white frosting using the watercolor technique.
- Smooth top and edges.
- Sprinkle golden brown sugar on top and bottom edge for the sandy look.
- Press molded gold fondant shells and starfish around the base.
- Use green fondant to shape seaweed curls.
- Create coral: melt candy melts, spread over bubble wrap, let cool, peel, and cut into pieces.
- Cream butter and sugar for cookies. Add egg and vanilla. Mix in dry ingredients.
- Roll dough to ¼” thick, cut shark shapes using custom cutter or template. Insert lollipop sticks at base.
- Bake at 350°F (175°C) for 10–12 minutes. Cool completely.
- Prepare royal icing. Color portions: yellow (baby shark), blue (daddy shark), red (mouth), white (body), black (eyes/mouth details).
- Pipe layers onto cookies: start with the body, then details like belly, eyes, mouth, and teeth. Allow layers to dry between applications.
- Add final details using edible marker for pupils and outline. Let dry fully.
- Roll fondant mixed with a bit of tylose to ¼” thick.
- Use cookie cutter to cut out the number “2”. Insert a skewer or stick at base.
- Let dry upright for 24 hours. Paint edge with edible gold if desired.
- Insert number “2” fondant topper in center.
- Surround with shark cookies on sticks.
- Place sugar lollipops behind cookies for bubble effect.
- Add coral pieces, gold balls, and shells around top and base.
- Finish with a light dusting of edible gold if desired.
- Best served at room temperature.
- Store in a cool place for up to 2 days, or refrigerate in a cake box up to 5 days.

Can I Make a Shark Cake Without Fondant?
Yes, you can! You don’t need fondant to make an awesome shark birthday cake. You can use buttercream, cookies, or even edible prints to decorate instead.
- Use buttercream icing: Create waves and textures with a spoon or spatula.
- Make cookie toppers: Bake simple sugar cookies shaped like sharks and decorate with royal icing.
- Edible image sheets: Order custom edible prints with shark characters and place them on your frosted cake.
- Shark toys or paper toppers: Stick clean plastic shark toys or printed toppers on toothpicks to finish the look.
How Do I Decorate a Cake To Look Like The Ocean?
Creating an ocean look is all about the colors and textures. Use different shades of blue and a little creativity.
- Use different blue shades: Mix light blue, sky blue, and turquoise buttercream and spread in swirls.
- Add wave texture: Swipe a spoon or offset spatula to make wave patterns.
- Sprinkle brown sugar on top: It looks like beach sand and adds texture.
- Stick candy or fondant seaweed and shells: These little details bring the ocean scene to life.
- Add bubble designs: Use gold or silver pearls to create bubble trails up the side of the cake.
Which Colors Are Best For An Ocean Cake Design?
Colors can change the whole vibe of your cake. For an ocean theme, stick to cool, soft tones and natural details.
- Light blue: For shallow water look.
- Turquoise: Gives a tropical feel.
- Sky blue: Works well as the main base.
- White: For foam, waves, and blending.
- Beige or brown: Use for edible “sand” with crushed biscuits or brown sugar.
- Gold accents: Add luxury with gold shells, pearls, or stars.
How Long In Advance Can I Make a Shark Birthday Cake?
You can plan ahead — just keep it fresh and safe.
- Cake layers: Bake 2–3 days before and store in the fridge wrapped in plastic.
- Buttercream: Make it 2 days ahead and store in an airtight container in the fridge.
- Decorate: Ideally the night before the party.
- Fully decorated cake: Can be made 1 day before. Keep it boxed and chilled.
Is It Safe To Put Cake Toppers Made Of Paper Or Plastic?
Yes — but only if you handle them correctly.
- Use food-safe picks or toothpicks: Attach toppers securely so they don’t fall over.
- Avoid ink smudges: If printing at home, use food-safe edible paper — not regular printer paper.
- Clean plastic items first: Wash any small toys or decorations well before placing them on the cake.
- Don’t insert directly if unsure: Wrap the base of the topper in plastic wrap or foil before inserting into the cake.

Can I Make a Shark Cake Without Using Eggs Or Dairy?
Absolutely, you can still make a delicious cake without those ingredients.
Simple cake options without eggs or dairy
- Vanilla cake made with plant milk and oil
- Chocolate cake using vinegar and baking soda for rise
- Lemon sponge with yogurt alternative
- Banana cake using mashed banana instead of eggs
- Coconut cake with non-dairy milk and vegan butter
How Do I Transport a Layered Shark Cake Safely?
Transporting a tall decorated cake can be tricky, but not if you’re careful.
- Chill it well first: Cold cakes travel better and reduce smudging.
- Use a sturdy cake board: Make sure it’s larger than the cake base.
- Place in a snug cake box: A tall box keeps the top decorations protected.
- Keep the base flat: Transport on a flat car surface like the trunk — never a slanted seat.
- Drive slow and steady: Avoid hard turns or sudden stops.
How Do I Make Gold Seashells For Cake Decoration?
Gold shells make your cake look extra special — and they’re easy to make at home.
- Use a seashell mold: Press in fondant or modeling chocolate.
- Let it dry slightly: So they hold their shape.
- Brush with edible gold dust: Use a dry brush to coat each shell.
- Optional: Mix gold dust with a few drops of clear alcohol to paint a shiny finish.
Can I Make a Shark Birthday Cake Without Professional Tools?
Yes, you don’t need fancy tools to create something amazing.
- Butter knife or spoon: For spreading and texturing frosting.
- Ziplock bags: Cut the corner to make a piping bag.
- Cookie cutters: For making shapes like sharks or shells.
- Toothpicks: For drawing or detailing on cookies.
- Plastic toys or paper prints: Instant toppers without needing to sculpt anything.
How Do I Store a Decorated Shark Cake Overnight?
You want to keep your cake fresh and decorations safe.
- Use a cake box: Place the cake in a tall cake box to protect the design.
- Refrigerate: Keep it in the fridge if it has perishable frosting or fillings.
- Avoid moisture: If you live in a humid area, cover loosely with plastic wrap to prevent sweating.
- Bring to room temp before serving: Remove the cake 1–2 hours before the party so the frosting softens.
You May Also Like To Check Out These Recipes:
- Gemini Cake
- Funnel Cake
- Blue And White Cake
- Wedding Sheet Cake
- Diy Wedding Cake
- Rustic Wedding Cake
- Simple Wedding Cake
- Wedding Cake Pops
- Pink Wedding Cake
- Anniversary Cake
- Sweet Potato Cake
- Lunch Box Cake
- Ferrero Rocher Cake
- Floral Wedding Cake
- Star Wars Cake
- Pink Birthday Cake
- Rhubarb Cake

