I’ll be honest—baking a red vintage cake feels a little like stepping back into a special kind of celebration.
The first time I made it, I couldn’t stop staring at the way the deep red color stood out against the smooth buttercream.
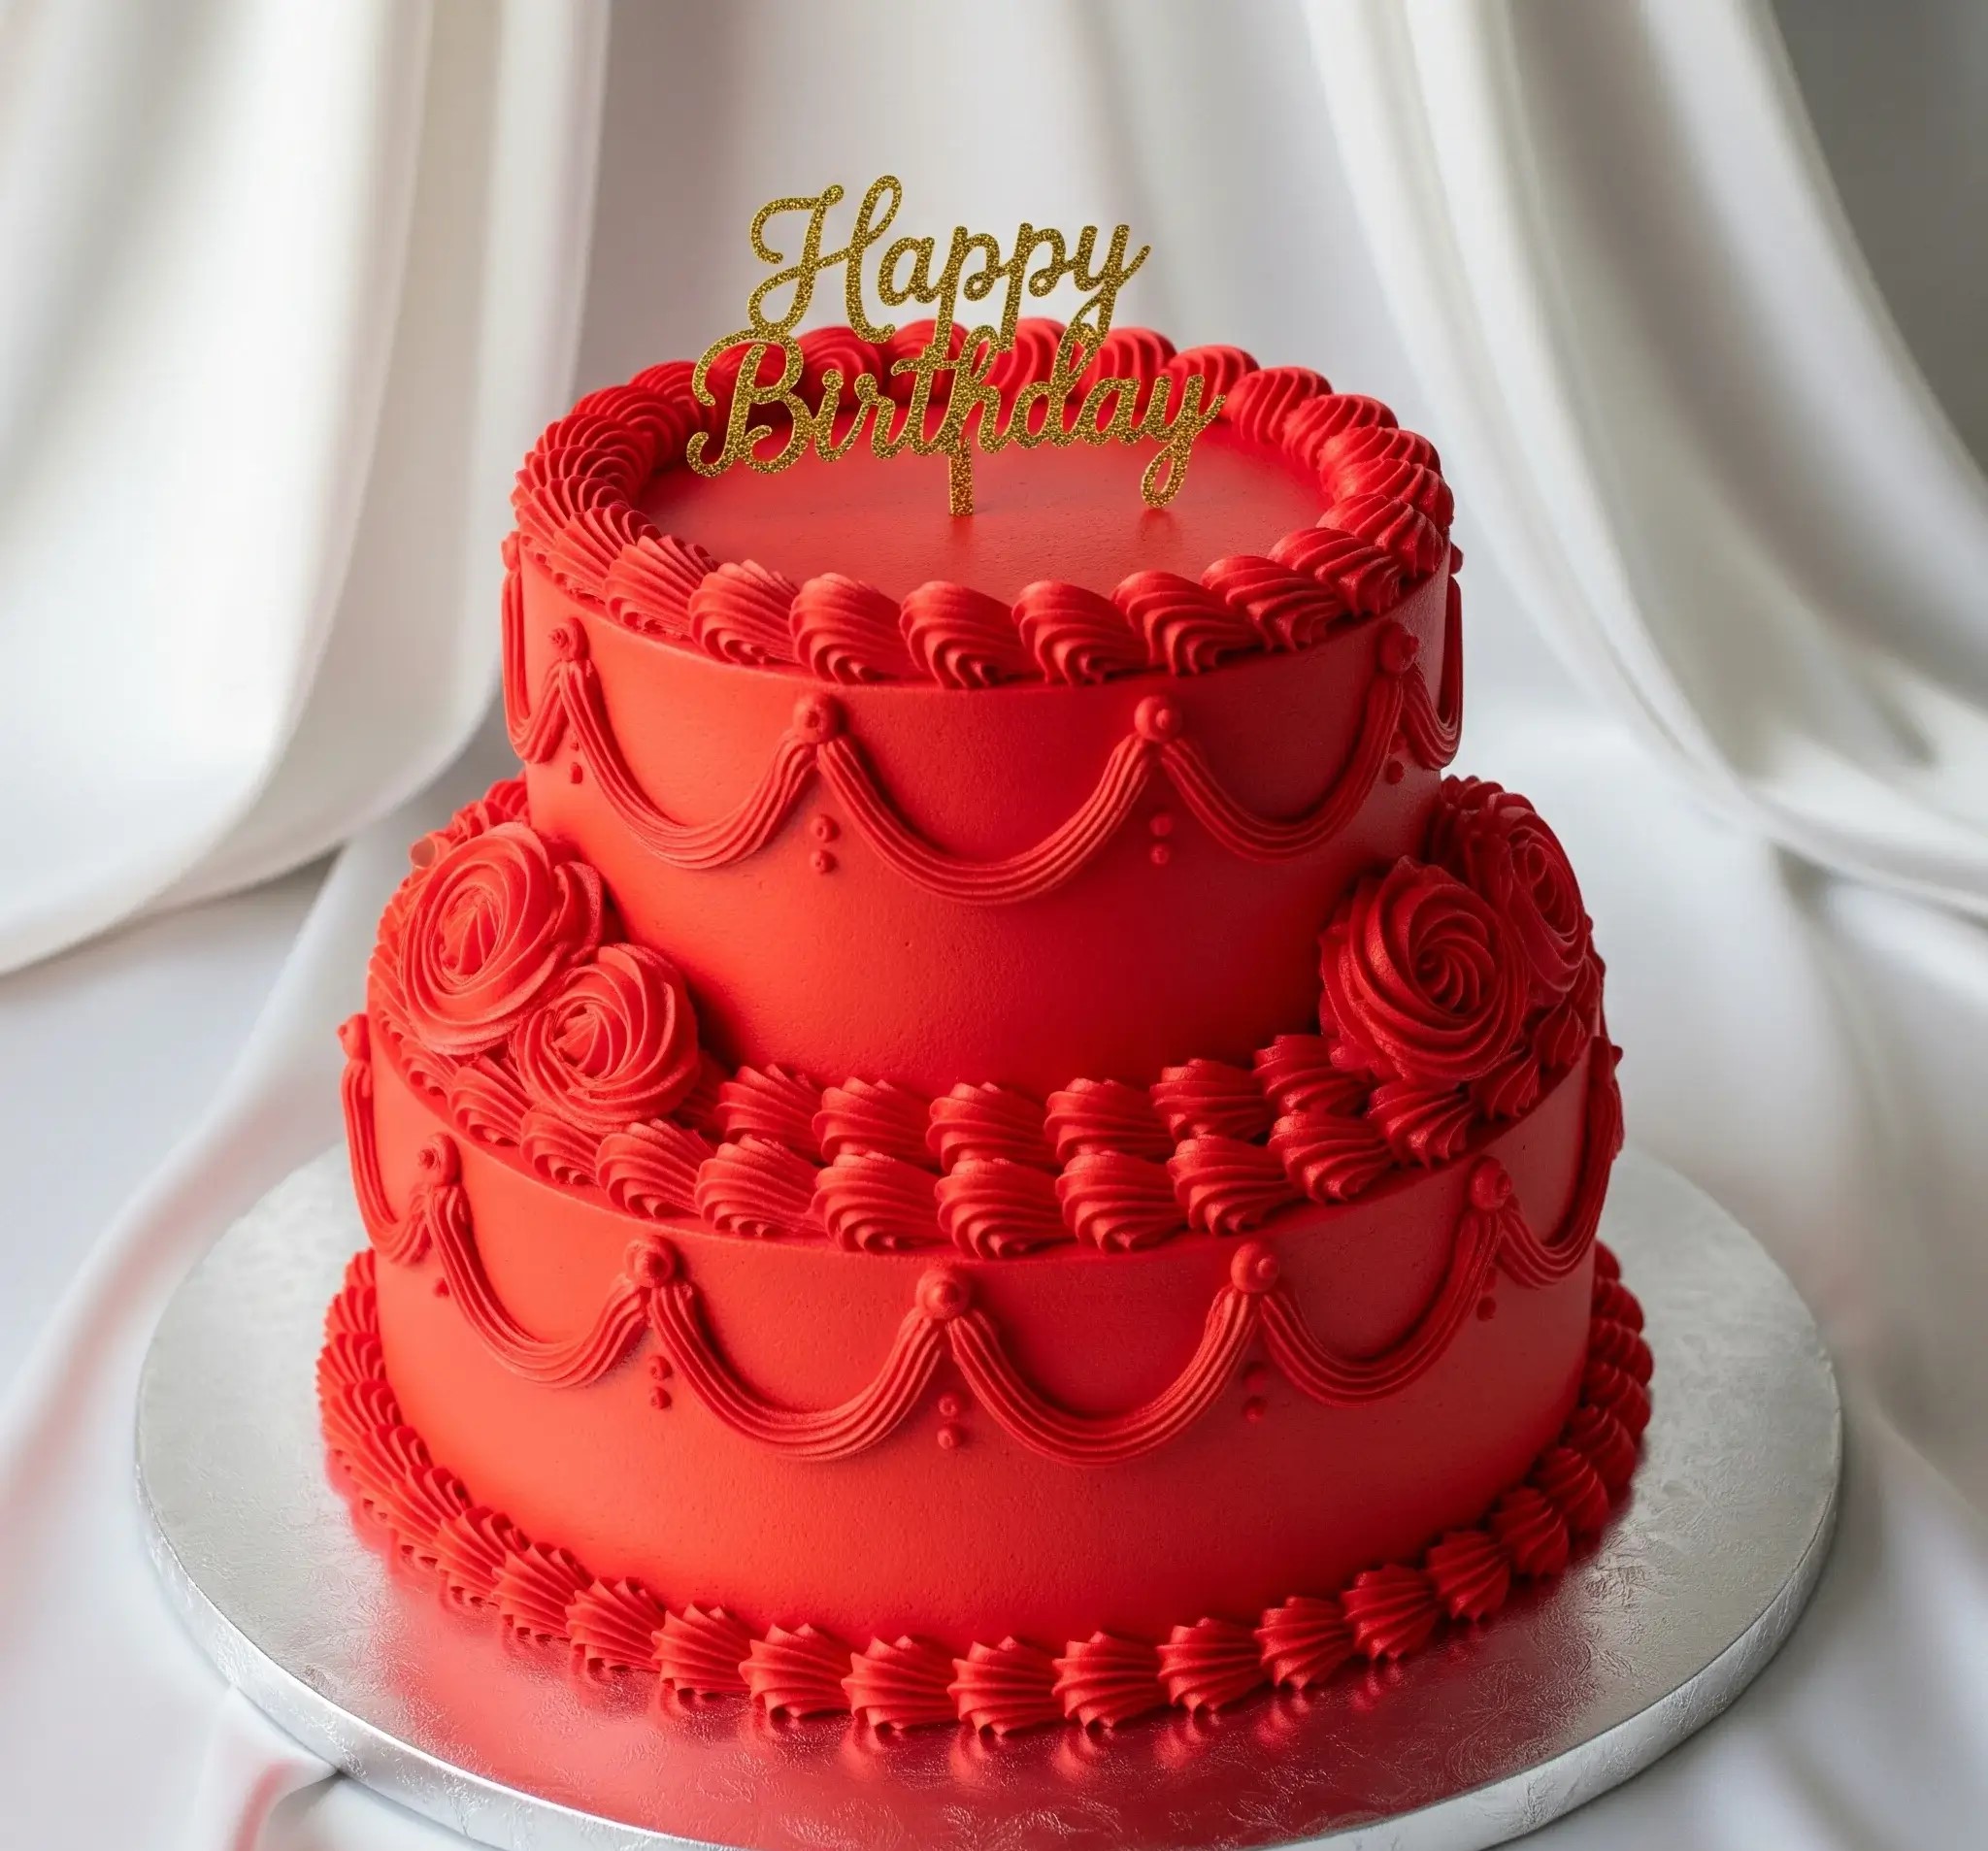
Once the scalloped piping and roses were in place, it looked like something you’d see on a carefully set party table, waiting to be admired before anyone dares to slice it.
For me, this cake isn’t just about the flavor (though the soft, moist layers do taste amazing). It’s about the way it looks—rich, bold, and dressed up with details that make it feel important.
I love how the golden “Happy Birthday” topper crowns it so simply yet so perfectly.
Every time I bake it, I feel like I’m gifting more than just cake—I’m sharing a memory that feels grand and joyful.
Red Vintage Cake Recipe
Ingredients
For the Cake (Two Tiers – 8-inch base + 6-inch top, each with 2 layers):
- 3 cups (360 g) all-purpose flour
- 2 ½ cups (500 g) fine granulated sugar
- 1 cup (240 ml) vegetable oil
- 1 ½ cups (360 ml) buttermilk (room temperature)
- 1 cup (240 ml) hot water
- 4 large eggs (room temperature)
- ½ cup (60 g) unsweetened cocoa powder
- 2 ½ tsp baking powder
- 1 ½ tsp baking soda
- 1 tsp salt
- 2 tsp pure vanilla extract
- 1 ½ tbsp red gel food coloring (use a strong concentrated gel, not liquid)
For the Red Buttercream:
- 2 cups (450 g) unsalted butter (softened)
- 8 cups (960 g) powdered sugar (sifted)
- ⅔ cup (160 ml) heavy cream (chilled)
- 2 tsp pure vanilla extract
- ¼ tsp salt
- Red gel food coloring (adjust until you get a deep, bold red)
For Assembly & Decoration:
- Cake boards: one 8-inch and one 6-inch (thick, sturdy)
- A large base cake drum (covered in silver or white foil)
- Dowels or straws (to support the top tier)
- Piping bags
- Open star tip (for shells and borders)
- Round tip (for scalloped piping)
- Closed star tip (for rosettes)
- Gold “Happy Birthday” cake topper
Instructions
Step 1: Bake the Cakes
- Preheat oven to 350°F (175°C). Grease and line two 8-inch round pans and two 6-inch round pans with parchment.
- In a bowl, whisk flour, cocoa powder, baking powder, baking soda, and salt.
- In another large bowl, whisk oil, sugar, and eggs until fluffy. Mix in buttermilk and vanilla.
- Add dry ingredients gradually, mixing just until combined. Stir in hot water last (the batter will be thin, that’s correct).
- Add red gel food coloring and mix until the batter is evenly bold red.
- Divide batter evenly among pans and bake 30–35 minutes (8-inch) and 25–30 minutes (6-inch), or until a toothpick comes out clean.
- Cool completely, then level the cakes flat with a serrated knife.
Step 2: Prepare the Buttercream
- Beat softened butter on medium speed until pale and creamy (about 5 minutes).
- Gradually add powdered sugar, mixing on low.
- Add heavy cream, vanilla, and salt, then whip on high until fluffy.
- Add red gel food coloring a little at a time until you achieve a deep vintage red. Beat well so the color develops fully.
Step 3: Stack and Crumb Coat
- Place one 8-inch layer on its cake board. Spread buttercream evenly, then stack the second 8-inch layer on top. Do the same for the 6-inch cakes.
- Apply a thin crumb coat on both tiers. Chill for 30 minutes.
- Frost each tier smoothly with a thick layer of red buttercream, using a scraper for a neat finish.
Step 4: Assemble the Tiers
- Insert 3–4 dowels into the center of the 8-inch tier to support the top tier. Trim flush with the cake.
- Carefully place the 6-inch cake (already on its own board) on top of the 8-inch cake.
Step 5: Vintage Piping & Decoration
- With an open star tip, pipe a shell border around the bottom edge of the 8-inch cake. Repeat for the base of the 6-inch cake and the top edge of the top tier.
- Use a round tip to pipe scalloped swags along the sides of both tiers. Add tiny dots where swags meet.
- With a closed star tip, pipe rosettes at the base of the top tier and evenly around the sides.
- Place the gold “Happy Birthday” topper securely in the center of the top tier.
- Your Red Vintage Cake should now look exactly like the one in the picture — bold red, smooth finish, piped scallops, rosettes, shell borders, and the elegant topper completing the look.

Which Food Coloring Is Best For a Red Vintage Cake?
A strong red shade comes only from the right type of food coloring.
- Gel food coloring: Gives a bold, deep red without needing too much.
- Paste food coloring: Works well if you want the richest red tone.
- Avoid liquid colors: They water down the batter and turn the cake pink.
Can I Make a Vintage Cake Without Artificial Colors?
Yes, but the shade will not be as bright as gel colors.
- Beetroot powder: Adds a natural reddish tone.
- Pomegranate juice: Gives a soft red tint in sponges.
- Hibiscus powder: Creates a pinkish-red shade.
How Do I Get a Smooth Finish On a Vintage Cake?
A clean, smooth finish makes the cake look elegant.
- Chill the cake: A cold cake is easier to frost smoothly.
- Crumb coat first: Apply a thin layer, chill, then frost again.
- Use a scraper: Hold it steady around the cake while turning the stand.
- Warm the spatula: A warm blade smooths buttercream better.
What Piping Tips Are Used For Vintage Cake Designs?
A clean, smooth finish makes the cake look elegant.
- Chill the cake: A cold cake is easier to frost smoothly.
- Crumb coat first: Apply a thin layer, chill, then frost again.
- Use a scraper: Hold it steady around the cake while turning the stand.
- Warm the spatula: A warm blade smooths buttercream better.
How Do I Decorate a Cake With Vintage-Style Swags And Roses?
These decorations give the cake its classic look.
- Mark guides: Use a toothpick to mark even points for swags.
- Pipe swags: Use a round tip to create neat curved lines.
- Add dots: Pipe small dots where swags meet for detail.
- Place roses: Pipe rosettes with a closed star tip along borders.
Can I Prepare a Vintage Cake a Day Before The Party?
Yes, it’s a smart way to save time.
- Bake cakes one day before: Keep them wrapped so they stay soft.
- Frost the same day: Decorations look fresher when done on the day of serving.
- If frosting a day ahead: Chill the cake, then bring to room temperature before serving.
How Do I Stop Red Buttercream From Tasting Bitter?
Too much food coloring can make the buttercream taste harsh.
- Use gel colors: They need less to give a strong shade.
- Add cocoa powder: It balances bitterness and deepens the color.
- Rest overnight: The color deepens while the taste mellows.
- Choose quality brands: Cheap colors taste chemical-like.
Can I Make a Red Vintage Cake Without Eggs?
Yes, it’s possible and still tastes great.
- Yogurt: Adds moisture and softness.
- Applesauce: Works well as an egg replacer.
- Vinegar + baking soda: Helps with rise and fluffiness.
- Mashed bananas: Good for binding but may change flavor slightly.
How Do I Prevent The Red Color From Staining Teeth?
Red buttercream can sometimes stain.
- Use high-quality gel: Stronger colors mean you use less.
- Don’t over-color: Stop adding once the red is rich enough.
- Let buttercream rest: Color deepens naturally after a few hours.
How Do I Transport a Two-Tier Vintage Cake Safely?
Keeping it stable is the main goal.
- Use sturdy boards: Each tier should have its own board.
- Add dowels: Place supports in the bottom tier before stacking.
- Chill before moving: A cold cake is less likely to shift.
- Box it properly: Use a tall box with non-slip mat under the board.
Why Is My Red Vintage Cake Turning Out Pink Instead Of Red?
This happens often but can be fixed.
- Not enough gel color: Add more for a deeper shade.
- Using liquid color: It dilutes the batter.
- Cocoa powder helps: A little cocoa makes the red richer.
- Rest the batter: Color develops more after mixing.
How Do I Store Leftover Vintage Cake?
Cake stays soft if stored correctly.
- Room temperature: Keep in an airtight box for up to 2 days.
- Refrigerator: Store up to 5 days, bring to room temp before serving.
- Cover properly: Prevents drying out and keeps the design safe.
Can I Freeze a Vintage Cake For Later?
Yes, freezing works well if done right.
- Wrap slices: Use plastic wrap and foil for each piece.
- Whole cake: Freeze unfrosted layers for up to 2 months.
- Thaw slowly: Leave in the fridge overnight before serving.
You May Also Like To Check Out These Recipes:
- Swedish Apple Cake
- Gingerbread Cake
- Scorpio Birthday Cake
- Black Velvet Cake
- Apple Cinnamon Cake
- Cranberry Cake
- Betty Boop Cake
- Jack Skellington Cake
- Apple Crumb Cake
- Eggnog Cake
- Pastel Cake
- Apple Upside Down Cake
- Jewish Apple Cake
- Yule Log Cake
- German Apple Cake
- Skull Cake
- Better Than Anything Cake
- Better Than Sex Cake
- Coconut Poke Cake
- Condensed Milk Cake
- Monster Eye Cake