I have to admit — the first time I made this horror cake, it wasn’t even for Halloween. I just wanted something bold, something loud, something deliciously dramatic. And wow, this cake delivered.
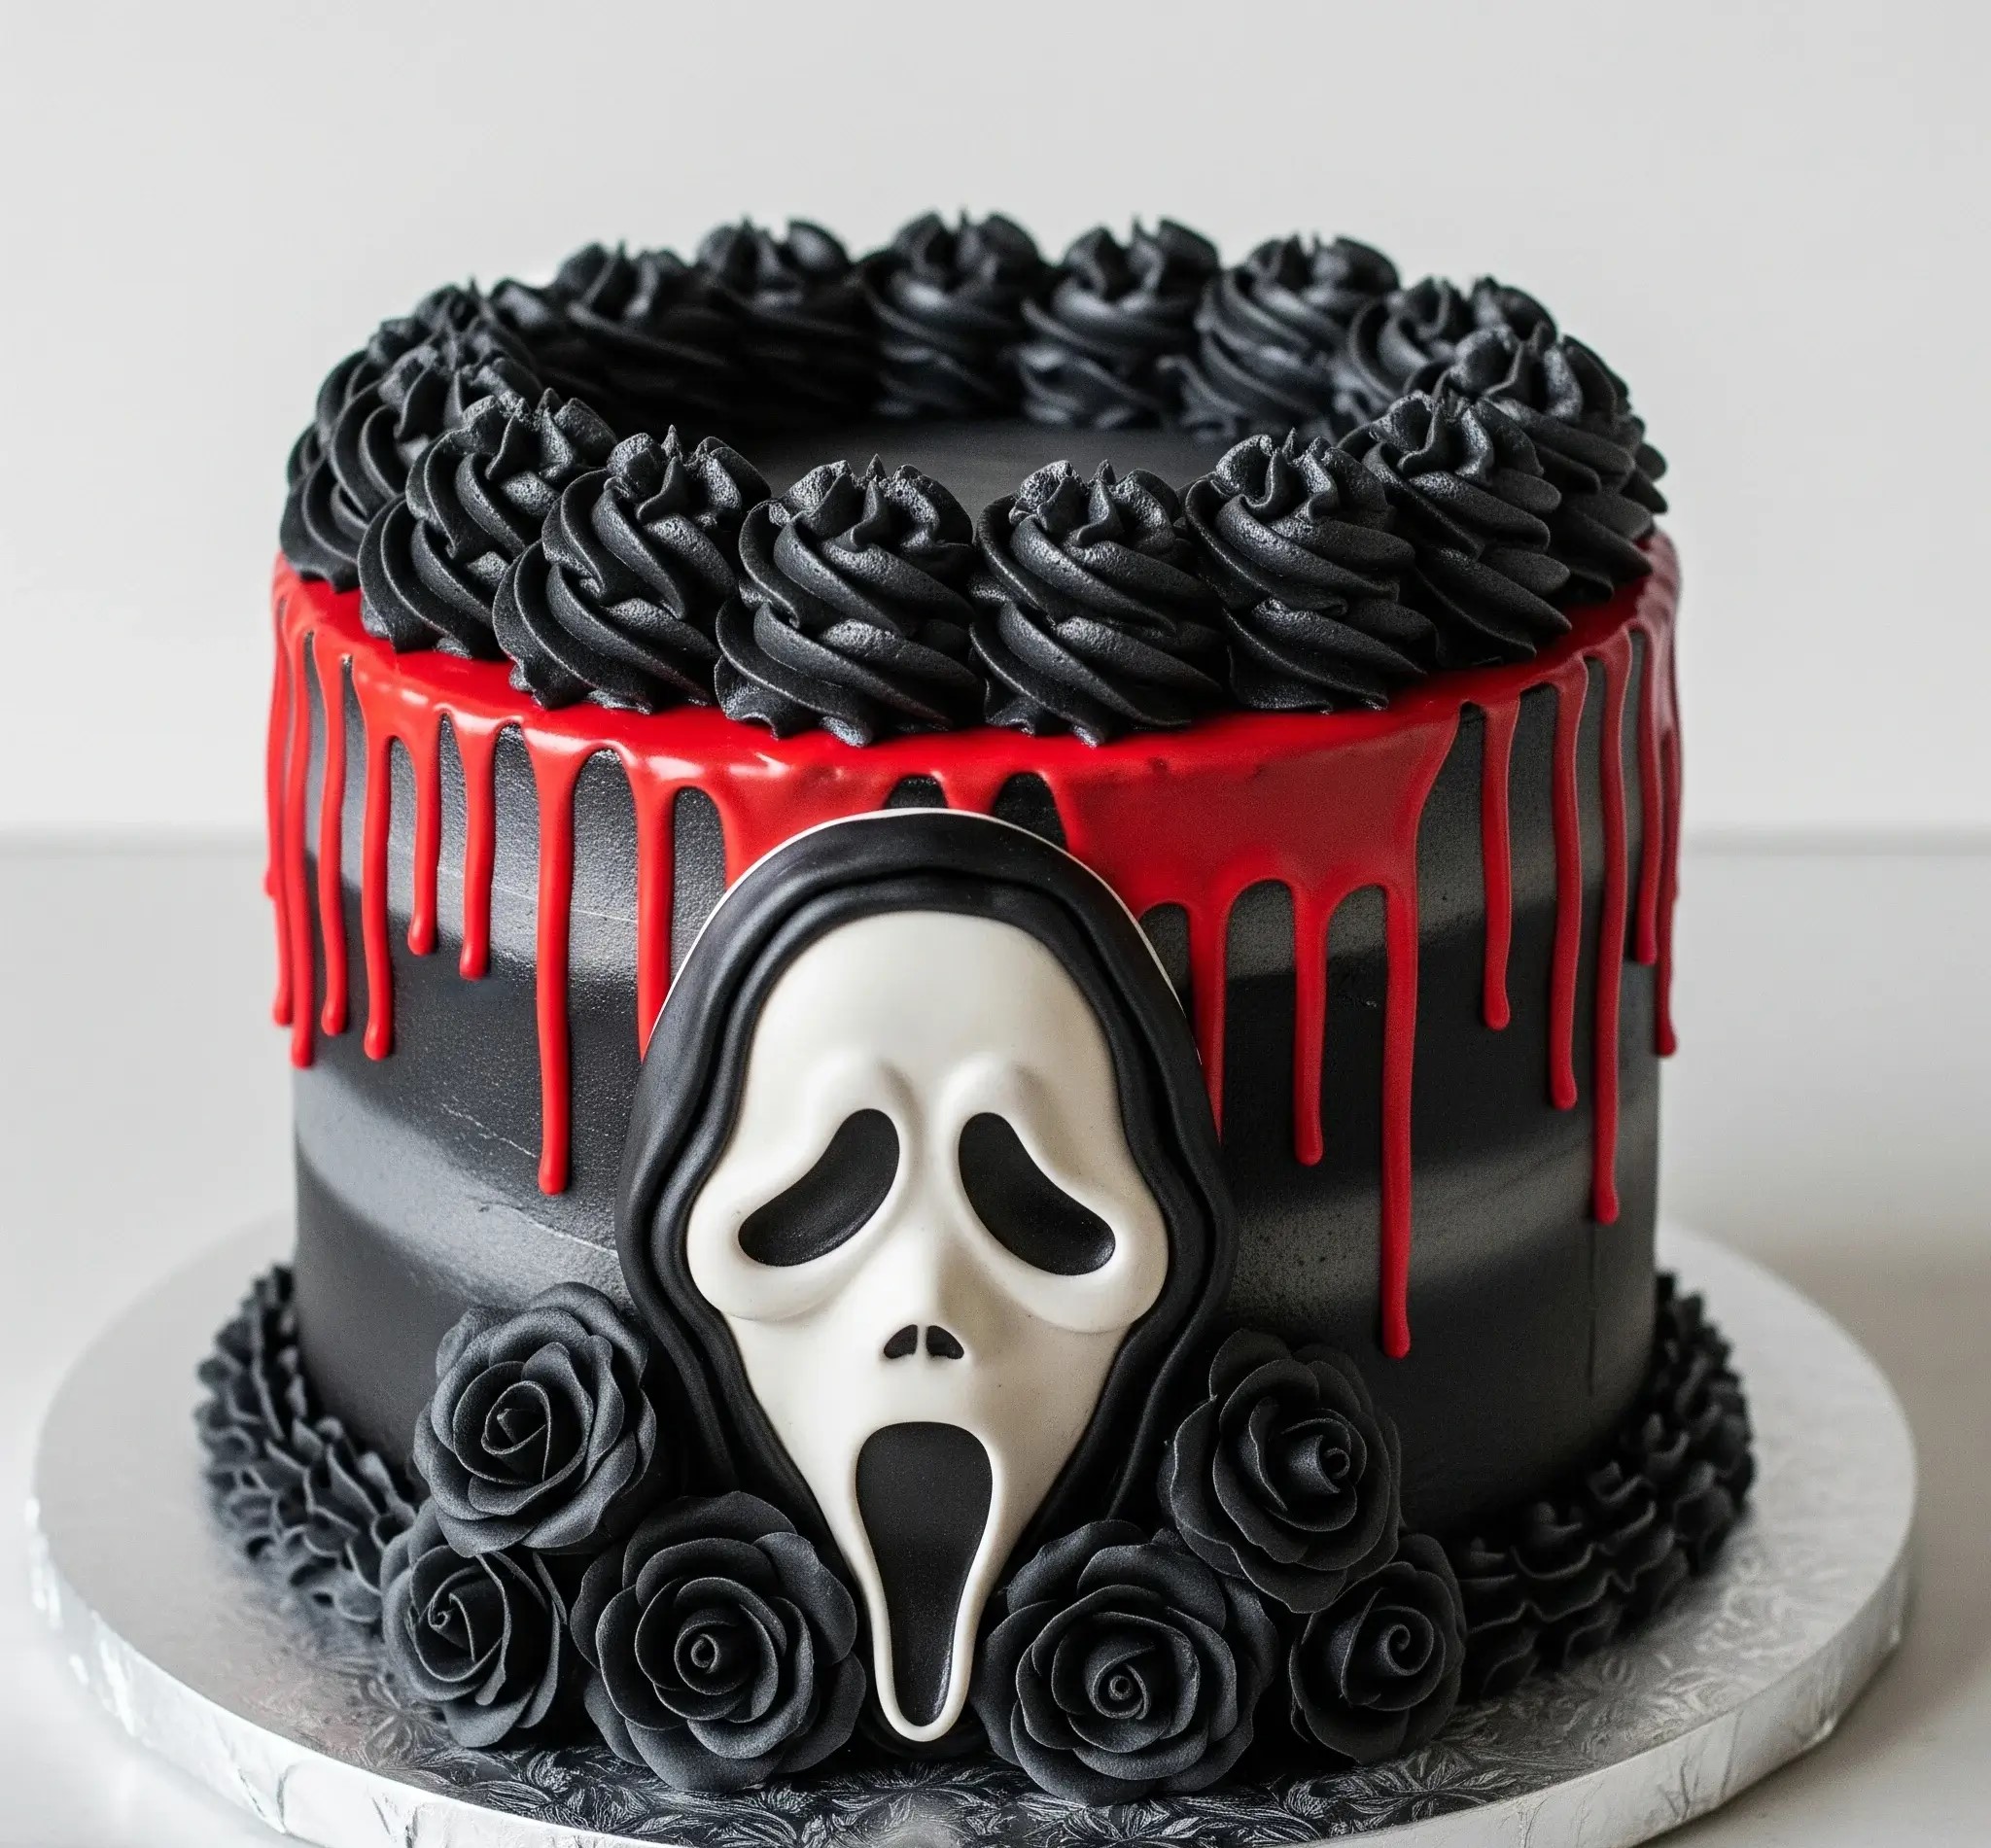
From the jet-black frosting to that blood-red drip and the spooky scream mask front and center — this cake doesn’t whisper, it screams. Literally.
The base is my go-to chocolate cake — soft, rich, and never dry. Then comes the deep black buttercream that’s so smooth and so dark, it feels almost too perfect to eat (but trust me, you’ll want to).
I had the most fun crafting the fondant scream mask — and you don’t need to be a cake artist to pull it off. Just a bit of patience, a small knife, and maybe a picture for reference.
The black fondant roses? They were a last-minute addition, and now I wouldn’t skip them for anything. They make the whole cake look like it came out of a haunted fairytale.
This cake is a full-on experience. It’s not just for horror fans — it’s for anyone who wants to bake something that makes people stop, stare, and say, “Wait… YOU made that?”
So if you’re ready to try something unforgettable, this is it. I’ve written every single step exactly how I do it, without skipping any detail.
Horror Cake Recipe (Black & Red Scream Mask Cake)
Servings: 12–14
Size: Two 6-inch layers
Prep Time: 2 hours
Bake Time: 35 minutes
Chill Time: 2 hours
Decoration Time: 1.5 hours
Ingredients
For the Black Chocolate Cake:
- 1 ¾ cups all-purpose flour (220g)
- 1 cup unsweetened Dutch-processed cocoa powder (100g)
- 2 cups granulated sugar (400g)
- 1 ½ tsp baking powder
- 1 ½ tsp baking soda
- 1 tsp salt
- 2 large eggs (room temperature)
- 1 cup buttermilk (240ml)
- ½ cup neutral oil (like canola or sunflower)
- 2 tsp pure vanilla extract
- 1 cup boiling water (240ml)
For the Black Buttercream:
- 1 ½ cups unsalted butter (softened)
- 5 cups icing sugar (sifted)
- ½ cup unsweetened black cocoa powder
- 2–4 tbsp heavy cream or milk
- 1 tsp vanilla extract
- Black gel food coloring (as needed)
For the Red Ganache Drip:
- ½ cup white chocolate chips (90g)
- 3 tbsp heavy cream
- Red gel food coloring
For the Scream Mask:
- 250g white fondant
- 100g black fondant
- Cornstarch (for dusting)
- Edible glue or water
For Black Fondant Roses & Border:
- 250g black fondant
- Small rose cutter and ball tool (or shape by hand)
- Edible glue
Instructions
1. Bake the Cake:
- Preheat oven to 180°C (350°F). Grease and line two 6-inch round cake pans.
- In a large bowl, whisk flour, cocoa powder, sugar, baking powder, baking soda, and salt.
- In another bowl, mix eggs, buttermilk, oil, and vanilla until combined.
- Gradually add wet ingredients to dry and mix until smooth.
- Slowly pour in boiling water while mixing. The batter will be thin — that’s perfect.
- Divide batter evenly between pans. Bake 30–35 minutes or until a skewer comes out clean.
- Let cool in pans for 10 minutes, then transfer to wire rack. Chill in fridge 1 hour.
2. Make the Black Buttercream:
- Beat butter on medium-high for 4 minutes until pale and fluffy.
- Add icing sugar and cocoa powder in batches, mixing on low.
- Add vanilla and 2 tbsp cream. Beat for 3 more minutes.
- Add black gel color gradually until a deep black shade forms.
- If needed, add more cream 1 tsp at a time for smoother consistency.
- Pro Tip: The color will deepen after a few hours — so make this in advance if possible.
3. Fill and Frost:
- Level cake layers if needed.
- Spread a layer of black buttercream between the cakes.
- Apply a thin crumb coat around the whole cake and chill for 20 minutes.
- Apply a second thick coat of buttercream, smoothing the sides with a scraper.
- Pipe rosettes around the top edge using a large star tip.
4. Red Ganache Drip:
- Heat cream until just steaming (not boiling).
- Pour over white chocolate. Let sit 2 minutes.
- Stir until smooth, then add red gel food color until it’s blood-red.
- Let cool slightly, then drip carefully over cake edges using a spoon or bottle.
5. Make the Scream Mask:
- Roll out white fondant and cut the ghost face shape by hand or use a printed paper template.
- Shape the eyes, nose, and mouth holes with black fondant and adhere with edible glue.
- Create the outer black hood shape using black fondant slightly larger than the face.
- Assemble the mask flat and let dry 1–2 hours to hold its shape.
6. Make Black Fondant Roses:
- Roll small balls of black fondant and flatten into petals.
- Wrap one petal into a tight cone for the center, then wrap remaining petals around it.
- Use a ball tool to thin edges for a realistic look.
- Make 5–7 roses and let them firm up for 30 minutes.
7. Final Assembly:
- Carefully place the scream mask onto the front of the cake using edible glue.
- Arrange black roses around the base and on either side of the mask.
- Pipe additional rosettes or fill any gaps with leftover buttercream if needed.
- Chill cake for 1 hour before serving for clean slicing.
Storage:
- Keep refrigerated for up to 4 days in a cake box.
- Bring to room temperature before serving for best texture and flavor.

How Do I Make Edible Blood For a Horror Cake?
Edible blood makes a horror cake look dramatic and realistic. You can make it with simple kitchen ingredients.
- Corn syrup base: Mix ½ cup corn syrup with red gel food color and a drop of blue or cocoa powder to darken.
- Jam version: Heat a few spoons of strawberry or raspberry jam with water, then strain for a thick red syrup.
- Icing sugar base: Mix icing sugar, water, and red food color until it looks like blood.
How Do I Color Frosting Black Without It Tasting Bitter?
Most people struggle with bitter black frosting. But with the right ingredients, you can fix it easily.
- Use black cocoa powder: It gives a deep color and chocolate taste without needing too much food coloring.
- Start with dark base: Make chocolate buttercream first, then add black color. You’ll need less gel.
- Use high-quality gel colors: Brands like Chefmaster or Americolor work faster and taste better.
- Let it sit: Make the frosting ahead and let it rest — the color darkens over time without adding more dye.
What Tools Do I Need To Make a Scream Mask Cake Topper?
The scream mask topper looks hard, but you only need a few tools to shape it neatly.
- White and black fondant: For shaping the face and mask border.
- Craft or fondant knife: To cut sharp, clean details.
- Edible glue or water + brush: For sticking fondant pieces together.
- Smoothing tool or fingers: To round edges and flatten parts.
- Template or printed face: Helps you trace or copy the exact shape.
Can I Make a Horror Cake Without Fondant?
Yes, you absolutely can. Fondant is helpful but not necessary at all.
- Buttercream piping: Use star or round tips for rosettes, swirls, or textured effects.
- Chocolate work: Melted dark or white chocolate can be piped into webs, drips, or shapes.
- Edible images: Print horror-themed edible toppers and stick them on with buttercream.
- Candy or cookies: Use black licorice, gummy worms, or cookie shapes for horror effects.
- Ganache and drip effects: Use red ganache for blood and black for shadowy details.

How Do I Prevent Red Ganache Drip From Running Too Much?
Ganache drips can easily slide down too far if not handled right. These tips will help you control it.
- Cool the cake well: Chill the cake at least 30 minutes before dripping.
- Let ganache thicken: Don’t use it hot. Let it cool until it drips slowly off a spoon.
- Test first: Try a small drip on the back before covering the whole cake.
- Use squeeze bottle or spoon slowly: Apply a small amount and adjust if needed.
- Don’t overheat cream: Too much heat keeps ganache thin and runny.
Can I Make a Horror Cake In Advance?
Yes, and in fact — making it early helps with better flavor and cleaner decorating.
- Bake cake layers 2 days ahead: Wrap them tightly and keep in the fridge.
- Buttercream can be made 3 days early: Just keep it in an airtight container and re-whip before using.
- Fondant details last 3–5 days: Make toppers and let them dry in advance.
- Assemble the cake 1 day before: Gives time to chill, settle, and stay fresh.
How To Store a Horror Cake With Fondant And Buttercream?
Storing a horror cake right will keep it fresh and protect all your work.
- Short term (1–2 days): Keep it in the fridge in a cake box. Let it sit at room temp 30 minutes before serving.
- Avoid plastic wrap on fondant: It can melt or ruin the finish.
- Store decorations separately: If possible, keep toppers off the cake until ready to serve.
- Don’t freeze fondant-covered cakes: Fondant cracks or gets sticky after thawing.
How Do I Get a Deep Black Buttercream Without Using Too Much Color?
Getting a rich black without overloading food coloring is easy if you follow a smart method.
- Start with chocolate base: Use cocoa powder or melted chocolate to get it dark fast.
- Use gel color, not liquid: Gel is stronger and doesn’t water down the frosting.
- Let it rest overnight: The color deepens as it sits, so you don’t need extra dye.
- Use black cocoa: It’s dark and blends well without leaving a bitter aftertaste.

