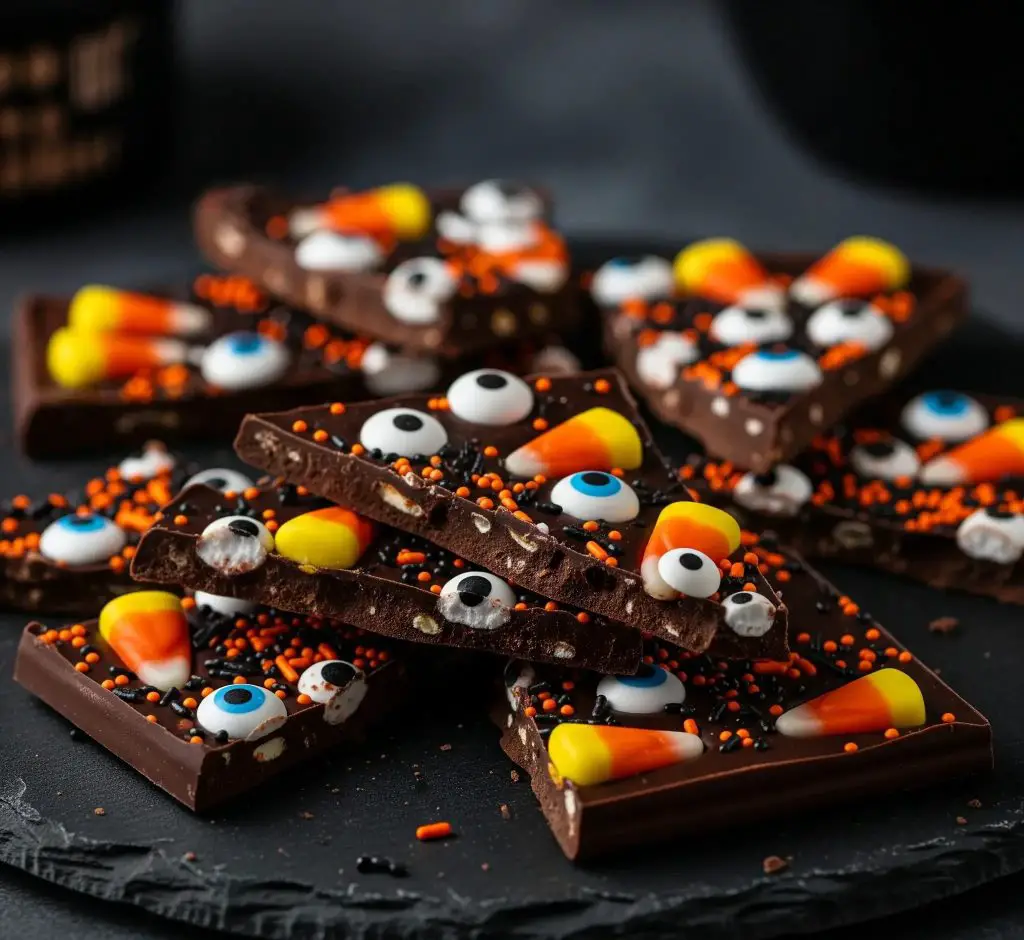
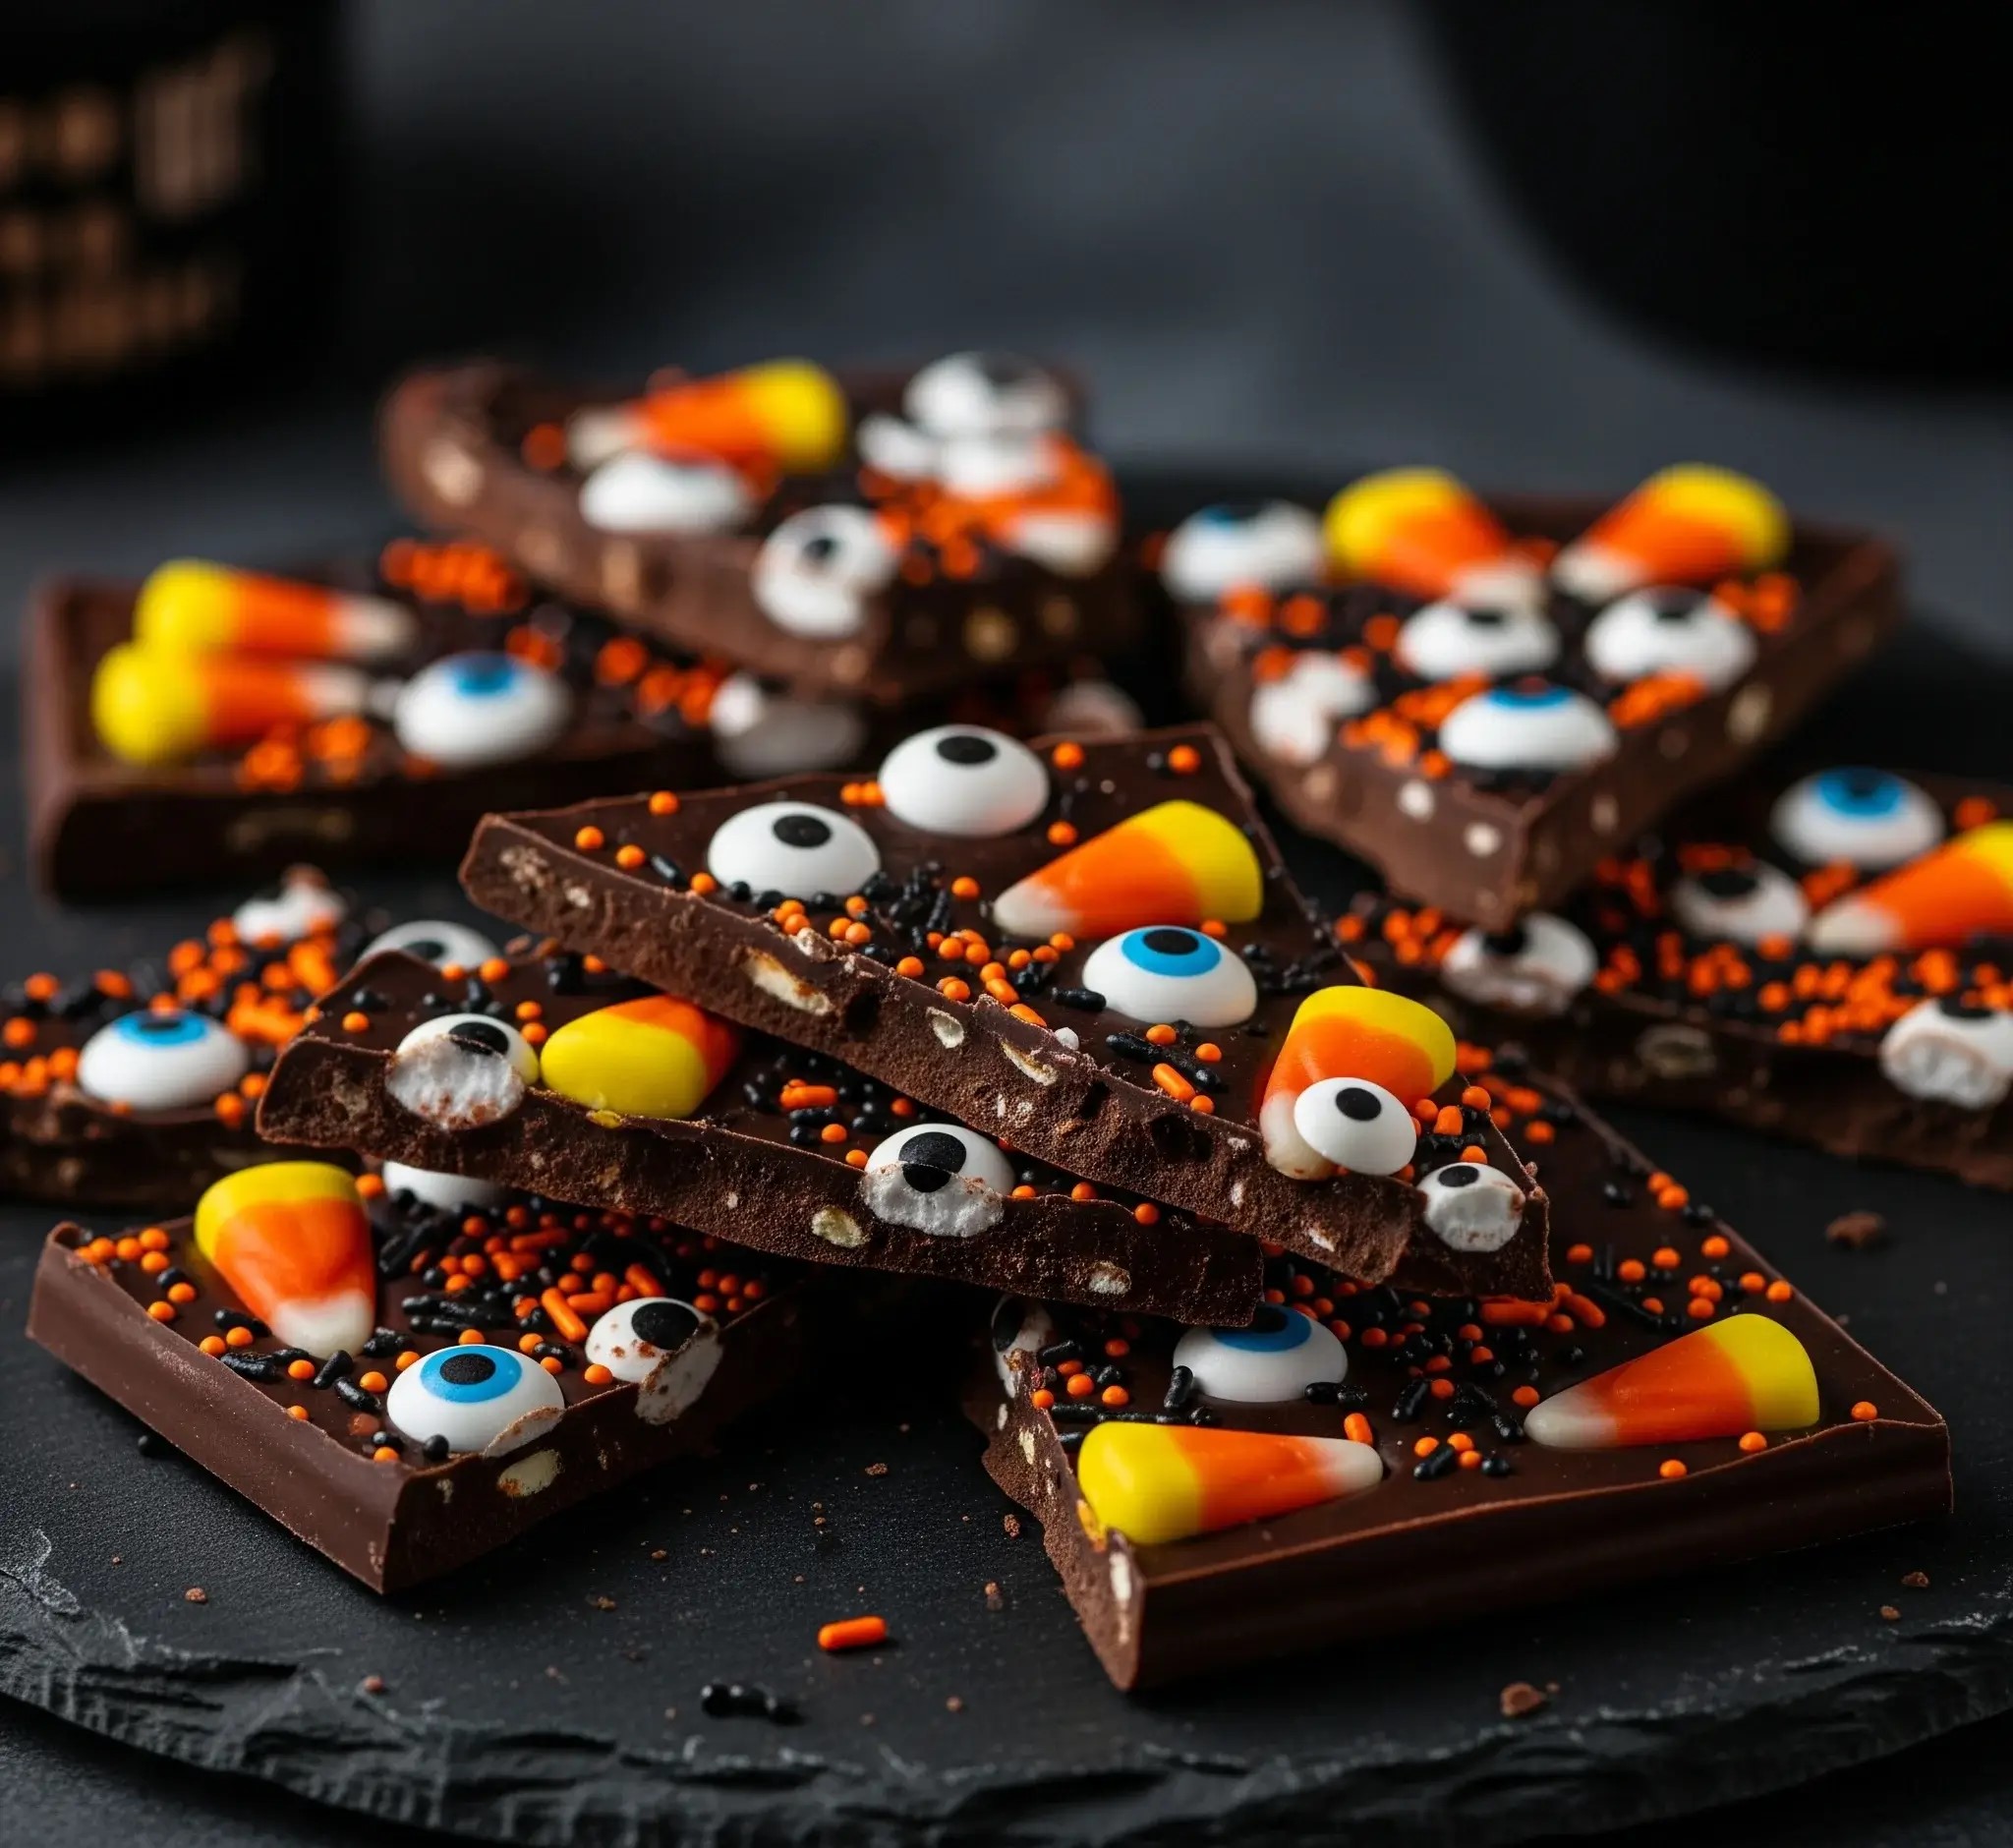
I still remember the first time I made Halloween Chocolate Bark—my kitchen counter looked like a candy store exploded, and I couldn’t stop grinning.
There’s just something thrilling about melting rich chocolate, sprinkling bright orange candy, and sticking googly candy eyes everywhere until it looks mischievous and fun.
It feels playful, like being a kid again, even if you’re the one holding the spatula.
This bark isn’t fussy or complicated. It’s the kind of treat that makes people laugh when they see those candy eyeballs staring back at them.
Every shard has its own little personality, and watching friends or kids pick their favorite piece is half the fun.
If you want an easy, eye-catching dessert that brings a little chaos and joy to your table, this Halloween Chocolate Bark is pure happiness in crunchy, chocolatey form.
Halloween Chocolate Bark Recipe
Ingredients (makes about 12–14 pieces):
- 2 cups (about 12 oz / 340 g) high-quality dark chocolate chips or chopped dark chocolate
- ½ teaspoon refined coconut oil or neutral vegetable oil (optional, for smoother melting)
- ½ cup candy corn
- ¼ cup candy eyeballs (mix of small and large sizes)
- 2 tablespoons small orange sugar sprinkles
- 1 tablespoon black nonpareils or micro sprinkles
Instructions
- Line a medium baking sheet (about 9×13 in) with parchment paper or a silicone baking mat. Smooth out any wrinkles so your bark has an even back.
- Make sure all toppings—candy corn, candy eyeballs, and sprinkles—are ready and within reach. Work quickly once the chocolate is melted.
- Microwave method: Place dark chocolate and coconut oil in a heatproof bowl. Microwave on 50% power in 30-second bursts, stirring between each, until completely melted and smooth (about 1½–2 minutes total).
- Double boiler method: Fill a small pot with 1–2 inches of water and bring to a gentle simmer. Place the chocolate in a heatproof bowl over the pot (do not let the bowl touch the water) and stir until smooth. Remove from heat.
- Immediately pour the melted chocolate onto the prepared baking sheet. Use an offset spatula or the back of a spoon to spread it into an even layer about ¼ inch thick. Don’t worry about perfect edges; a rustic shape is part of the charm.
- While the chocolate is still soft, press candy corn pieces randomly but evenly across the surface.
- Add candy eyeballs of different sizes for a fun “spooky” effect. Gently press them so they stick without sinking too deep.
- Sprinkle orange sugar sprinkles and black nonpareils over the chocolate, filling gaps and adding texture.
- Transfer the baking sheet to the refrigerator and chill for 30–40 minutes, or until fully hardened.
- Once firm, lift the entire sheet of chocolate by the parchment paper. Place it on a cutting board.
- Use your hands or a sharp knife to break or cut the bark into irregular pieces, roughly 2–3 inches each. The uneven edges give it a more festive look.
- Arrange the pieces on a serving platter or package them in treat bags.
- Store in an airtight container at room temperature (in a cool, dry place) for up to 2 weeks, or in the fridge for up to 3 weeks if your kitchen is warm.
- Make sure the chocolate is completely melted and smooth; any lumps will make spreading uneven.
- Press candy decorations gently—too much pressure will submerge them.
- If you want extra shine on the bark, temper the chocolate instead of just melting it, but this step is optional for most home cooks.
- For clean breaks, use a warm knife (dip in hot water and dry) if you prefer neat edges rather than hand-broken rustic shapes.

How Can I Melt Chocolate Smoothly Without Burning It?
Here are the easiest ways to melt chocolate the right way:
- Use gentle heat: melt over a double boiler or in the microwave with short bursts.
- Stir often: keep mixing so heat spreads evenly.
- Keep everything dry: even a drop of water can ruin chocolate and make it grainy.
- Stop early: remove from heat before fully melted and let the leftover warmth finish it.
Can I Make Halloween Chocolate Bark Ahead Of Time?
Yes, you can! Making it ahead saves time on a busy day.
- Best timing: make it 2 to 3 days before serving.
- Keep toppings simple: dry toppings like candy, sprinkles, or nuts last longer.
- Avoid wet toppings: fresh fruit or cream should be avoided as they spoil quickly.
How Thick Should The Chocolate Layer Be For Good Texture?
The thickness matters for the best crunch and balance.
- Ideal thickness: about ½ cm to ¾ cm.
- Too thin: it breaks too easily.
- Too thick: it feels heavy and may take longer to set.
Can Kids Safely Help Make Halloween Chocolate Bark?
Yes! It’s a fun activity for kids with a little guidance.
- Let them decorate: add sprinkles, candy eyes, or candy corn.
- Spread cooled chocolate: safe for kids if it’s not hot.
- Avoid handling heat: adults should melt chocolate.
- Make it creative: let kids choose fun patterns and colors.

How Do I Make Glossy Chocolate Bark Without Tempering Skills?
You don’t need to be a pro to get shine in your bark.
- Use good quality chocolate for a natural glossy look.
- Add 1 teaspoon oil (like coconut or vegetable oil) when melting.
- Spread smoothly with a spatula for even shine.
- Chill quickly in the fridge for a nice finish.
What’s The Best Way To Store The Bark So It Doesn’t Get Soft?
Storage is the key to keeping bark crunchy.
- Use airtight container: keeps away air and humidity.
- Keep in cool, dry place: room temperature is fine if it’s not hot.
- Avoid fridge: moisture can soften chocolate unless your kitchen is too warm.
Is It Okay To Freeze Halloween Chocolate Bark For Later?
Yes, you can freeze it, but do it right.
- Wrap in parchment paper: place between layers to stop sticking.
- Seal in freezer bag: push out extra air before sealing.
- Thaw slowly: let it come to room temperature in the bag to avoid moisture on the chocolate.
You May Also Like To Check Out These Recipes:
- Hershey Bar Cake
- Sonic The Hedgehog Cake
- Christmas Cookie Cake
- Christmas Bundt Cake
- Chess Cake
- Flourless Chocolate Cake
- Mandarin Orange Cake
- Dinosaur Cake
- Demon Slayer Cake
- Grinch Cake
- Grinch Cake Pops
- Little Debbie Christmas Tree Cakes
- Red Velvet Poke Cake
- Cheetah Print Cake
- Red Velvet Cheesecake Cake
- Christmas Cake Pops
- Cranberry Christmas Cake
- Christmas Poke Cake
- Holiday Cake
- Christmas Tree Cake
- Scorpio Birthday Cake
- Butter Pecan Praline Poke Cake
- Pumpkin Cake Roll With Cream Cheese Filling

