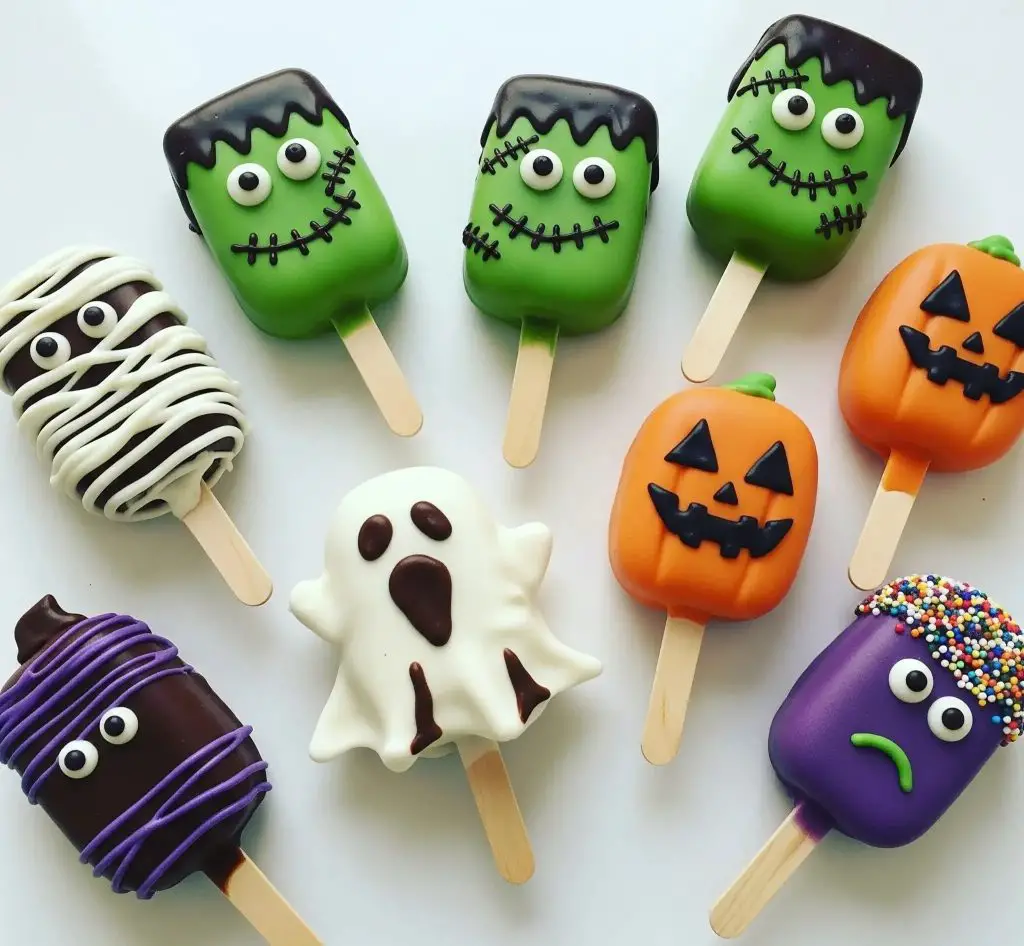
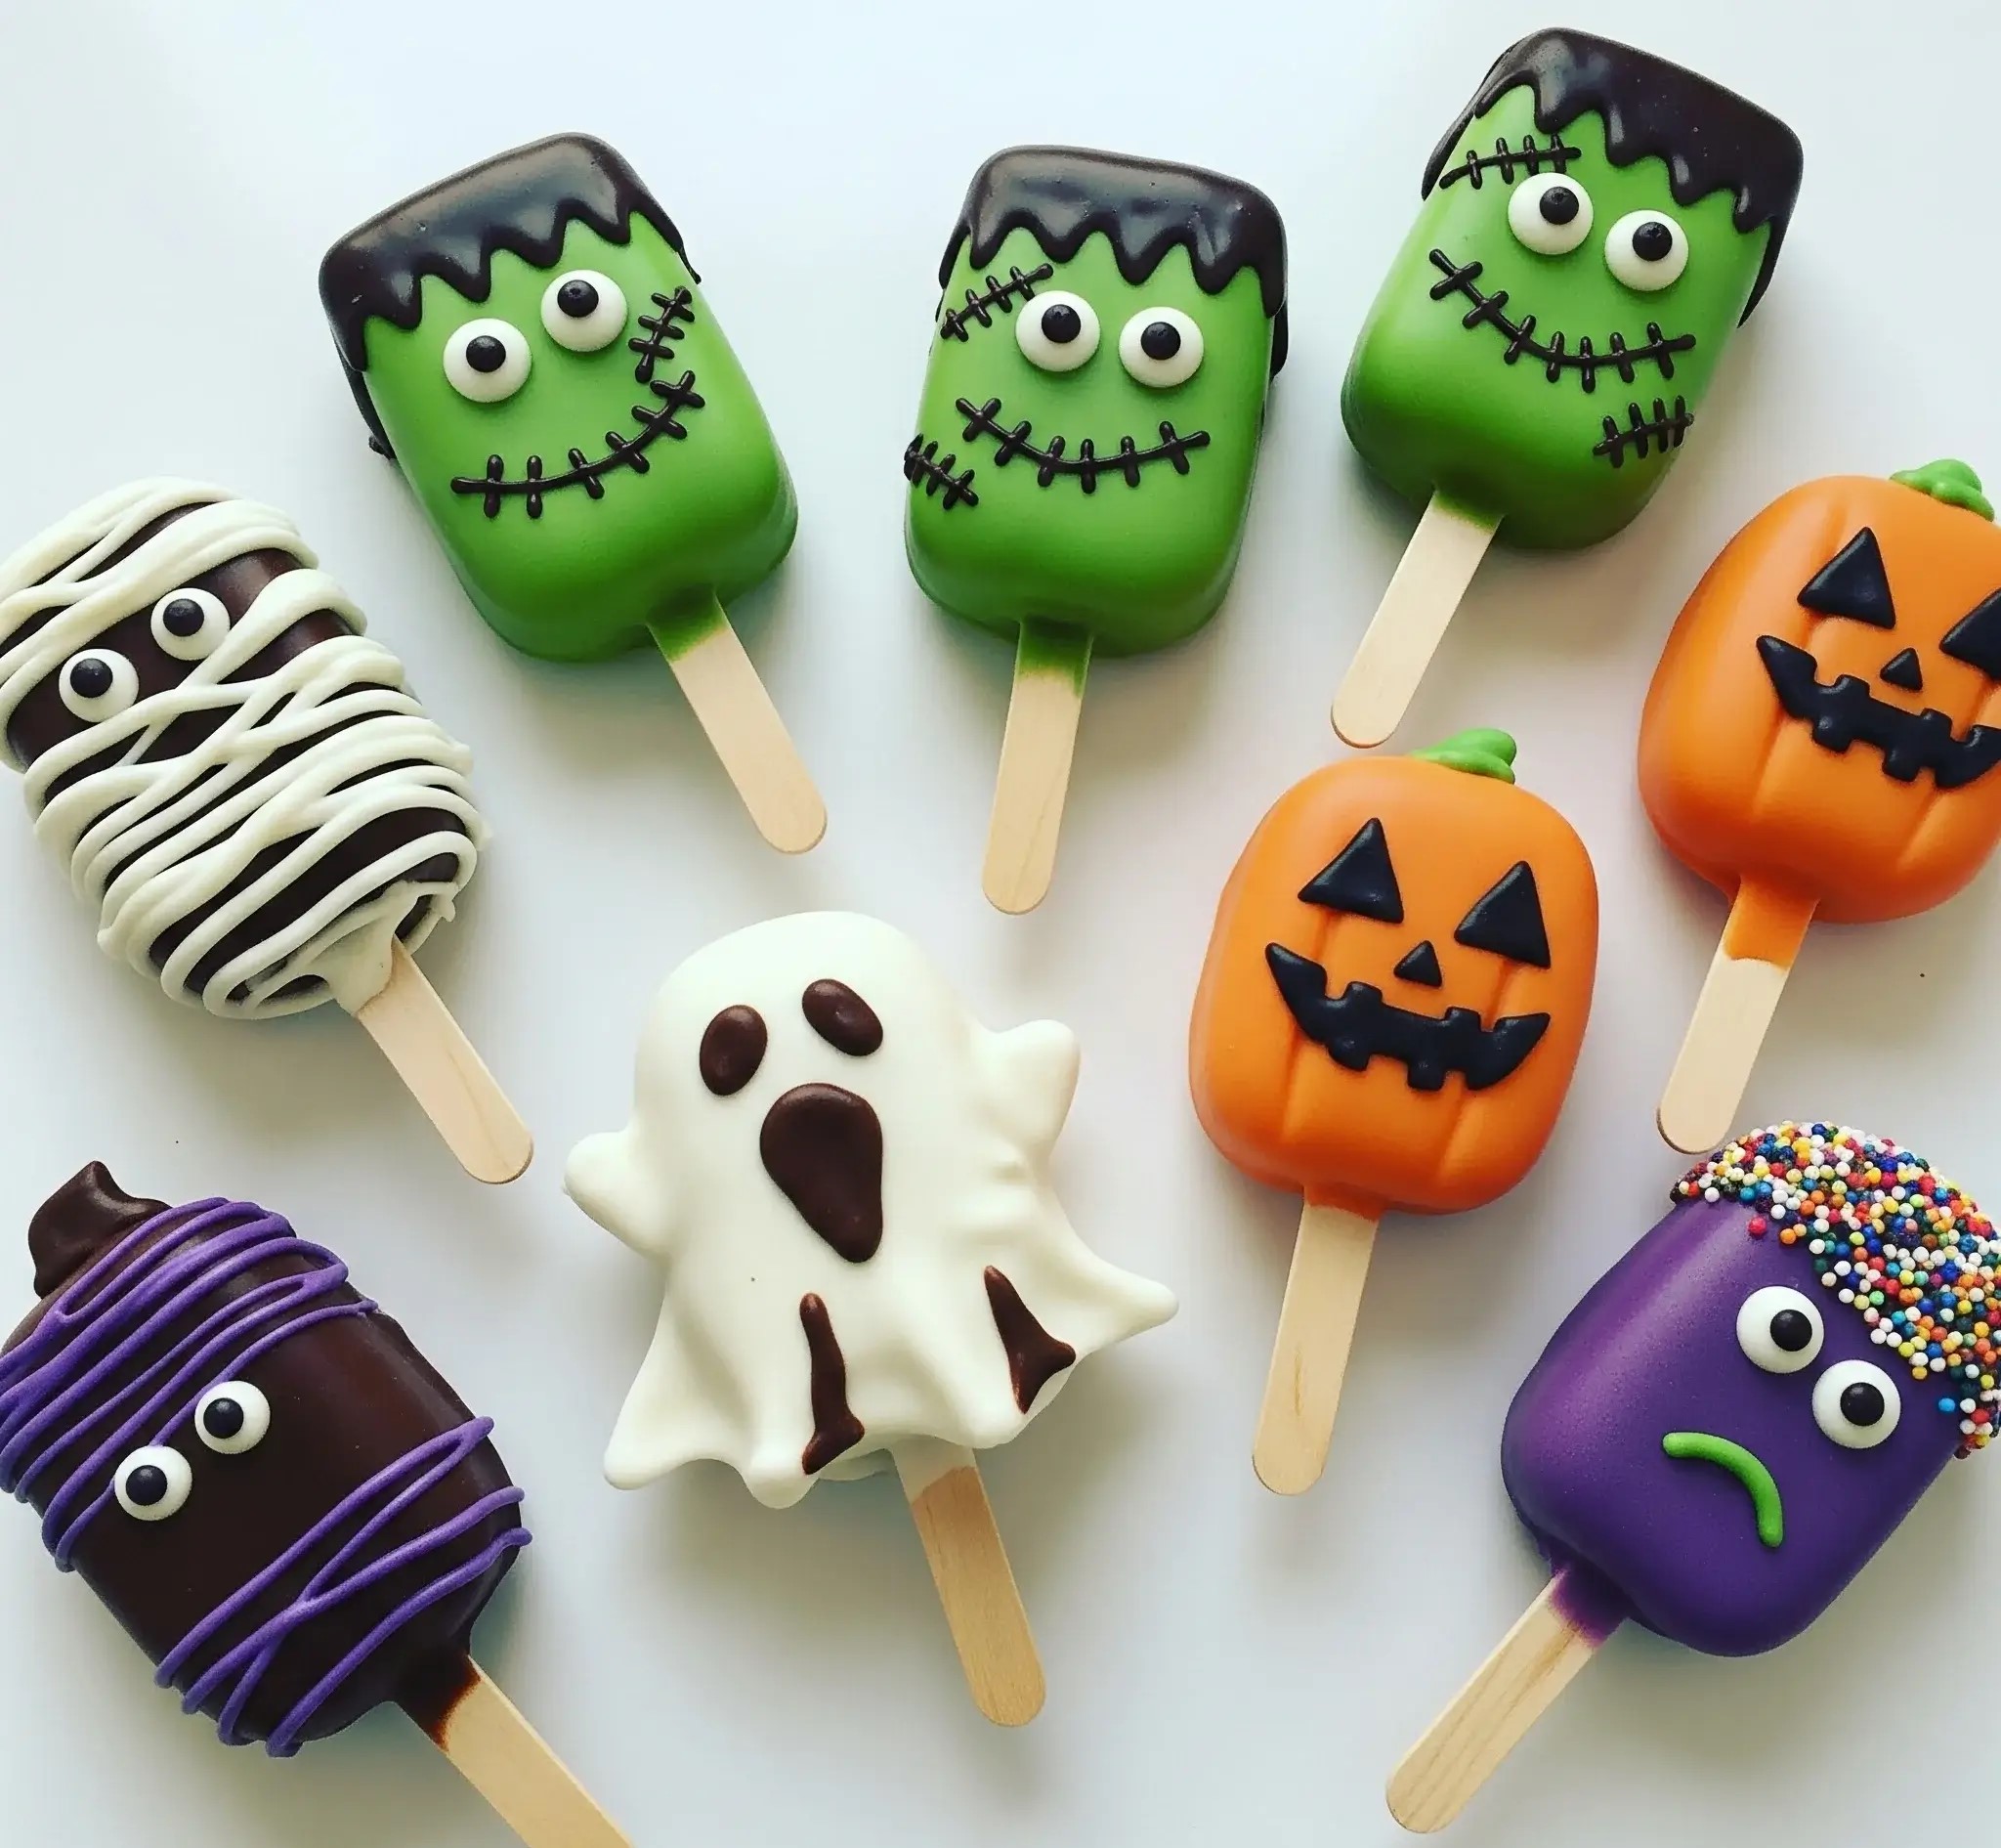
Some desserts are just plain fun to make—and for me, these Halloween cake pops are exactly that.
I remember the first time I made them… my kitchen was a complete mess (sprinkles everywhere), but I couldn’t stop smiling at how cute they turned out.
Each little character—Frankenstein, the ghost, the pumpkin with its silly grin—felt like its own tiny story. They’re the kind of treats people can’t resist picking up, even if they pretend they’re “just for the kids.”
And let’s be honest, half the fun is in decorating them. No perfection needed—just a steady hand and a little creativity.
What I love most about this recipe is that it’s simple and playful. You bake a soft vanilla cake, crumble it up, mix it with frosting, shape it like you’re playing with dough, and then dip and decorate however your Halloween heart desires.
The best part? These look just like the ones in the picture—right down to the rainbow sprinkle hair, mummy wraps, and spooky faces. I’ve included every little detail so you can recreate them exactly, without guessing what goes where.
So whether you’re planning a Halloween party or just want to surprise someone with a sweet and spooky treat, these cake pops are totally worth it. Let’s jump into the recipe and make some magic.
Halloween Cake Pops Recipe (Frankenstein, Mummy, Pumpkin, Ghost & More)
Yields: 10–12 large cake pops
Prep Time: 1 hour
Chill Time: 1 hour
Decorating Time: 1.5 hours
Ingredients
For the Cake Pop Base:
- 1 cup all-purpose flour
- 1/2 tsp baking powder
- 1/4 tsp salt
- 1/4 cup unsalted butter, softened
- 1/2 cup granulated sugar
- 1 large egg
- 1/4 cup milk
- 1/2 tsp vanilla extract
For the Frosting Binder:
- 1/4 cup unsalted butter, softened
- 1/2 cup powdered sugar
- 1 tbsp milk
- 1/4 tsp vanilla extract
For the Outer Coating & Decorations:
- Green candy melts (Frankenstein)
- Orange candy melts (Pumpkin)
- White candy melts (Ghost + Mummy base)
- Purple candy melts (Sad monster)
- Dark brown or black candy melts (Hair, mouth, stitches, etc.)
- Purple and white candy melts (for mummy and wrapped monster)
- Candy eyes (mini size)
- Rainbow sprinkles (for monster hair)
- Lollipop or popsicle sticks
- Black gel food coloring (optional for detailing)
- Piping bags or squeeze bottles
- Styrofoam block or cake pop stand (for drying)
- Leaf green and orange fondant (tiny detail work on pumpkins)
Instructions
Step 1: Bake the Vanilla Cake
- Preheat oven to 175°C (350°F).
- In a bowl, whisk flour, baking powder, and salt.
- In a separate bowl, cream the butter and sugar until fluffy.
- Add egg and vanilla, mixing well.
- Alternate adding flour mixture and milk to the butter mixture.
- Pour into a greased 8×8” pan and bake for 20–22 minutes or until a toothpick comes out clean.
- Let it cool completely.
Step 2: Make the Frosting Binder
- Beat the butter until creamy.
- Add powdered sugar, then milk and vanilla, and beat until smooth.
Step 3: Form Cake Balls
- Crumble the cooled cake into fine crumbs.
- Mix in the frosting, 1 tablespoon at a time, until it holds shape (you may not need all the frosting).
- Shape into smooth domes or ovals depending on which character you want. Flatten the tops slightly for Frankenstein and pumpkins.
- Insert sticks into the base of each shape and chill in the fridge for 1 hour or freeze for 20 minutes.
Step 4: Prepare Candy Melts
- Melt each color of candy melt in separate bowls according to package instructions (microwave in 15–20 sec intervals, stir often).
- If the coating is too thick, add 1 tsp of neutral oil (like sunflower or canola).
Step 5: Dipping & Decorating
Frankenstein:
- Dip in green candy melts. Let dry.
- Dip top in dark brown/black melts to create hair.
- Pipe on stitched mouth and scar details using black melts or edible pen.
- Add candy eyes while the coating is still wet.
Pumpkin:
- Dip in orange melts. Let set.
- Use black melts to pipe triangle eyes and jagged smile.
- Roll a tiny green fondant ball for the stem, flatten and attach on top.
Ghost:
- Dip in white melts and shape drips or waves at the base with a spoon to mimic a ghostly cloak.
- Use dark melts for a screaming mouth and eyes.
Mummy:
- Dip in white melts.
- Let set, then drizzle white melts over the pop in zig-zag lines for bandages.
- Place eyes on top of the lines while still soft.
Sad Purple Monster:
- Dip in purple melts. Let set.
- Dip top in melted chocolate or candy melts and quickly cover with rainbow sprinkles.
- Attach candy eyes.
- Pipe on a small sad face with green or black melts.
Wrapped Purple Monster:
- Dip in dark chocolate or purple melts.
- Drizzle purple or contrasting candy melt all over to resemble wrapping.
- Stick on googly eyes for a cute finish.
Step 6: Let Them Set
-
Place the finished pops into a styrofoam block or stand upright in a tall glass to let the candy shell fully harden at room temperature.
Storage:
-
Store in an airtight container at room temperature for 3–4 days or in the fridge for up to 1 week.
Tips for Success:
- Work in small batches while decorating so coating doesn’t harden too quickly.
- Don’t skip chilling — it helps keep pops from falling off the stick.
- Use gloves while shaping cake pops for a smooth, neat finish.

Can I Make Halloween Cake Pops Without Candy Melts?
Yes, you can make cake pops even if you don’t have candy melts.
- White chocolate chips: Melt and add a tiny amount of oil to make it smooth.
- Regular chocolate bars: Break and melt gently, stir well to avoid burning.
- Colored white chocolate: Add gel food coloring to melted white chocolate for bright Halloween colors.
- Nut spreads or chocolate spreads: For a softer coating (not firm, but tasty).
How Do You Get Cake Pops To Stay On The Stick?
If your cake pops keep falling off, try these easy tricks:
- Use a little melted chocolate: Dip the stick tip into melted chocolate before inserting it into the cake ball.
- Chill after shaping: Let cake balls chill in the fridge for at least 30–60 minutes.
- Don’t make them too heavy: Keep the cake ball small and balanced.
- Use firm cake pop dough: Too much frosting can make them too soft.
Why Do My Cake Pops Crack After Dipping?
Cracks usually happen because of a sudden temperature change.
- Let cake pops warm up a little: Don’t dip freezing cold pops in hot chocolate.
- Cool your melted coating slightly: Don’t use overly hot candy melts or chocolate.
- Avoid over-chilling: 15–20 minutes in the fridge is enough before dipping.
- Use thinner coating: Thick coatings crack more easily.
What Can I Use Instead Of Candy Eyes For Cake Pops?
No candy eyes? No problem! You can make your own with simple ingredients.
- Mini chocolate chips: Stick flat side facing out.
- White chocolate dots + black dot icing: Pipe tiny white circles, then add black center.
- Black sesame seeds or tiny sprinkles: For spooky tiny eyes.
- Round cereal pieces + icing: Use something like Cheerios for a base.
- Marshmallow bits + chocolate dots: Mini marshmallows sliced thin.

Can I Make Halloween Cake Pops Without a Cake Pop Mold?
Yes, you don’t need a mold at all.
- Take a spoonful of cake mix and roll it between your palms.
- For characters like pumpkins or ghosts: shape them using fingers to add little details.
- Chill before adding the stick so they stay firm.
How Do I Keep The Candy Coating Smooth On Cake Pops?
A smooth finish makes them look neat and professional.
- Melt candy gently: Use short bursts in the microwave, stir often.
- Add a few drops of oil: Sunflower or vegetable oil helps thin out thick candy.
- Tap off the extra: After dipping, gently tap the stick against the bowl.
- Let coating settle: Stand cake pops upright and let gravity smooth the surface.
- Use a deep cup or glass: Easier to dip in one go without swirling.
What Type Of Stick Should I Use For Cake Pops?
You can use different types of sticks depending on what you have.
- Popsicle sticks: Sturdy and flat, good for larger cake pops.
- Lollipop sticks: Traditional and round, easy to handle.
- Paper straws: Great for parties — colorful and decorative.
- Skewers (wooden): Cut the sharp end and use as cake pop sticks.
Can I Freeze Halloween Cake Pops?
Yes, you can freeze them if you want to prep way ahead.
- Freeze before coating: Shape them and freeze on a tray, then transfer to a sealed bag.
- Freeze after decorating: Wrap each pop in plastic wrap and place in an airtight container.
- Thaw with care: Let them thaw in the fridge first to avoid condensation ruining the coating.

