Making a Cinderella cake was one of those moments that reminded me why I love baking.
Not because it’s fancy, or because it gets attention—but because of the look on a little girl’s face when she sees her favorite princess standing right in the middle of her birthday table. That joy? You can’t fake that.
I remember the first time I made this cake for my niece. She froze. Like actually froze mid-step and just whispered, “Is that real?” And I knew right then, it wasn’t just a cake.
It was the main event. That kind of reaction is what makes this recipe so special to me.
It’s not hard to make, either. You don’t need bakery-level skills or expensive tools.
You just need a bit of time, a steady hand for those swirls, and a doll that fits snugly in the middle. It’s cake, frosting, and a little bit of fairy-tale magic all rolled into one.
If you’ve got a kid in your life who lights up at the name “Cinderella,” trust me—this cake is going to be the thing they remember. You’ll feel a little proud when it’s done. And they’ll feel like royalty.
Cinderella Cake Recipe (Serves 20–24)
Ingredients
For the Vanilla Dome Cake (use 3 layers):
- 2½ cups (310g) all-purpose flour
- 2½ tsp baking powder
- ½ tsp salt
- 1 cup (225g) unsalted butter, softened
- 2 cups (400g) granulated sugar
- 4 large eggs
- 1 tbsp pure vanilla extract
- 1 cup (240ml) whole milk
For the Buttercream Frosting (Sky Blue Rosettes):
- 2 cups (450g) unsalted butter, softened
- 7–8 cups (875g–1kg) powdered sugar, sifted
- 6 tbsp whole milk
- 2 tsp vanilla extract
- Sky blue gel food coloring
- White sugar pearls or mini fondant flowers for detailing
For Assembly and Decoration:
- 1 Barbie-style doll (or food-safe cake topper) – preferably with a blue dress bodice
- Plastic wrap (to wrap the doll’s lower half)
- Small fondant pieces for bodice add-ons (optional white shoulder puff sleeves)
- Piping bags and open star piping tip (e.g., Wilton 1M)
- Cake board
Instructions
1. Bake the Cake Layers
- Preheat oven to 350°F (175°C). Grease and flour a dome cake mold or an oven-safe stainless-steel mixing bowl.
- In a bowl, whisk flour, baking powder, and salt. Set aside.
- In a large bowl, cream butter and sugar until light and fluffy (3–5 minutes).
- Add eggs one at a time, mixing well after each. Stir in vanilla extract.
- Alternate adding the flour mixture and milk, beginning and ending with flour. Mix until just combined.
- Pour the batter into the prepared dome mold and two 6-inch round pans (to add height under the dome).
- Bake for 55–65 minutes for the dome, and 25–30 minutes for the flat layers. A toothpick should come out clean.
- Cool completely. Level all cakes flat using a serrated knife.
2. Prepare the Buttercream
- Beat softened butter on high until creamy (about 3 minutes).
- Gradually add powdered sugar, beating on low.
- Add milk and vanilla extract, and beat until smooth.
- Add sky blue gel coloring and mix until fully tinted.
3. Assemble the Doll Cake
- Place one 6-inch cake layer on a cake board. Spread a thin layer of frosting on top.
- Stack the second 6-inch layer and then the dome cake on top. Trim the dome bottom if needed to sit flat.
- Wrap the lower half of the doll in plastic wrap. Insert the doll in the center of the stacked cake.
- Carve a small opening down the center of the cakes to fit the doll snugly if needed.
4. Crumb Coat and Chill
- Spread a thin layer of frosting over the entire cake to seal crumbs.
- Chill in the fridge for 20 minutes until set.
5. Decorate the Dress
- Fill a piping bag fitted with a large star tip with blue buttercream.
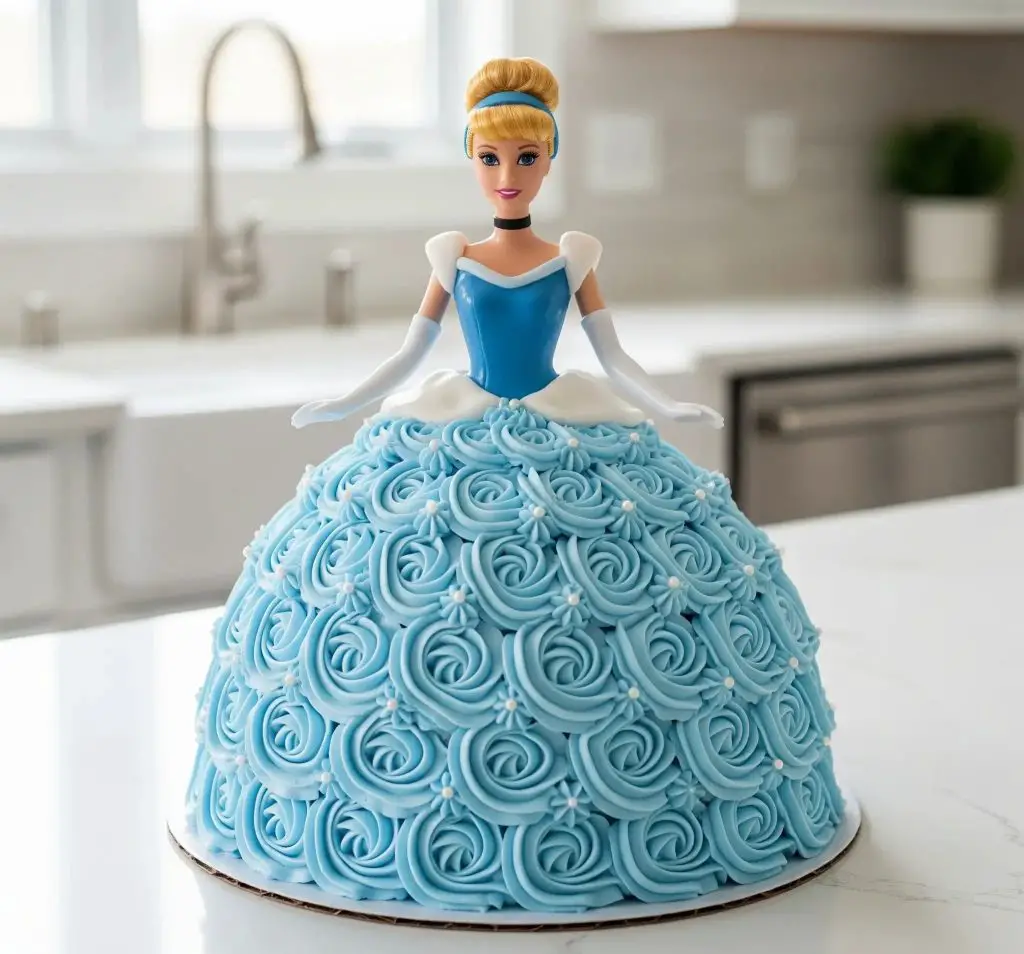
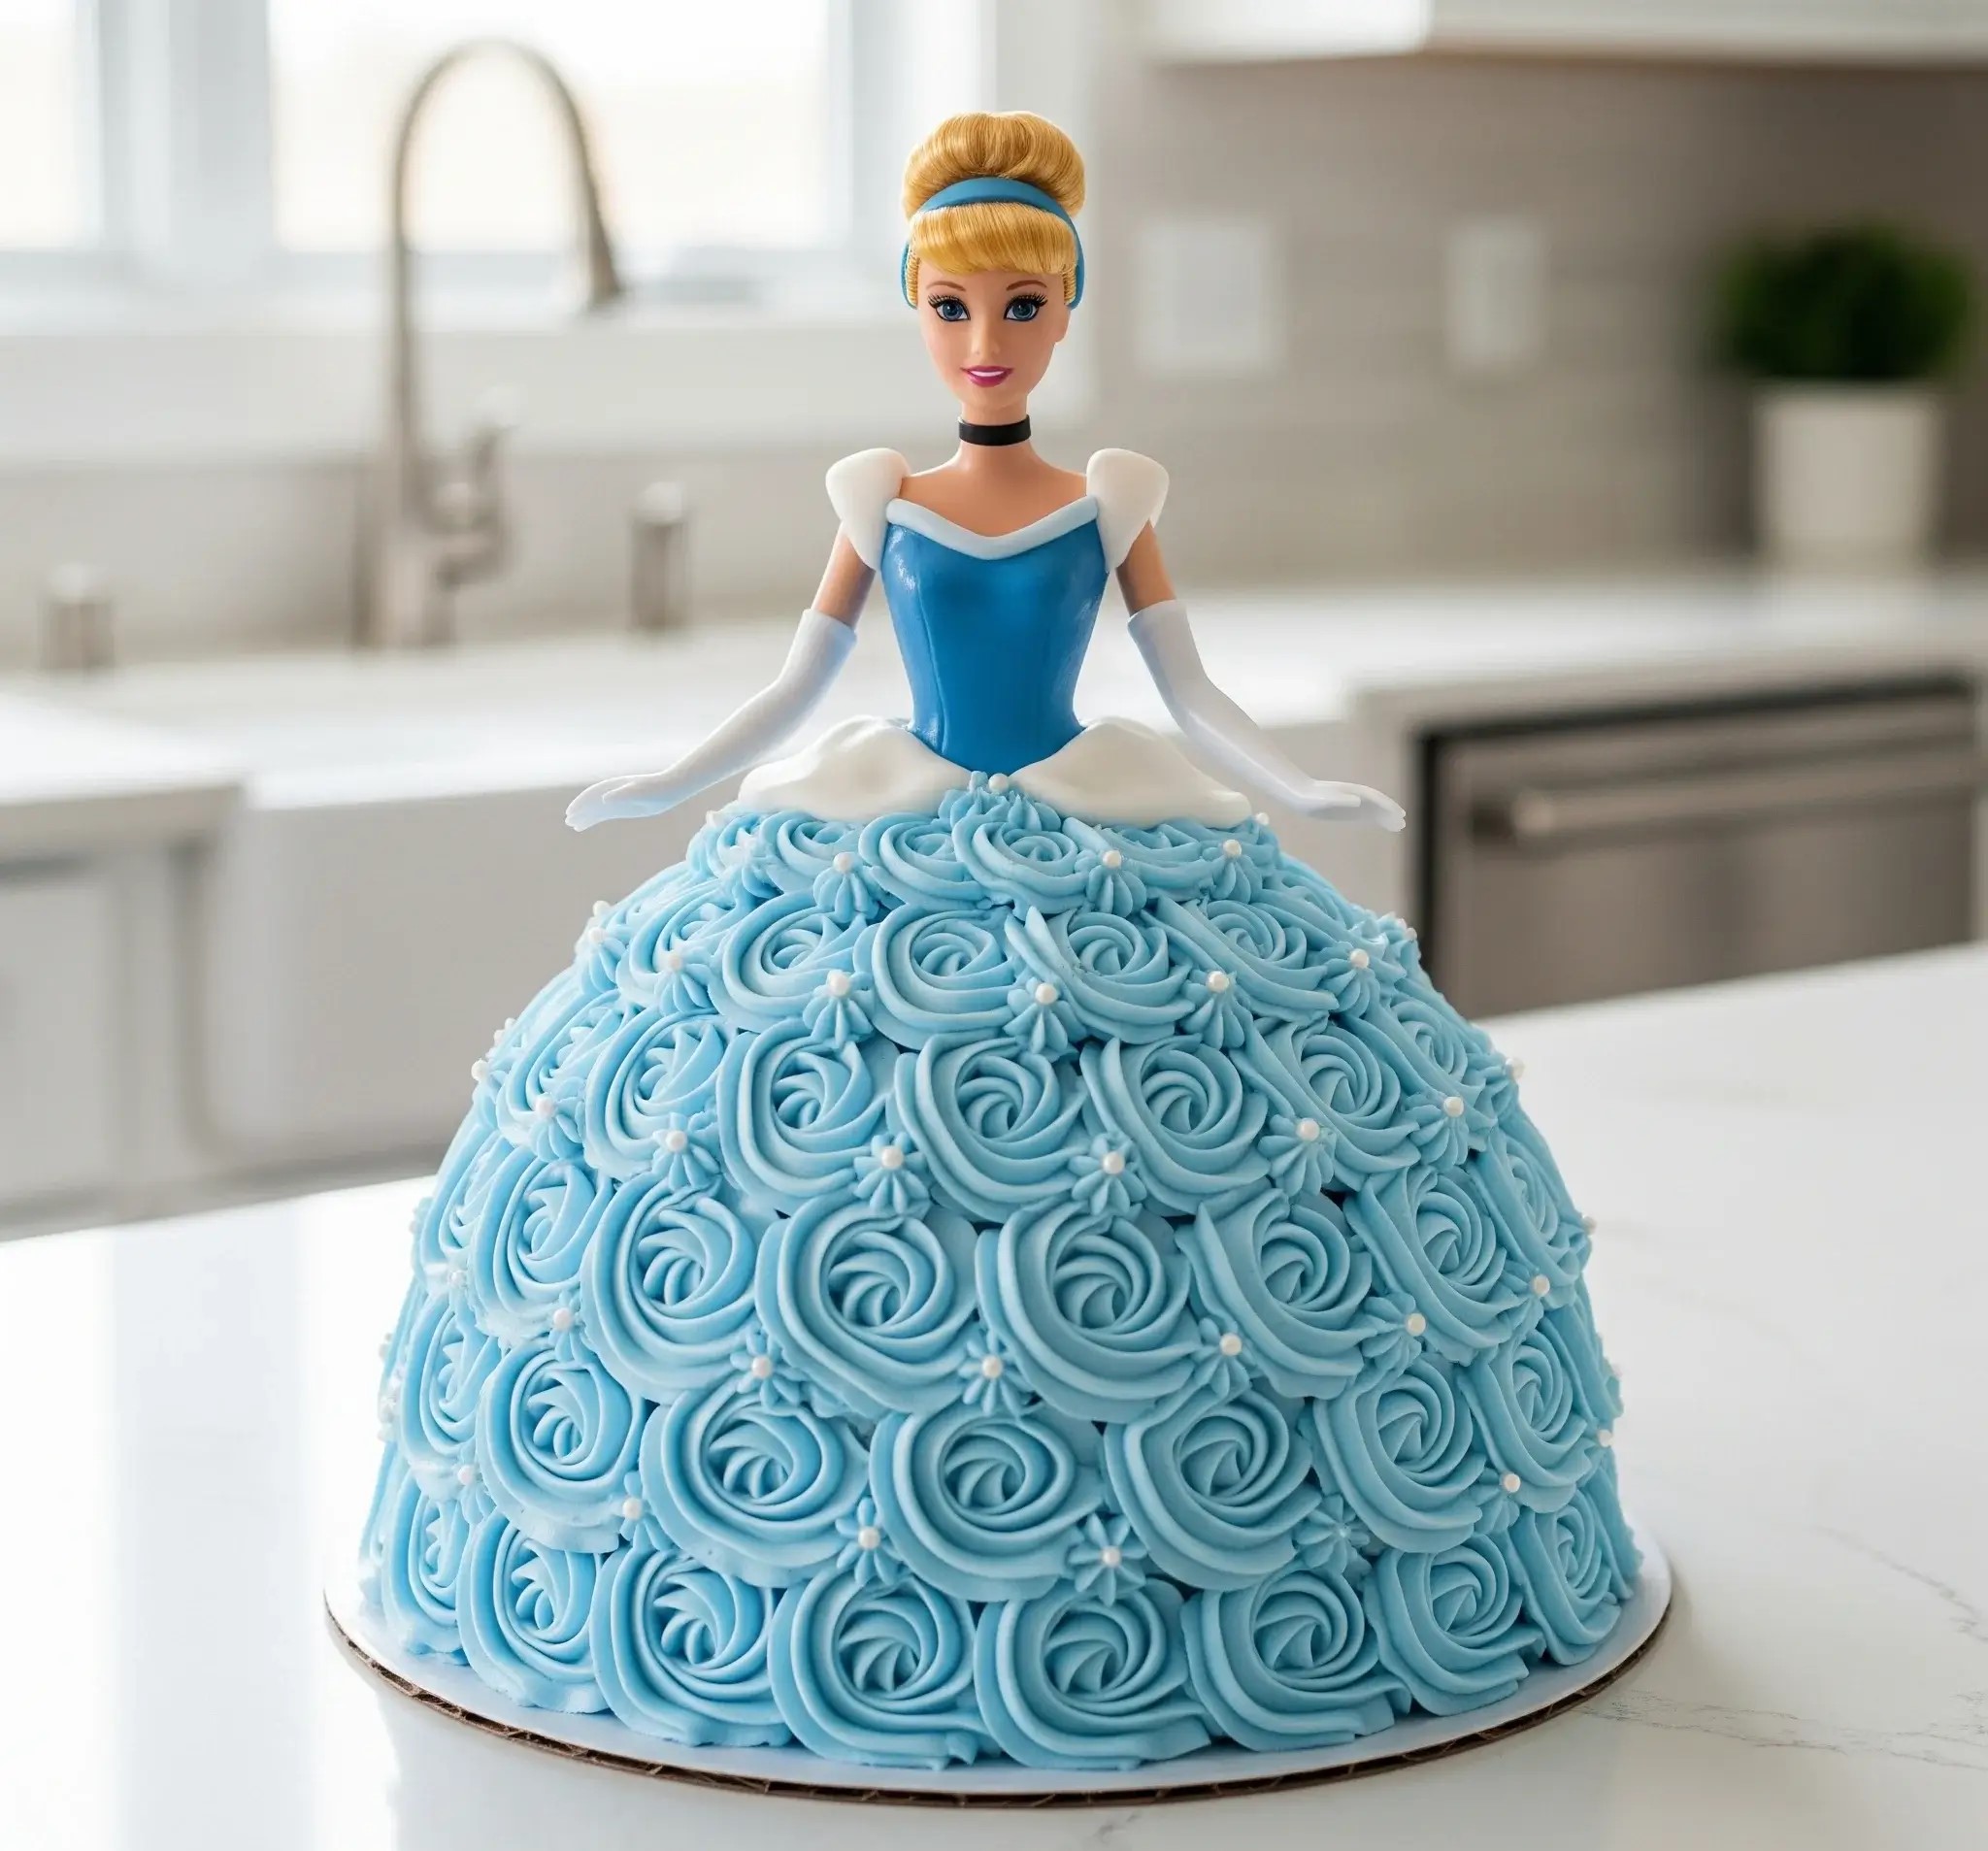
- Pipe swirls all over the dome to mimic the ruffled fabric in the image. Start from the bottom and work upward.
- Add sugar pearls or mini fondant flowers in the center of some rosettes to add sparkle and texture.
- Pipe additional frosting around the doll’s waist to blend the bodice into the cake.
- Optional: Use a small bit of white fondant to craft shoulder puffs as seen in the image.
Final Touch
- Place the cake in a clean, well-lit area for display. The detailed piping and blue palette perfectly capture Cinderella’s gown, making it a magical centerpiece for any party.
- Let the cake rest at room temperature for 20–30 minutes before serving for best texture.

What Kind Of Cake Pan Do You Need For a Cinderella Dress Cake?
To shape the dress just right, you need a rounded cake that forms the gown. Here’s what works best:
- Dome-shaped pan or bowl: Use a stainless steel mixing bowl or a dome cake mold to create that round, full skirt shape.
- 6-inch round pans: Stack 1–2 flat layers underneath the dome to give the dress more height.
- Trim and carve if needed: After baking, trim the edges slightly so the final shape looks smooth like a flowing gown.
What Icing Tip Is Best For Making The Dress Swirls?
If you want that ruffled, princess-dress look like in the Cinderella cake, choosing the right piping tip is key. Here are the top picks:
- Large open star tip (Wilton 1M): Best for big, pretty swirls that look like soft fabric folds.
- Closed star tip (Wilton 2D): Makes tighter, fuller rosettes for a more dramatic texture.
- Drop flower tip: Works well for adding small accents or extra dress details.
Can I Make a Cinderella Cake Ahead Of Time?
Yes, you can absolutely make this cake ahead. Just plan the steps wisely to keep everything fresh.
- Bake the cake layers 1–2 days early: Wrap them tightly and store at room temperature or in the fridge.
- Make the buttercream in advance: Store it in an airtight container in the fridge. Let it come to room temperature before using.
- Assemble the day before the event: Stack, frost, and decorate. Then store it properly to keep it perfect for serving.
Can I Use Fondant Instead Of Buttercream For The Dress?
Yes, fondant works too—especially if you want a smooth, elegant finish instead of swirls. Here’s how you can use it:
- Cover the dome with fondant: Roll it out and drape it over the chilled cake. Use your hands to smooth it into the dress shape.
- Add fondant ruffles: Cut strips and layer them to create folds or waves in the skirt.
- Mix both fondant and buttercream: Use fondant for the base and buttercream for details like borders or accents.

Is The Doll In The Cinderella Cake Edible?
No, the doll inside the cake is not edible.
- It’s a real plastic doll: Usually a Barbie-style figure or a doll topper meant for decorating.
- Wrap the legs in plastic wrap: This keeps it food-safe when inserted into the cake.
- Use a cake pick topper if you want no actual doll: Some cake toppers have only the upper half of the doll and are made for cakes.
How Do I Keep The Cake From Collapsing With The Doll Inside?
A few small tricks can help the cake hold its shape, even with a doll in the center.
- Use firm cake layers: Avoid extra-moist or crumbly cakes. Vanilla or pound cake works best.
- Chill the layers before stacking: Cold cake is easier to work with and stays firm while decorating.
- Cut a hole, don’t force the doll in: Measure the doll’s legs and gently carve a tunnel into the stacked cake.
- Wrap the doll tightly: Plastic wrap keeps the doll clean and helps it slide in without cracking the cake.
- Use a cake board under the dome if needed: It gives the cake more stability when moving or lifting.
How Do You Store a Doll Cake Overnight?
If you’re making the cake a day before the party, keeping it fresh is easy with the right storage:
- Place the cake in a large cake box.
- Keep it in the fridge if room temperature is warm.
- Let it sit at room temp for 30 minutes before serving.
- Avoid placing near strong odors like onions or garlic.
- Don’t freeze the fully decorated cake.

