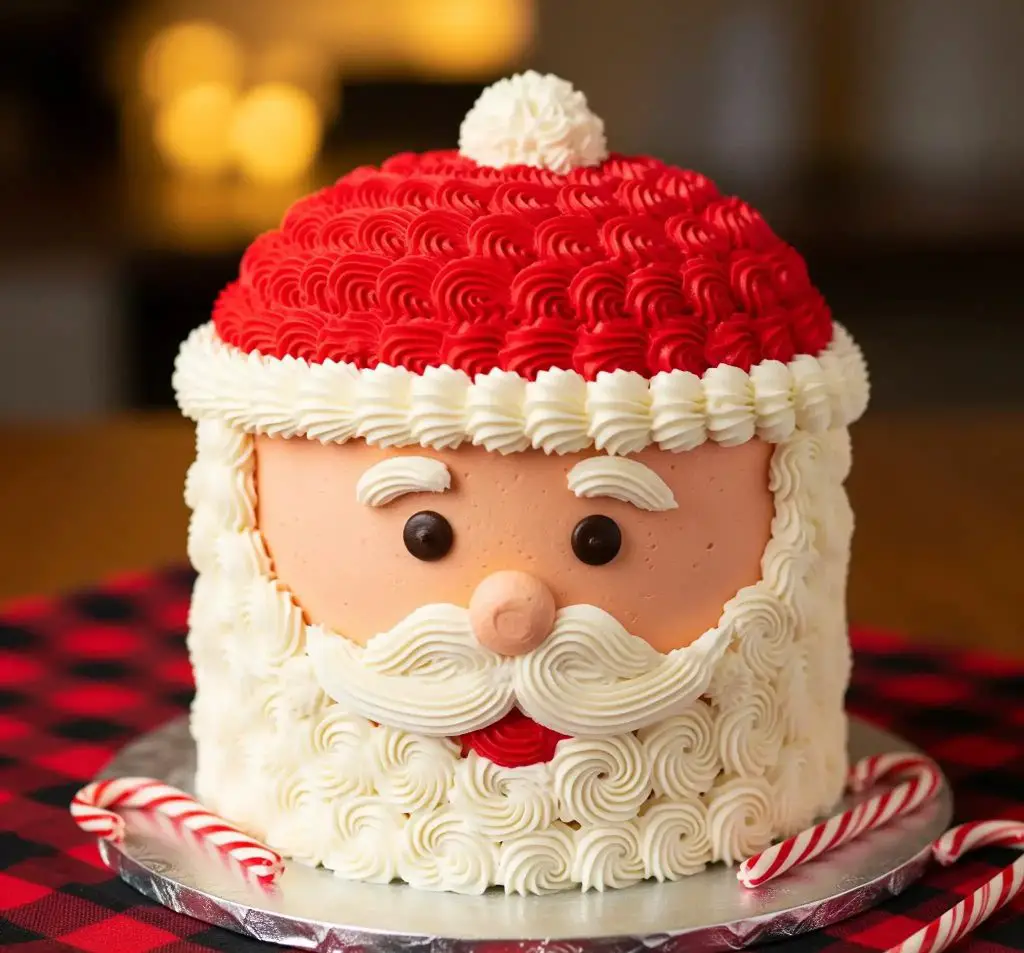
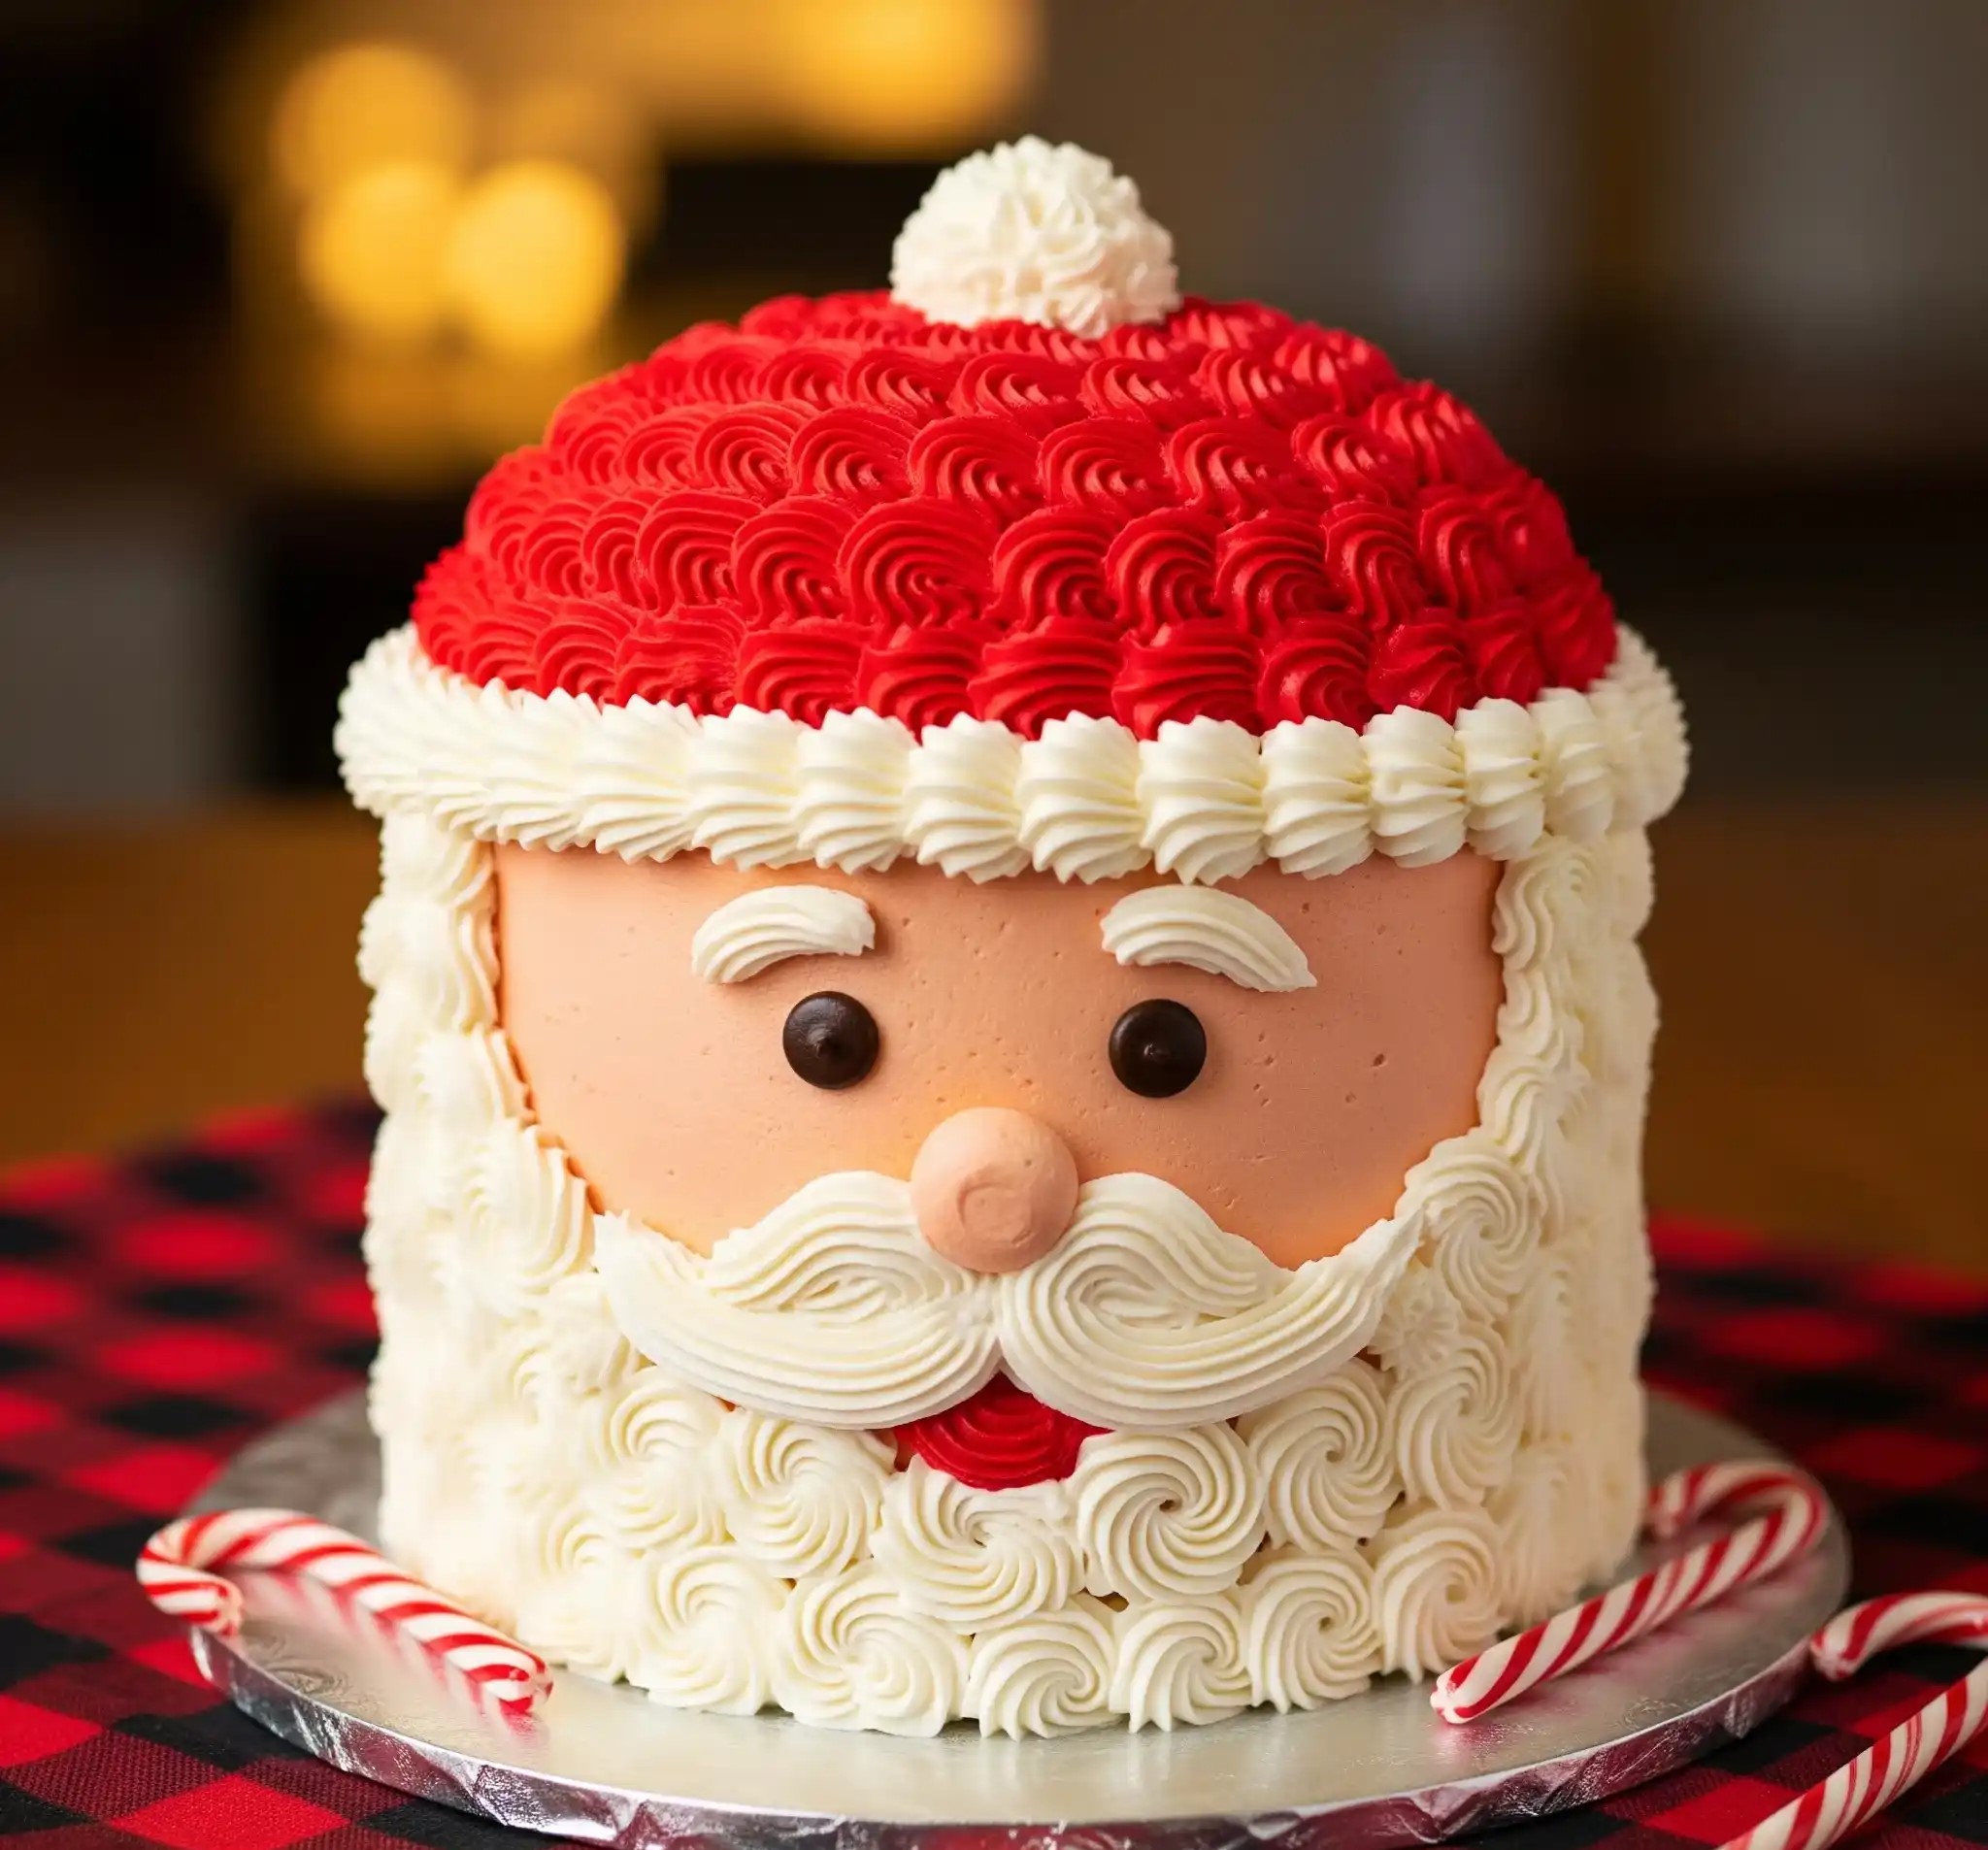
Every year, as soon as December hits, I get this urge to bake something that feels like pure holiday joy—and honestly, this Santa face cake is exactly that.
It’s not just a cake, it’s the cake my family waits for. The moment I place it on the table, everyone lights up—especially the kids. I mean, who wouldn’t smile at a jolly little Santa made entirely of frosting?
This recipe has become a bit of a tradition for me. I still remember the first time I made it—I was nervous about getting the face right, and my hand was shaking when I piped the beard.
But when I stepped back and saw it all come together, I almost teared up. It looked adorable, and it tasted even better.
Now, it’s a must-bake every year. No matter how busy I am, I make time for this cake because it makes everything feel more… special.
You don’t need fancy tools or bakery skills to pull this off—just a little bit of patience and a good buttercream. Trust me, once you make it, you’ll be proud. And the best part?
You’ll create a moment everyone remembers. The smiles, the photos, the “I want the nose!” arguments—it’s worth every swirl of frosting.
So come into my kitchen (well, kind of), and I’ll walk you through the whole thing. Step by step. Just like I do every year.
Christmas Santa Face Cake Recipe
Yield: 8-inch round cake (serves 10–12)
Time: 3 hours (including baking, cooling, and decorating)
Ingredients
For the Vanilla Cake (3 layers):
- 2 ¾ cups all-purpose flour (sifted)
- 1 tbsp baking powder
- ½ tsp salt
- 1 cup unsalted butter, room temperature
- 2 cups granulated sugar
- 4 large eggs, room temperature
- 1 tbsp pure vanilla extract
- 1 cup whole milk, room temperature
For the Buttercream Frosting (used for frosting, piping, and decorating):
- 2 cups unsalted butter, room temperature
- 7 cups powdered sugar, sifted
- 2 tsp vanilla extract
- 5–6 tbsp milk (as needed for consistency)
- Red gel food coloring
- Peach or skin-tone gel food coloring
- Optional: Pink gel food coloring (for the nose tint)
For Decoration:
- 2 chocolate buttons or brown candy melts (for eyes)
- 1 mini pink fondant ball or buttercream-dotted nose
- 2 mini candy canes (for display)
- Piping bags with star tips, round tip, and petal tip
- Offset spatula and bench scraper
- Cake turntable (recommended)
Instructions
Step 1: Make the Cake Layers
- Preheat your oven to 350°F (175°C). Grease and line three 8-inch round cake pans with parchment paper.
- In a medium bowl, whisk together the flour, baking powder, and salt.
- In a large mixing bowl, beat the butter and sugar until pale and fluffy (about 3–4 minutes).
- Add the eggs one at a time, beating well after each addition. Mix in the vanilla extract.
- Alternately add the dry ingredients and milk to the batter in 3 additions, beginning and ending with flour. Mix just until combined.
- Divide the batter evenly into the prepared pans. Smooth the tops.
- Bake for 25–30 minutes or until a toothpick inserted in the center comes out clean.
- Let cakes cool in pans for 10 minutes, then transfer to wire racks to cool completely.
Step 2: Prepare the Buttercream
- Beat the butter until creamy and light (about 3–4 minutes).
- Gradually add powdered sugar, one cup at a time. Mix on low at first to avoid mess.
- Add vanilla and 5 tbsp milk. Beat for 4–5 minutes until fluffy. Adjust with more milk if needed.
- Divide buttercream into 4 bowls:
- White: For beard, eyebrows, hat trim, and base layer.
- Red: Tint with red gel color for Santa’s hat and mouth.
- Peach/skin-tone: Tint lightly for the face.
- Optional pink: For the nose, or use a fondant ball.
Step 3: Assemble the Cake
- Level your cake layers if needed. Place one layer on your cake board or turntable.
- Spread a layer of white buttercream between each cake layer.
- Once stacked, crumb coat the entire cake with a thin layer of white frosting. Chill for 30 minutes.
Step 4: Frost and Design Santa’s Face
- Face Area: Using the peach frosting and an offset spatula, frost an oval shape on the front center of the cake (this is Santa’s face). Smooth it carefully.
- Beard and Hair: Fill a piping bag fitted with a large star tip with white frosting.
- Pipe rosettes and swirls around the lower half of the cake and sides to form Santa’s beard and side hair.
- Eyebrows: Use a small star or petal tip to pipe two arched white eyebrows above the eyes.
- Eyes: Press two chocolate buttons or candy melts into the face for the eyes.
- Nose: Either pipe a small pink or peach swirl for the nose or use a pink fondant ball.
- Mouth: With red frosting and a small round tip, pipe a small curved smile under the mustache area.
- Mustache: Pipe two symmetrical swirls beneath the nose using white frosting and a star tip.
Step 5: Santa Hat and Trim
- Hat Base: Using red frosting with a large closed star tip, pipe tight upward swirls across the top dome of the cake to mimic the knitted texture of Santa’s hat.
- Hat Border: Pipe a thick white border at the bottom edge of the red hat using a star tip.
- Pom-Pom: Pipe a round white ball at the top center of the hat using a closed star tip or build it with small piped stars to resemble a fluffy pom-pom.
Step 6: Final Touches
- Clean up the cake base edges using a bench scraper.
- Place two mini candy canes on the cake board diagonally on each side for a festive touch.
- Chill the cake for 20 minutes to set the design, then serve or display.
- Storage: Keep the cake in a cool place or refrigerate in a covered box. Bring to room temperature before serving for best flavor.

How Far In Advance Can I Make a Christmas Cake?
You can make a traditional Christmas cake well before Christmas—this actually helps the flavor get better with time.
- 4 to 6 weeks before Christmas: That’s the ideal time to bake a rich fruitcake.
- Feed the cake regularly: If using juice or syrup, brush it once a week to keep it moist.
- Wrap it properly: Use baking paper and foil before storing.
- Keep it in a cool, dry place: No need to refrigerate if wrapped well.
What’s The Best Icing For a Christmas Cake?
The best icing depends on how you want your cake to look and taste. Here are common options:
- Fondant icing: For smooth, neat finish and detailed designs.
- Buttercream icing: Soft, creamy, and easy to spread or pipe.
- Royal icing: Dries firm and gives a snow-like effect.
- Whipped cream: Tastes light and fresh but doesn’t last long outside the fridge.
Can I Make a Christmas Cake Without Eggs?
Yes, you can easily make an eggless Christmas cake. Use these instead:
- Yogurt: ¼ cup per egg – makes cake soft.
- Applesauce: ¼ cup per egg – adds slight sweetness.
- Mashed bananas: ½ banana per egg – makes cake moist and dense.
- Buttermilk: ¼ cup per egg – gives a fluffy texture.
How Do I Prevent My Christmas Cake From Drying Out?
Here are simple ways to keep your cake moist and soft for days.
- Use the right pan size: So the cake cooks evenly without overbaking.
- Don’t overbake: Check early with a toothpick to avoid drying out.
- Wrap in foil or baking paper: As soon as it cools, wrap tightly to hold in moisture.
- Brush syrup or juice: Weekly brushing with fruit syrup keeps the inside soft.
- Store in a container: Keeps air away and protects it from getting stale.

Is It Okay To Skip Marzipan In Christmas Cake Decorating?
Yes, you can skip marzipan if you like.
- Use a thin buttercream layer instead: Helps fondant stick smoothly.
- Go for all-buttercream design: Skip fondant entirely and decorate with just frosting.
- Dust with powdered sugar: For a light, snowy look if you don’t want icing at all.
How Do I Get a Smooth Finish On My Christmas Cake?
Want your cake to look clean and polished? Follow these tips:
- Start with a flat cake surface: Trim the top if it’s domed.
- Crumb coat first: Apply a thin layer of frosting to catch loose crumbs.
- Chill the cake after crumb coat: 20–30 minutes helps set the base.
- Use an offset spatula and scraper: Smooth out the top and sides carefully.
- Work with soft, smooth buttercream: No lumps means smoother results.
- For fondant: Roll it evenly and smooth it gently with your hands or a fondant smoother.
How Do I Store a Christmas Cake To Keep It Fresh?
Good storage makes a big difference in how your cake tastes and looks.
- Wrap tightly: Use baking paper, then foil.
- Keep it in an airtight container: Helps seal in freshness.
- Store in a cool, dry place: A cupboard away from heat is perfect.
- Avoid fridge unless needed: It can dry out the cake unless your room is very warm.
- Check weekly: If it’s a fruitcake, brush with juice or syrup to keep it moist.
Can I Freeze Christmas Cake?
Yes, you can freeze it easily—just follow the right steps.
- Wrap it twice: First in plastic wrap, then foil.
- Store in a freezer-safe container: Adds extra protection.
- Label the date: So you don’t forget how long it’s been frozen.
- Freeze without decorations: Add icing or buttercream after thawing.
- Thaw in the fridge overnight: Let it come to room temperature before serving.
You May Also Like To Check Out These Recipes:
- 25th Birthday Cake
- 23rd Birthday Cake
- Leo Birthday Cake
- Strawberry Lemonade Cake
- Sourdough Chocolate Cake
- Snickerdoodle Cake
- Pumpkin Cake
- Blueberry Pound Cake
- Cannoli Cake
- Blueberry Coffee Cake
- Keto Mug Cake
- Zucchini Cake
- Funfetti Cake From Scratch
- Chocolate Mini Cake
- Mint Chocolate Cake
- Pineapple Sunshine Cake

