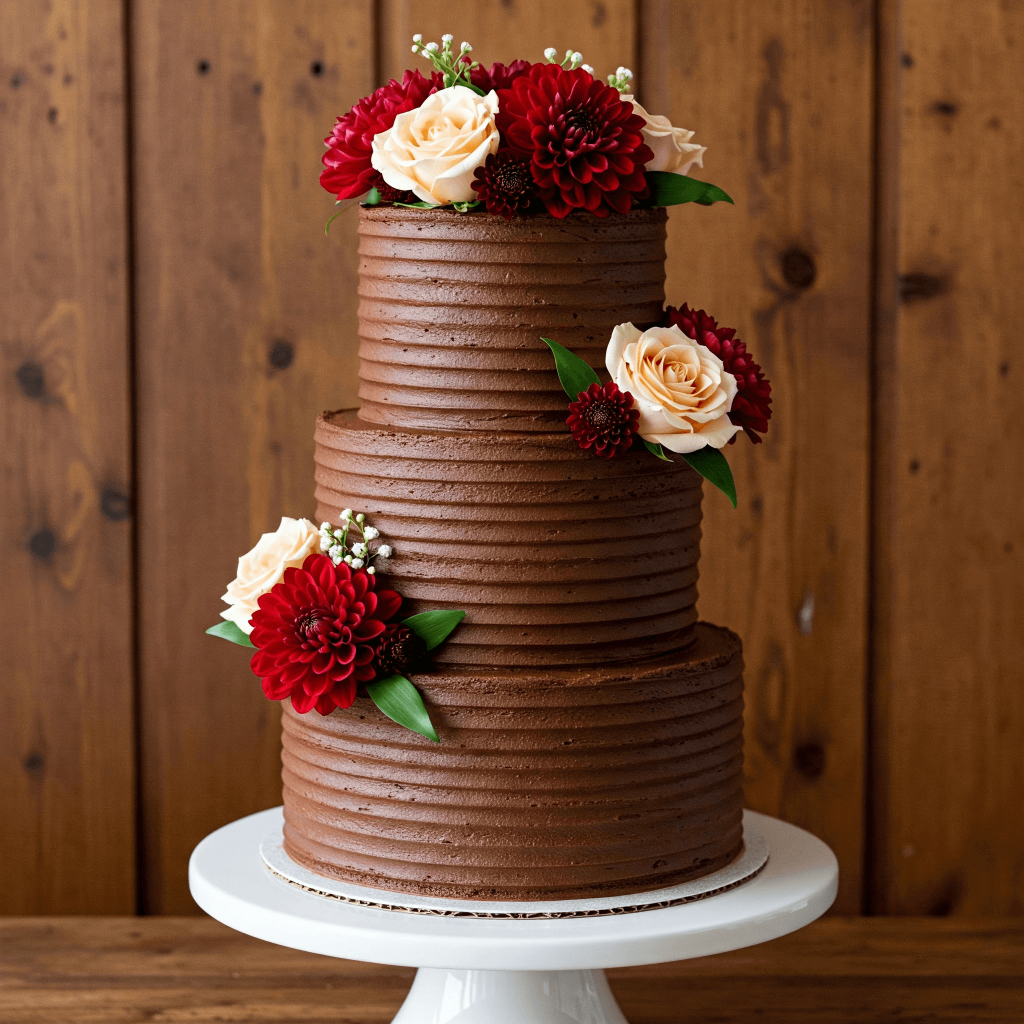
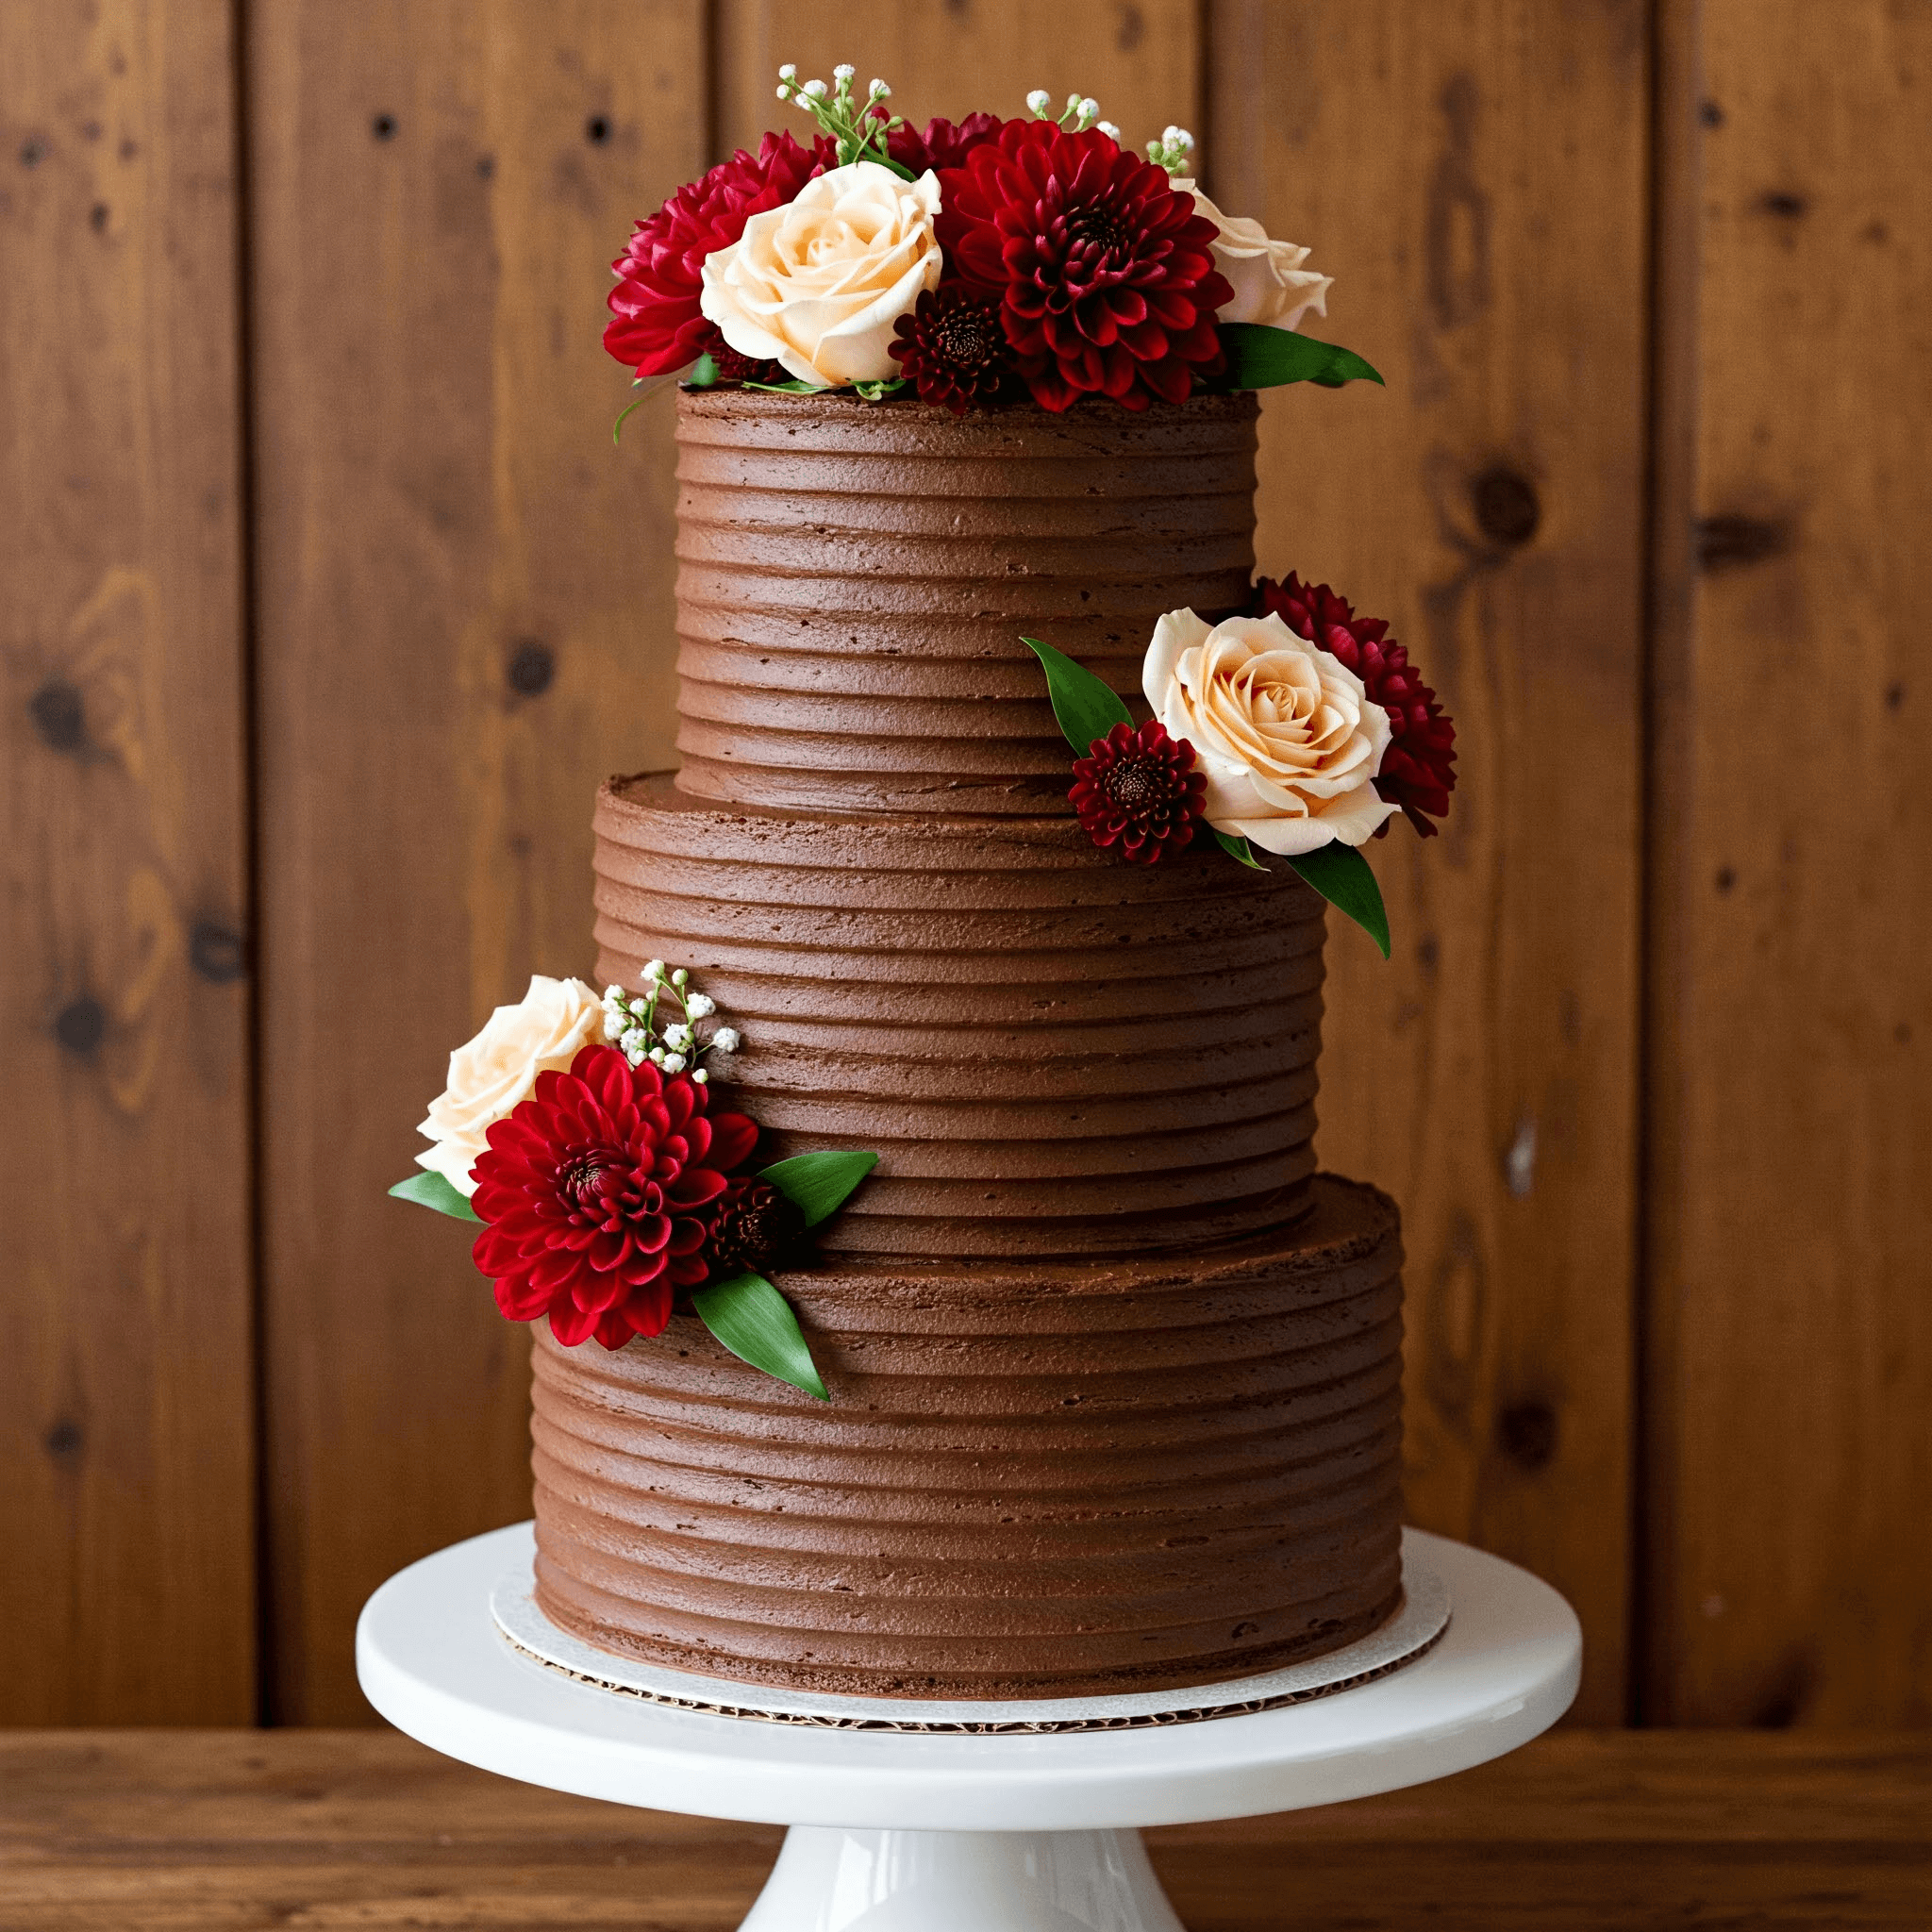
If you’re dreaming of a wedding cake that’s both beautiful and indulgent, then a chocolate wedding cake is exactly what you need.
There’s something about the rich, deep flavor of chocolate paired with creamy frosting that just feels perfect for a celebration.
It’s not just a cake—it’s the kind of dessert that draws everyone in, gets admired from every angle, and then leaves everyone asking for seconds.
I get it. You want something that’s both stunning and delicious, something that reflects your taste and love for good food.
That’s why a chocolate wedding cake works so well—it’s a classic that can be dressed up in so many ways.
Whether you want it to feel elegant with delicate flowers, or bold with striking decorations, it’s all possible.
Plus, the smooth chocolate and buttercream combination is sure to please anyone with a sweet tooth.
If you’re planning to make your own, I’m here to help. The recipe I’m sharing is not just any chocolate cake; it’s the kind that will make your wedding day even more memorable.
I’ll guide you through each step—whether it’s mixing the cake batter, frosting it just right, or adding those beautiful flourishes with flowers and greenery. It’s time to create a cake that not only looks amazing but tastes even better.
Chocolate Wedding Cake Recipe
Ingredients for the Cake:
- 2 ½ cups all-purpose flour (spooned & leveled)
- 2 ½ teaspoons baking powder
- ½ teaspoon baking soda
- ½ teaspoon salt
- 1 ½ cups unsweetened cocoa powder (high-quality)
- 1 ¾ cups granulated sugar
- ¾ cup light brown sugar
- 1 ½ cups whole milk
- 3 large eggs
- 1 cup unsalted butter, softened
- 1 teaspoon vanilla extract
- 1 cup hot water (to bloom the cocoa)
Ingredients for the Chocolate Buttercream Frosting:
- 2 cups unsalted butter, softened
- 4 cups powdered sugar
- ½ cup unsweetened cocoa powder
- 2 teaspoons vanilla extract
- 4-6 tablespoons whole milk (adjust for consistency)
- Pinch of salt
Ingredients for Decoration:
- 6-8 red dahlias or similar edible flowers (fresh)
- 6-8 white roses or similar edible flowers (fresh)
- Baby’s breath (optional, for accenting)
- Greenery leaves (such as mint or basil leaves, fresh)
- Optional: edible gold or pearl dust for additional decoration
Instructions
- Preheat your oven to 350°F (175°C). Grease and line three 6-inch round cake pans with parchment paper. Grease the sides of the pans as well for easy removal later.
- In a large bowl, sift together the flour, baking powder, baking soda, salt, and cocoa powder. Whisk to combine.
- In another bowl, beat the butter, granulated sugar, and brown sugar together using a hand mixer or stand mixer at medium speed. Beat until light and fluffy, which should take around 3-4 minutes.
- Add the eggs one at a time, beating well after each addition. Add the vanilla extract and beat to combine.
- Begin adding the dry ingredients to the wet mixture in three parts, alternating with the milk. Start and end with the dry ingredients. Mix on low speed to avoid over-mixing.
- Carefully mix in the hot water until the batter becomes smooth. The batter will be quite thin, which is normal.
- Pour the batter evenly into the prepared cake pans. Bake for 30-35 minutes or until a toothpick inserted into the center comes out clean.
- Let the cakes cool in the pans for 10 minutes, then transfer to a wire rack to cool completely.
- In a large mixing bowl, beat the softened butter with a stand mixer or hand mixer on medium speed until smooth and creamy (about 2 minutes).
- Add the powdered sugar, cocoa powder, and a pinch of salt. Beat on low speed to prevent a sugar cloud, then increase the speed to medium and mix for about 3-4 minutes.
- Add vanilla extract and milk 1 tablespoon at a time until the desired consistency is achieved. If the frosting is too thick, add more milk. If too thin, add more powdered sugar.
- Whip the frosting for an additional 3-4 minutes on high to make it light and fluffy.
- Once the cakes are fully cooled, level the tops if they have domed.
- Place the first layer of cake on a cake stand or serving plate. Spread a generous layer of chocolate buttercream over the top.
- Place the second cake layer on top, and repeat the frosting process. Add the third layer of cake and frost the entire cake with a thin crumb coat. Chill in the fridge for 20 minutes.
- Once the crumb coat has set, apply a final layer of frosting, smoothing the sides and top evenly.
- Carefully arrange the fresh edible flowers (red dahlias, white roses) on the cake. Space them out evenly around the top tier.
- Tuck small greenery leaves between the flowers for a natural, fresh look.
- If desired, dust the flowers with a bit of edible gold or pearl dust for added elegance.
- The cake’s decoration is customizable, so feel free to adjust the types of flowers or foliage to match the event’s theme.
- Make sure to only use edible flowers to decorate, and ensure that the flowers are pesticide-free.
- The buttercream can be stored in the refrigerator for up to 1 week if not used immediately.

How To Make a Moist Chocolate Wedding Cake?
If you want your chocolate wedding cake to be soft and rich, follow these key tips:
- Use oil instead of only butter: Oil keeps the cake moist longer because it doesn’t harden like butter when cooled.
- Don’t skip buttermilk or yogurt: Both add moisture and a light tang that balances chocolate’s richness.
- Add hot water or hot coffee to the batter: It “blooms” the cocoa powder and deepens the chocolate flavor while making the batter smoother.
- Avoid overmixing the batter: Too much mixing makes the cake tough instead of tender.
- Bake at the right temperature: Too high and the outside bakes too fast; too low and it dries out. 325°F to 350°F is safe.
- Don’t overbake: Check a few minutes early with a toothpick. It should come out with moist crumbs, not dry.
- Wrap cake layers while warm: Once slightly cool, wrap them in plastic wrap. This locks in steam and keeps them super moist.
What Kind Of Chocolate Is Best For a Wedding Cake?
The type of chocolate you use can make or break your cake. Here’s what works best:
- High-quality unsweetened cocoa powder: Dutch-processed or natural is fine, but it must be fresh and dark for a rich flavor.
- Dark chocolate (60–70% cocoa solids): Use real chocolate (not chocolate chips) if melting into batter or ganache.
- Semi-sweet chocolate: Works well for frostings if you want a slightly sweeter balance.
- No compound chocolate or chocolate-flavored bars: They lack real cocoa butter and don’t taste as good.
Can I Use Buttercream Or Ganache For a Chocolate Wedding Cake?
Yes, you can use both—but each has its own style and feel. Here’s how they compare:
Buttercream:
- Light and fluffy texture
- Easy to spread and smooth
- Can be colored or flavored easily
- Best for classic or rustic looks
Ganache:
- Rich and silky finish
- Creates a glossy or drippy effect
- Stays firm when chilled
- Ideal for modern or elegant designs
How Far In Advance Can I Bake a Chocolate Wedding Cake?
Planning ahead is smart, especially for weddings. Here’s how early you can prep your cake:
- Bake the cake layers up to 3 days before: Wrap them tightly in plastic wrap and store in the fridge.
- Bake and freeze the cake up to 1 month before: Double wrap in plastic, then foil. Thaw in the fridge 24 hours before assembling.
- Make buttercream 5–7 days before: Keep in an airtight container in the fridge. Let it soften before using.
- Assemble and frost the cake 1–2 days before the event: Store it in a cake box in the fridge until delivery.

How To Transport a Tiered Chocolate Wedding Cake Safely?
Transporting a cake takes care and planning. These steps will help you avoid damage:
- Use a strong, level cake board: Every tier needs a thick base to stay stable.
- Use support dowels or straws: These hold the weight of upper tiers without collapsing.
- Stack tiers on-site if possible: If not, drive very slowly and avoid sharp turns.
- Place the cake box on a flat surface in the car: The car floor is better than a seat.
- Keep the car cool: Chocolate melts quickly in heat, so use AC.
- Bring emergency tools: Offset spatula, extra frosting, flowers, and tissues—just in case.
How Do I Prevent a Chocolate Wedding Cake From Being Too Dry?
A dry cake can ruin even the prettiest tier. Use these tricks to keep it moist:
- Use ingredients like buttermilk, sour cream, or yogurt: These lock in moisture.
- Add a sugar syrup soak between layers: A light brushing of syrup keeps each bite soft.
- Don’t overbake: Start checking 5 minutes before the timer.
- Use fresh, good-quality cocoa and chocolate: Stale ingredients = dry, dull cake.
- Let cake cool properly before frosting: Trapping steam inside can dry it out later.
Can I Make a Gluten-Free Chocolate Wedding Cake?
Yes, you can make a delicious gluten-free version. Just use proper substitutes that still taste amazing:
- Almond flour chocolate cake
- Gluten-free chocolate sponge cake
- Rice flour and cocoa cake
- Coconut flour chocolate layer cake
- Gluten-free chocolate fudge cake
Can I Freeze a Chocolate Wedding Cake Before The Wedding?
Yes, freezing is a smart way to save time and keep the cake fresh. Just follow these steps:
- Cool the cake completely: Never freeze a warm cake.
- Wrap tightly in two layers: Use plastic wrap first, then foil to prevent freezer burn.
- Freeze layers separately if possible: This makes it easier to stack and frost later.
- Thaw slowly in the fridge overnight: Keep it wrapped while thawing to avoid sogginess.
- Avoid freezing decorated cakes: Decorations can lose shape or color when thawed.

