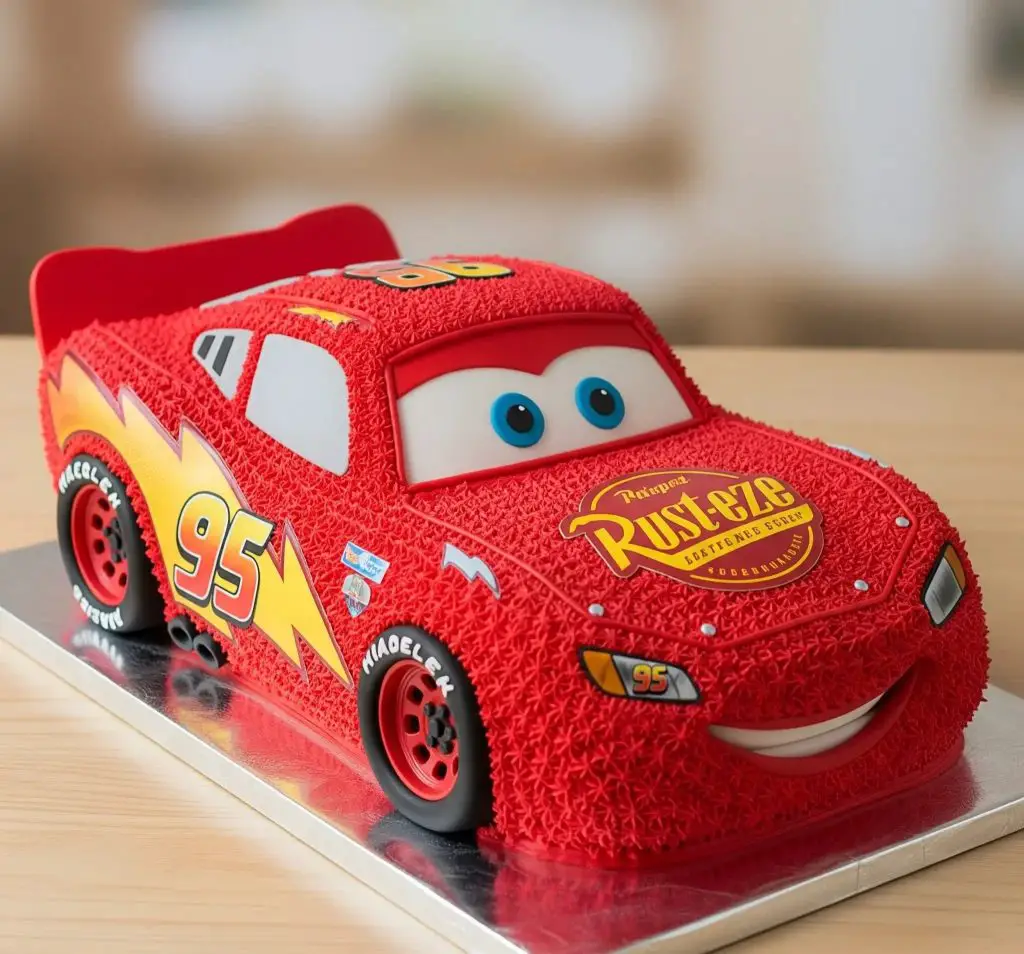
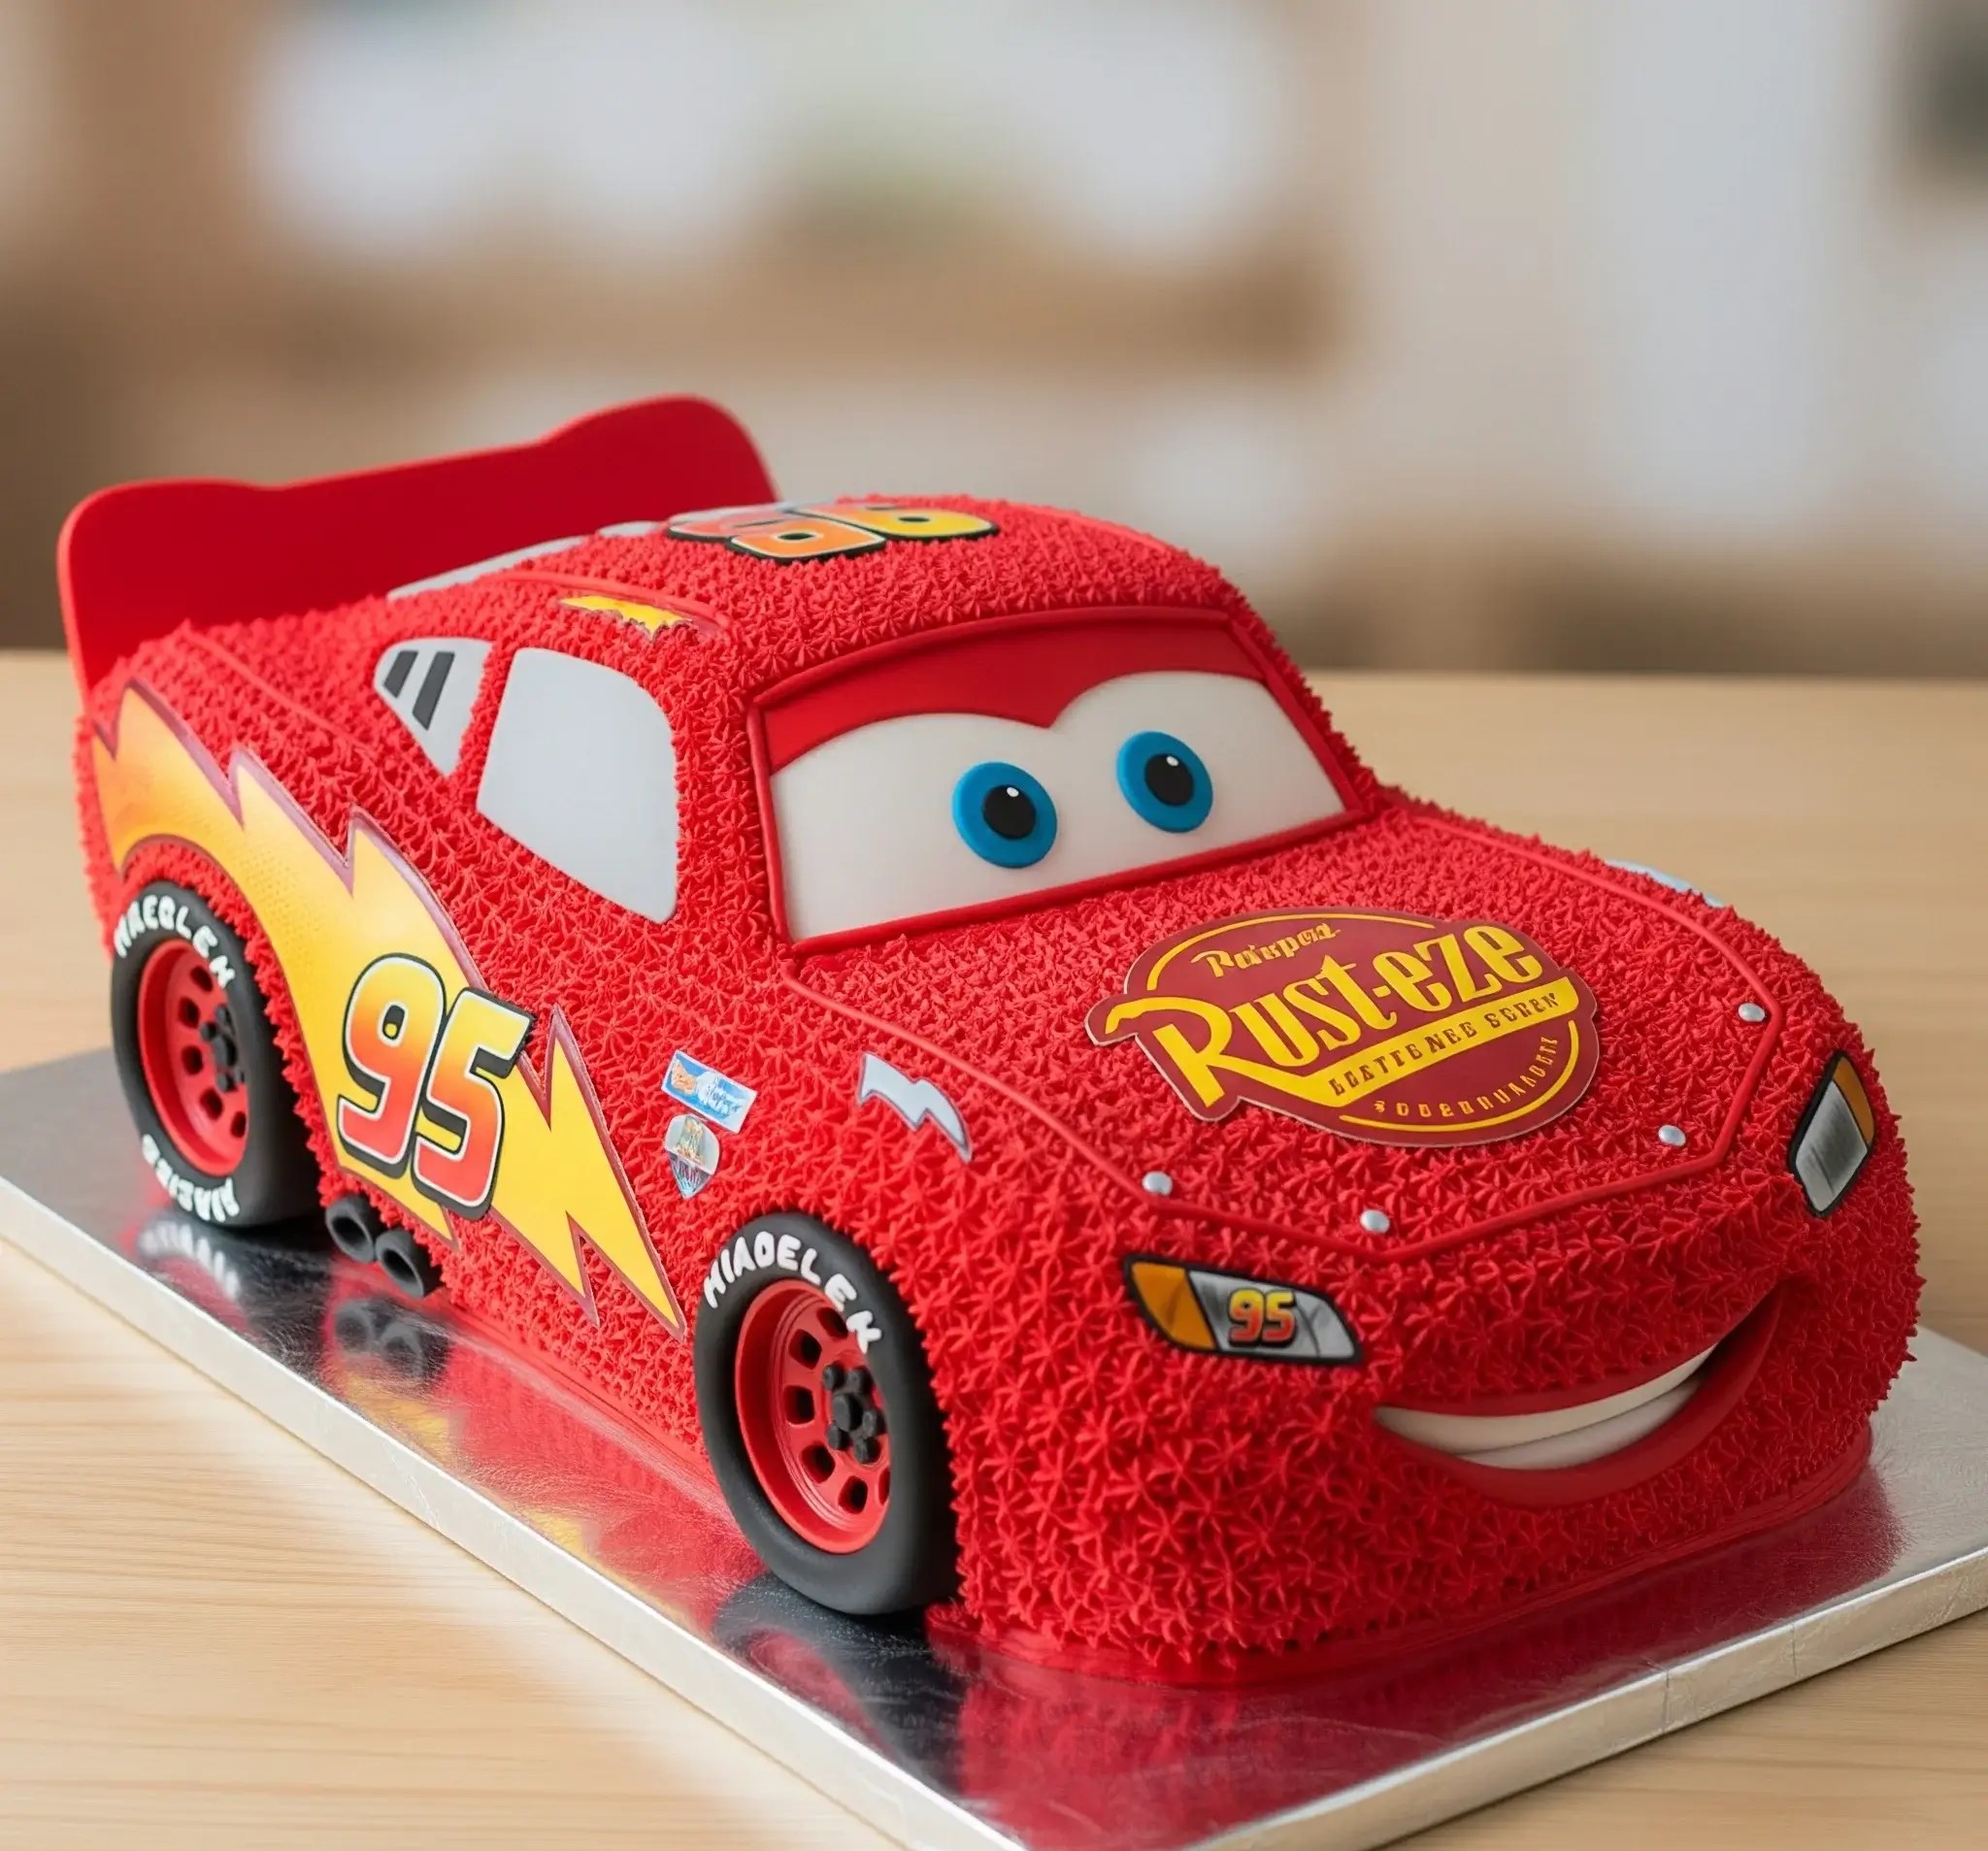
Honestly, I didn’t think a cake could cause this much chaos—in the best way. I made this car cake for my nephew’s birthday, and I’m not exaggerating when I say he screamed when he saw it. Screamed.
Like full-volume, wide-eyed, hands-on-his-head kind of joy. It wasn’t just him either—every kid at the party suddenly wanted to touch it, drive it, or take it home.
And when the adults saw it was actually homemade? Their jaws hit the floor.
That’s when I realized… this cake is magic.
It looks super detailed—those eyes, the bold red color, the wheels, the smile—but it’s surprisingly doable. You don’t need to be a pro decorator. I’m not.
You just need a good plan, the right tools (nothing fancy, I promise), and a little patience.
I started with basic loaf cakes, carved out the shape, piped buttercream like a kid with a coloring book, and then used fondant for the windows, tires, and that famous lightning bolt. Piece by piece, it all came together.
This recipe isn’t just about baking a cake. It’s about making a moment. Watching a little one’s face light up because you made something just for them? You can’t beat that. So if you’re here to make memories, not just desserts—you’re in the right place.
Let’s build this beauty, step by step. I’ll show you everything.
Car Cake (Lightning McQueen Style)
Ingredients
For the Cake Base (2 Loaf Pans):
- 2 ½ cups all-purpose flour (sifted)
- 2 ½ tsp baking powder
- ½ tsp baking soda
- ½ tsp salt
- 1 cup unsalted butter (softened)
- 1 ¾ cups granulated sugar
- 4 large eggs
- 1 cup whole milk
- 2 tsp pure vanilla extract
For the Buttercream Frosting (Red Outer Texture & Filling):
- 2 cups unsalted butter (softened)
- 6 cups powdered sugar (sifted)
- 3–4 tbsp milk
- 1 tsp vanilla extract
- Red gel food coloring (concentrated for bold color)
For Fondant Detailing (Decorations):
- Red fondant (for the smooth surfaces like windshield base)
- Black fondant (tires, smile line, bumper, window trims)
- White fondant (eyes, headlights)
- Yellow fondant (lightning bolt & logos)
- Blue fondant (eyes)
- Edible printed logos or cut them from fondant if edible printer not available
Other Tools:
- Sharp knife
- Loaf pans or rectangular cake pans
- Offset spatula
- Fondant rolling pin
- Toothpicks
- Star piping tip
- Piping bags
- Cake board (covered in silver foil)
- Cornstarch (to prevent fondant sticking)
Instructions
Step 1: Bake the Cake Car Body
- Preheat your oven to 175°C (350°F). Grease and line two loaf pans with parchment paper.
- In a bowl, sift flour, baking powder, baking soda, and salt.
- In a large bowl, cream butter and sugar until light and fluffy (about 4–5 minutes).
- Add eggs one by one, beating after each addition.
- Mix in vanilla.
- Alternate adding flour mix and milk into the butter mixture. Start and end with flour.
- Pour batter evenly into pans. Tap gently to remove air bubbles.
- Bake for 30–35 minutes or until toothpick comes out clean.
- Cool for 10 minutes in pans, then remove and let cool completely on racks.
Step 2: Carving the Car Shape
- Place both loaf cakes side-by-side (stack if needed for height).
- Use a sharp knife to carve the front hood with a gentle slope and round off the back for a spoiler base.
- Cut down the sides slightly to give the body a sleeker, racer look.
- Shape the windshield, curve the top slightly, and trim the front bumper and grille area.
- Save trimmed bits to form raised areas like wheel arches.
Step 3: Make the Red Buttercream
- Beat softened butter until pale.
- Add powdered sugar gradually while mixing.
- Mix in milk and vanilla extract until creamy.
- Add red gel coloring until you get a bold Lightning McQueen red. Mix thoroughly.
Step 4: Crumb Coat & Chill
- Apply a thin layer of red buttercream to seal crumbs.
- Chill in the fridge for 30 minutes to firm it up.
Step 5: Final Coat with Piped Texture
- Fill piping bag with red buttercream and use a star tip.
- Pipe tiny stars close together all over the body – skip windows, eyes, and lower bumper where fondant will be applied.
Step 6: Fondant Detailing
- Windows: Roll white fondant into rectangle shapes for the side and rear windows. Trim edges clean and place.
- Eyes: Cut two oval white fondant pieces. Add blue circles and black pupils. Stick gently on the front windshield.
- Smile & Mouth: Use black fondant to outline the smile. Use white for inside the mouth area (teeth).
- Tires: Shape thick black fondant rings. Press the center gently, add red fondant rims, and use a toothpick to make tire treads.
- Lightning Bolt & Number 95: Use yellow fondant for lightning and cut “95” using small number cutters. Apply carefully to each side.
- Logos & Stickers: If you have edible paper, print the “Rust-eze” logo and others, then stick them using water. Otherwise, carefully recreate logos with tiny fondant pieces.
Step 7: Spoiler & Assembly
- Cut a rectangle of red fondant for the spoiler. Attach to the rear top with toothpicks or edible glue.
- Position wheels at the base, using buttercream or melted chocolate to stick.
Step 8: Final Touches
- Add highlights to eyes using tiny dots of white fondant.
- Use a clean brush to apply edible glue or a dab of water for shine on specific parts like the logo area.
- Clean edges with a dry brush for a professional finish.

How Do You Get The Bright Red Color On a Car Cake Without It Turning Pink?
Achieving that bold red car color can be tricky, especially if it keeps turning out light or pinkish. Here’s how to get it right:
- Use gel food coloring, not liquid: Gel colors are thicker and much more concentrated than regular liquid food coloring. They give a deeper red without making the frosting runny.
- Start with pink or orange base frosting: Instead of coloring plain white, tint it lightly pink or orange first. This helps the red develop faster and stronger.
- Color it a few hours ahead: Let the red frosting sit for 2–4 hours or overnight. The color gets darker as it rests.
- Use a butter-based frosting: White buttercream made with real butter will always have a yellow tint. To get a purer red, use shortening-based white frosting or a mix of butter and shortening.
- Avoid over-mixing: Add color in small amounts and stop mixing once the shade looks close. Over-mixing makes it too soft.
- Don’t panic if it looks dark pink at first: It will deepen after resting, especially if stored in an airtight container.
How Do You Make Car Wheels From Fondant Or Icing?
Wheels bring the whole car cake to life! Here’s how you can shape and decorate wheels easily:
- Roll black fondant thick: About ½ inch thick circles work well for sturdy wheels. Use a round cookie cutter or bottle cap to shape them.
- Add treads with toothpick or cutter: Press light lines around the edges to make them look like real tires.
- Make the hubcaps separately: Use red or silver fondant circles for the center of the wheel. Stick them on top of the black base.
- Attach with melted chocolate or frosting: Use either to “glue” the wheels on the sides.
- Use Oreo cookies in a rush: If you’re skipping fondant, you can use halved Oreos and pipe a red or silver circle in the middle.
Which Cake Pan Is Best For Making a 3D Car Cake?
Choosing the right pan helps make carving easier and keeps the cake stable.
- Use two loaf pans: They’re the perfect size and shape for carving into a car body.
- Stick to heavy, straight-sided pans: They give clean edges and even height.
- Avoid dome-top pans: Leveling them wastes time and cake.
- For small cakes, use mini loaf pans: Perfect for individual car cakes or smaller parties.

Can I Make a Car Cake Without Using Fondant?
Yes, you absolutely can! Many people prefer buttercream-only cakes. Here’s how to do it:
- Use buttercream to pipe the full design: Cover the car with red piped stars or smooth frosting for a clean look.
- Eyes and windows with white & black frosting: Pipe ovals and outlines using a small round tip.
- Wheels with Oreos or frosted cookies: A fun and easy alternative.
- Lightning bolt and logos from colored icing: Use piping bags with yellow, white, and black buttercream for full detail.
How Far In Advance Can I Make a Car Cake For a Birthday?
You can make the cake ahead of time if you plan it right:
- Bake the cake 2 days before: Let it cool completely and wrap tightly in cling film.
- Carve and crumb coat 1 day before: This keeps the shape firm and ready for decorating.
- Finish decorating the night before: This gives enough time for buttercream to set without drying out.
- Add fondant details last: Apply them a few hours before the party to keep colors fresh.
- Store in the fridge: In a cake box or loosely covered with plastic wrap so it doesn’t dry.
How Do I Transport a 3D Car Cake Safely?
Nothing hurts more than watching your hard work slide around. Transport like this instead:
- Use a non-slip cake board: Choose a thick, strong board slightly bigger than the cake.
- Chill the cake before travel: A cold cake is more stable.
- Place in a snug box: A tight-fitting box helps prevent movement during the ride.
- Drive slow and steady: Especially on speed bumps or turns.
- Add a paper towel cushion: Around the base to keep it from shifting inside the box.
- Keep it flat: Never put it on a car seat. Always use the floor of the vehicle.
How Do I Make a Car Cake Look Realistic?
Even if it’s cartoon-style, adding little touches makes a huge difference. Here’s how:
- Shape the body carefully: Smooth curves and right proportions give it a better look.
- Use edible eyes: Big white ovals with blue and black fondant or frosting details.
- Add a front grill and bumper: With black and white fondant strips or piped lines.
- Make clear wheel arches: Carve them in and separate them visually with color.
- Pipe or stick number and lightning bolts: Don’t skip this—it makes it recognizable instantly.
- Use a toothpick for panel lines: Lightly press lines to show doors, hood, and trunk.
You May Also Like To Check Out These Recipes:
- Fall Wedding Cake
- Black Forest Cake
- Harry Potter Birthday Cake
- Birthday Cake Ideas For Men
- Vintage Wedding Cake
- Black And White Wedding Cake
- Bluey Birthday Cake
- Chocolate Cake Pops
- Chocolate Zucchini Cake
- Gluten Free Chocolate Cake
- No Bake Eclair Cake
- Dirt Cake With Gummy Worms
- Peanut Butter Chocolate Cake
- Winnie The Pooh Baby Shower Cake
- Baby Shower Cake Ideas For Girls & Boys

