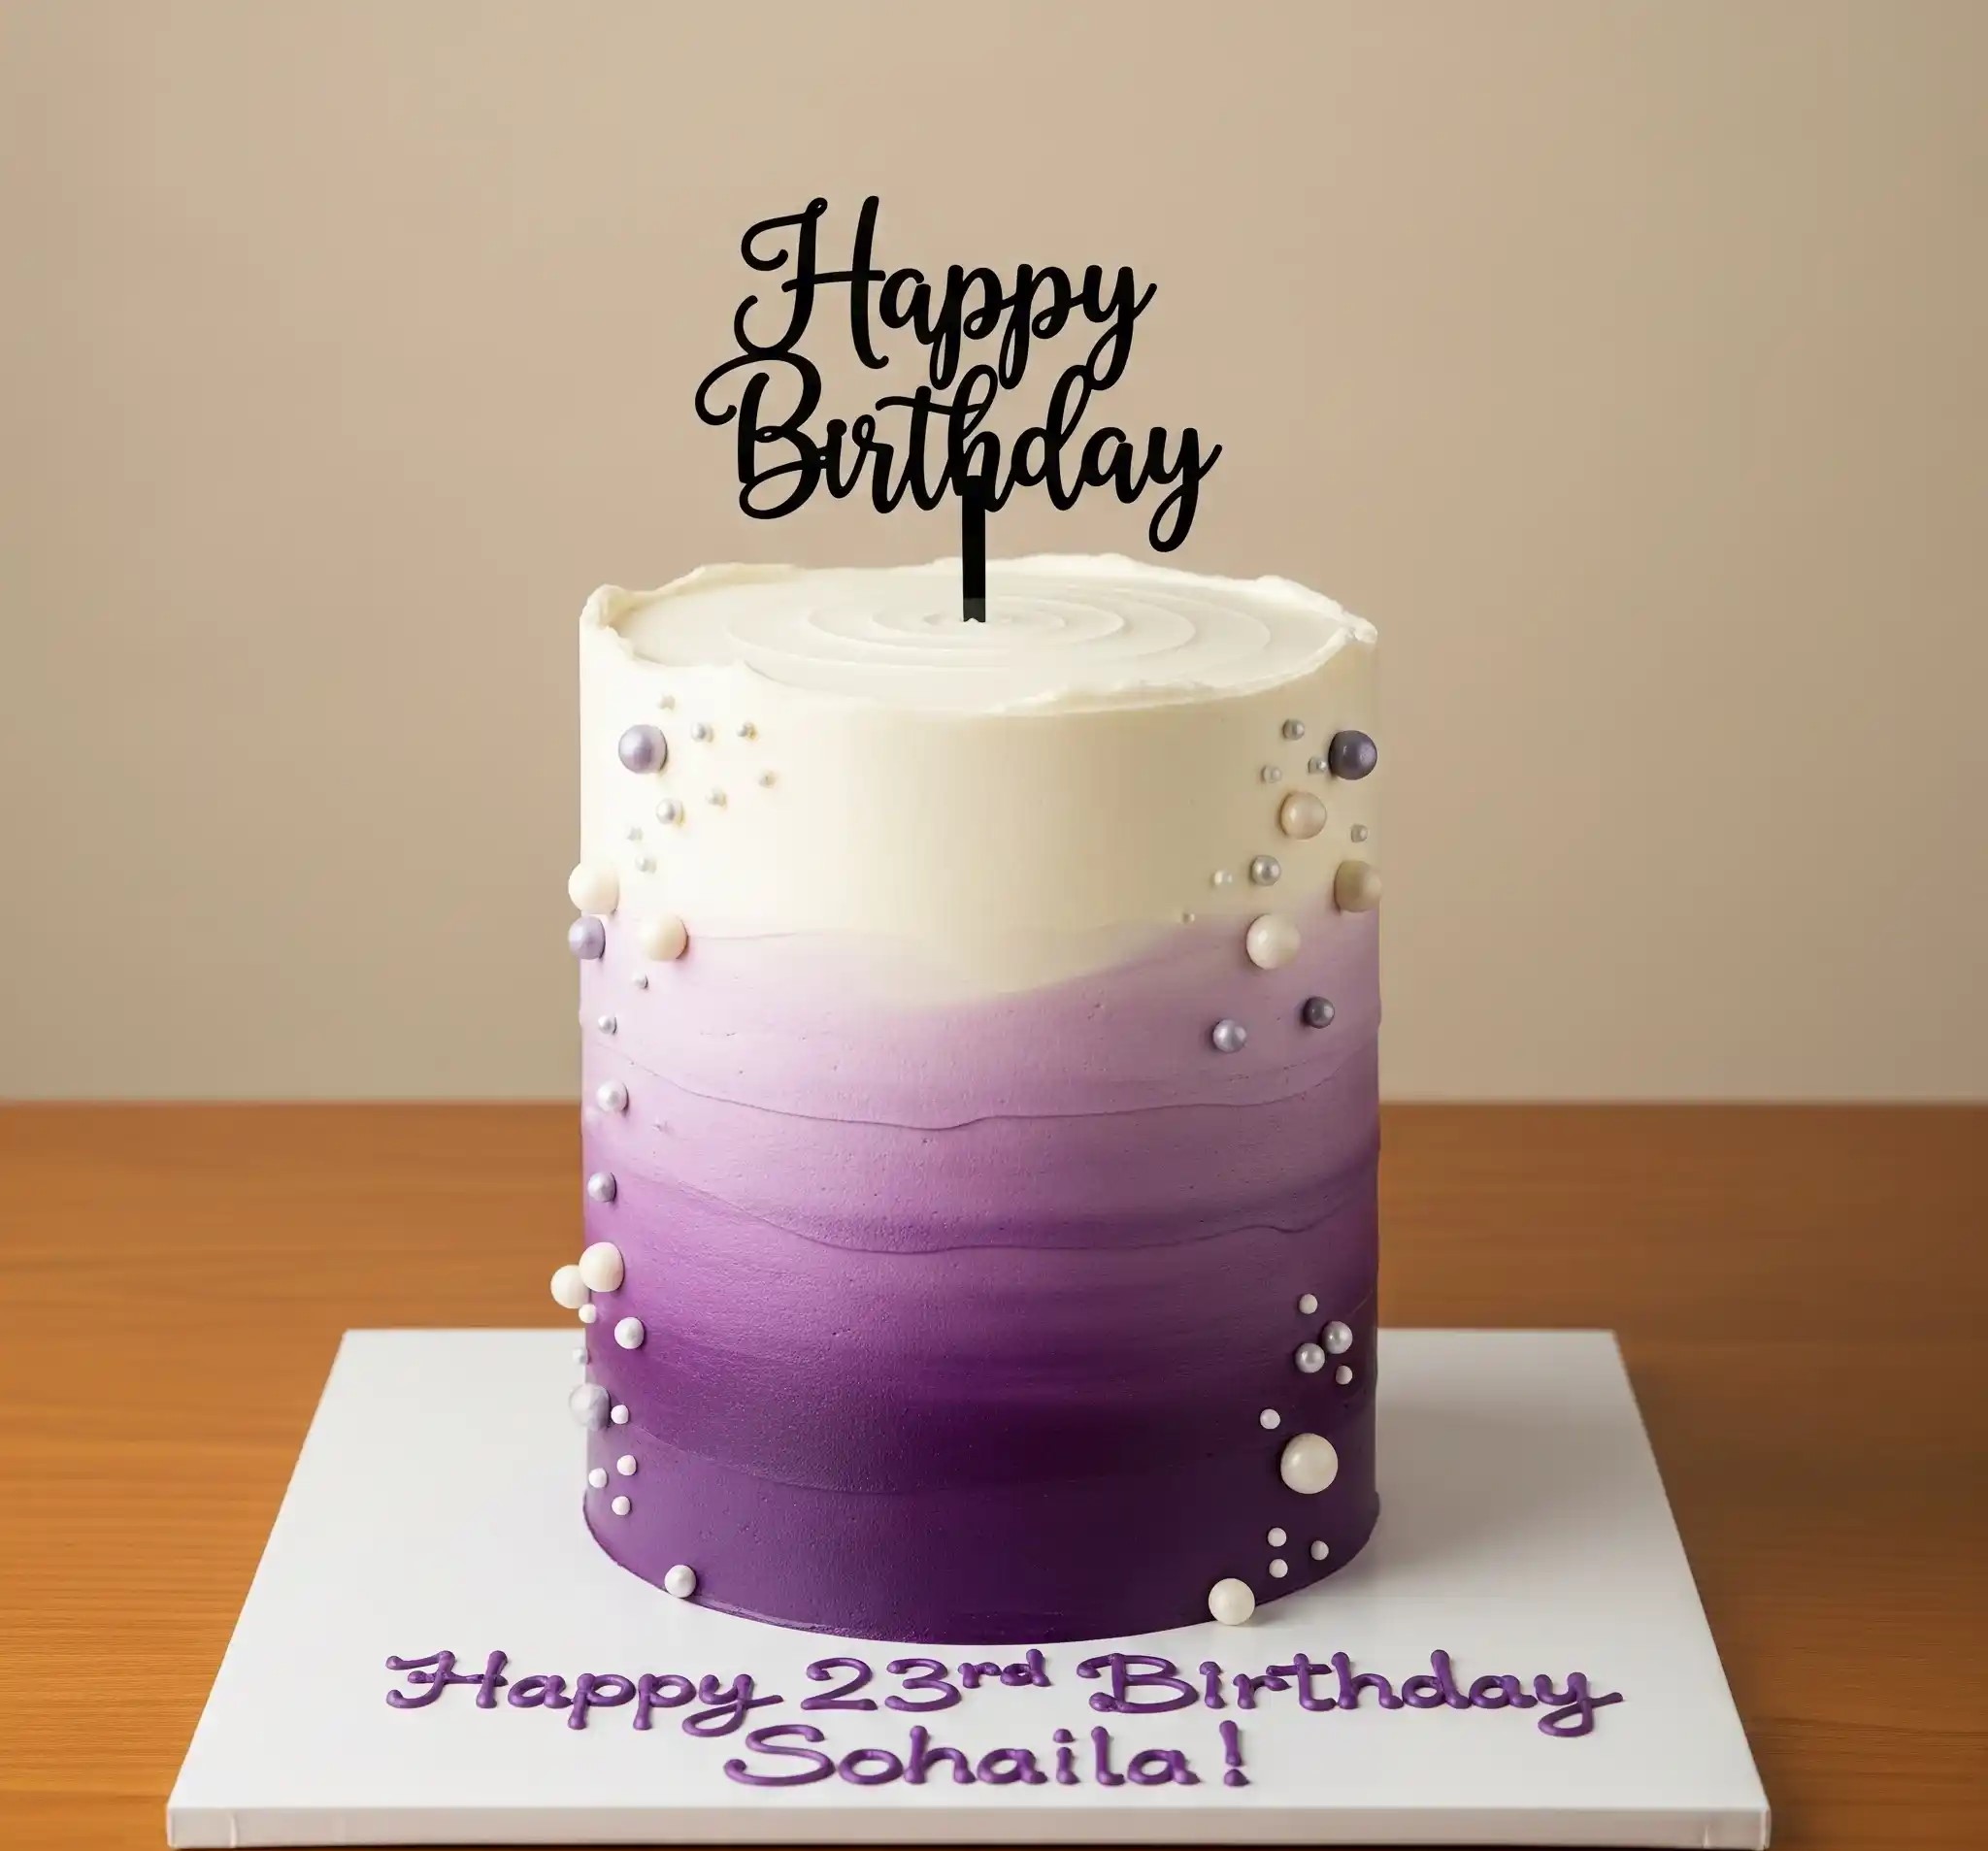
23rd Birthday Purple Ombré Cake For Sohaila
Ingredients
For the Cake (Three 6-inch layers, tall cake):
- 2 ¾ cups (345g) all-purpose flour (sifted)
- 2 ½ tsp baking powder
- ½ tsp baking soda
- ½ tsp salt
- 1 cup (227g) unsalted butter, softened
- 1 ¾ cups (350g) granulated sugar
- 4 large eggs, room temperature
- 1 tbsp vanilla extract
- 1 cup (240ml) whole milk, room temperature
- ¼ cup (60ml) plain yogurt (for added moisture)
For the Vanilla Buttercream:
- 2 cups (454g) unsalted butter, softened
- 6 cups (720g) powdered sugar, sifted
- 3–4 tbsp milk or heavy cream
- 1 tbsp vanilla extract
- Pinch of salt
- Gel food coloring: violet, lavender, and deep purple
For Decoration:
- Assorted edible sugar pearls (white, silver, lilac, ivory)
- “Happy Birthday” cake topper (black acrylic or cardstock)
- Purple edible gel or piping gel (for writing on the board)
- Small offset spatula and bench scraper
- Piping bags (optional but helpful)
Instructions
- Preheat oven to 350°F (175°C). Grease and line the bottom of three 6-inch round cake pans with parchment paper.
- In a bowl, whisk together the flour, baking powder, baking soda, and salt. Set aside.
- In a large mixing bowl, beat the butter and sugar on medium speed for 3–5 minutes until light and fluffy.
- Add eggs one at a time, beating well after each addition. Mix in the vanilla.
- In a separate bowl or measuring jug, combine milk and yogurt.
- Alternately add dry ingredients and the milk-yogurt mixture to the batter, starting and ending with the dry. Mix just until combined.
- Divide the batter evenly into the pans. Bake for 30–35 minutes or until a toothpick inserted in the center comes out clean.
- Cool cakes in pans for 10 minutes, then turn out onto wire racks to cool completely. Level the tops using a serrated knife if needed.
- In a large bowl, beat butter for 3–4 minutes until creamy and pale.
- Gradually add powdered sugar, 1 cup at a time, mixing on low to prevent clouds.
- Add vanilla, salt, and milk (1 tbsp at a time) until smooth and spreadable.
- Once the buttercream is ready, set aside ⅓ for the top white section. Divide the remaining buttercream into 3 equal parts and tint:
- One part lavender
- One medium purple
- One deep plum or dark purple
- Place one cake layer on a cake board or turntable. Spread an even layer of plain white buttercream on top.
- Repeat with the next two layers. Chill the stacked cake for 15–20 minutes to firm up.
- Apply a crumb coat using a thin layer of white buttercream. Chill for 15 minutes.
- Using an offset spatula, apply the colored buttercream in three sections:
- Bottom: deep purple
- Middle: lavender
- Top: white (carry it slightly over the top edge)
- Use a bench scraper to smooth the sides, blending the colors where they meet. Don’t over-blend — you want a soft ombré transition.
- Smooth the top with the offset spatula.
- Gently press edible pearls into the sides of the cake — heavier cluster at the top fading into fewer pearls near the bottom.
- Place the “Happy Birthday” topper into the center of the cake.
- Mix purple food gel with a drop of water or piping gel. Use a fine piping tip or food-safe brush to write:
“Happy 23rd Birthday Sohaila!” on the cake board. - Chill the cake for 20–30 minutes before serving to set everything.

How Do I Decorate a Cake For a 23rd Birthday?
Decorating a 23rd birthday cake can be simple but still look beautiful and grown-up. Here are some ideas and tips to help:
- Use soft colors like purple, pink, or nude tones: These shades give the cake a mature and elegant look.
- Add ombré-style frosting: Blending two or three shades of the same color makes the cake stand out without needing too many extras.
- Decorate with sugar pearls or metallic sprinkles: These tiny details make the cake feel polished and fancy.
- Write the name and age on the cake board: Instead of crowding the cake top, use the base for a clean and modern look.
- Use an acrylic or card cake topper: A simple “Happy 23rd Birthday” topper adds height and style.
- Keep it clean and smooth: Neatness makes the biggest difference in decoration.
How Do I Make a Smooth Buttercream Finish On a Birthday Cake?
A smooth finish makes your cake look professional. It just takes the right method and some patience:
- Use a bench scraper: This helps spread and smooth the buttercream evenly around the cake.
- Chill between steps: After applying a crumb coat, chill the cake for 15–20 minutes to firm it up before adding the final layer.
- Keep your spatula clean: Wipe it off often to avoid crumbs or bumps in the frosting.
- Use a turntable: It makes it easier to frost the cake evenly by rotating it as you work.
- Thin your buttercream slightly: Add 1–2 teaspoons of milk or cream if the frosting feels too stiff.
- Don’t rush: Apply buttercream slowly and smooth in sections.
Are Edible Pearls Safe To Use On Birthday Cakes?
Yes, edible pearls are completely safe to use if they are marked as food-grade. Here’s what to keep in mind:
- Always choose food-safe pearls: Not all cake decorations are made for eating. Look for pearls that are labeled safe to eat.
- Use sparingly on the surface: They’re safe but also hard — so it’s best to place them away from where someone might bite directly into one.
- Avoid using plastic or non-edible beads: Even if they look nice, they should not be placed on areas that will be eaten.
- Check the ingredients list: Some pearls are made with natural sugars and glazes — simple and safe.

How Far In Advance Can I Make a Buttercream Birthday Cake?
You can prepare your buttercream birthday cake a couple of days in advance with no problem. Here’s how to manage it well:
- Cake layers: Bake and wrap them tightly in plastic — store at room temperature for 1 day or in the fridge for 3 days.
- Buttercream frosting: Can be made up to 5 days ahead — keep it in an airtight container in the fridge.
- Assembled and frosted cake: Best made 1–2 days before the event — keep it in a box in the fridge.
- Add fresh toppings (if any) on the day of serving: This keeps everything looking fresh and clean.
- Let it come to room temperature before serving: Cold cake can feel dry — allow 1 hour at room temp.
What Tools Do I Need To Make a Professional-Looking Birthday Cake At Home?
You don’t need too many tools — just the right ones. Here are the basics:
- Offset spatula: For spreading frosting smoothly.
- Bench scraper: To get clean, straight sides.
- Turntable: Makes decorating much easier and faster.
- Cake leveler or serrated knife: For flat, even layers.
- Piping bags and tips: For writing, borders, or simple details.
- Cake boards: These give support and help with neat presentation.
- Food gel colors: Better than liquid — they won’t thin out your frosting.
How Do I Achieve The Ombré Effect With Buttercream?
The ombré effect looks tricky but is very easy with the right technique. It’s all about color layering and blending.
- Choose 2–3 shades of the same color: Like light purple, medium purple, and deep purple.
- Color your buttercream in separate bowls: Use food gel for rich, smooth color.
- Apply darkest color at the bottom: Then move to the medium shade in the middle and the lightest on top.
- Use a clean spatula or bench scraper to smooth: Go slowly around the cake to blend the colors where they meet.
- Wipe off extra buttercream from the scraper between passes: This keeps the finish neat.
What’s The Best Way To Store a Birthday Cake Overnight?
Storing your cake right keeps it fresh and tasty for the next day. Here’s how to do it safely:
- If the cake is frosted: Store it in a covered cake box in the fridge to keep the frosting firm and safe.
- If unfrosted: Wrap each layer tightly in plastic wrap and store in the fridge.
- Avoid airtight containers for frosted cakes: They can mess up your decorations.
- Let it rest at room temp for 30–60 minutes before serving: So the cake softens and the flavors come out better.
- Keep away from strong-smelling foods in the fridge: Cakes absorb odors fast.
You May Also Like To Check Out These Recipes:
- Leo Birthday Cake
- Strawberry Lemonade Cake
- Sourdough Chocolate Cake
- Snickerdoodle Cake
- Pumpkin Cake
- Blueberry Pound Cake
- Cannoli Cake
- Blueberry Coffee Cake
- Keto Mug Cake
- Zucchini Cake
- Funfetti Cake From Scratch
- Chocolate Mini Cake
- Mint Chocolate Cake
- Pineapple Sunshine Cake

