Sixteen snuck up on us, didn’t it? One minute it was cartoons and cupcakes, and now—it’s lip gloss, playlists with meaning, group chats that never stop buzzing, and dreams that are starting to feel real.
Sixteen is special in a way that’s hard to put into words. It’s a little grown, still a little soft, and full of everything in between.
And if you ask me, a birthday like that needs a cake that speaks the same language.
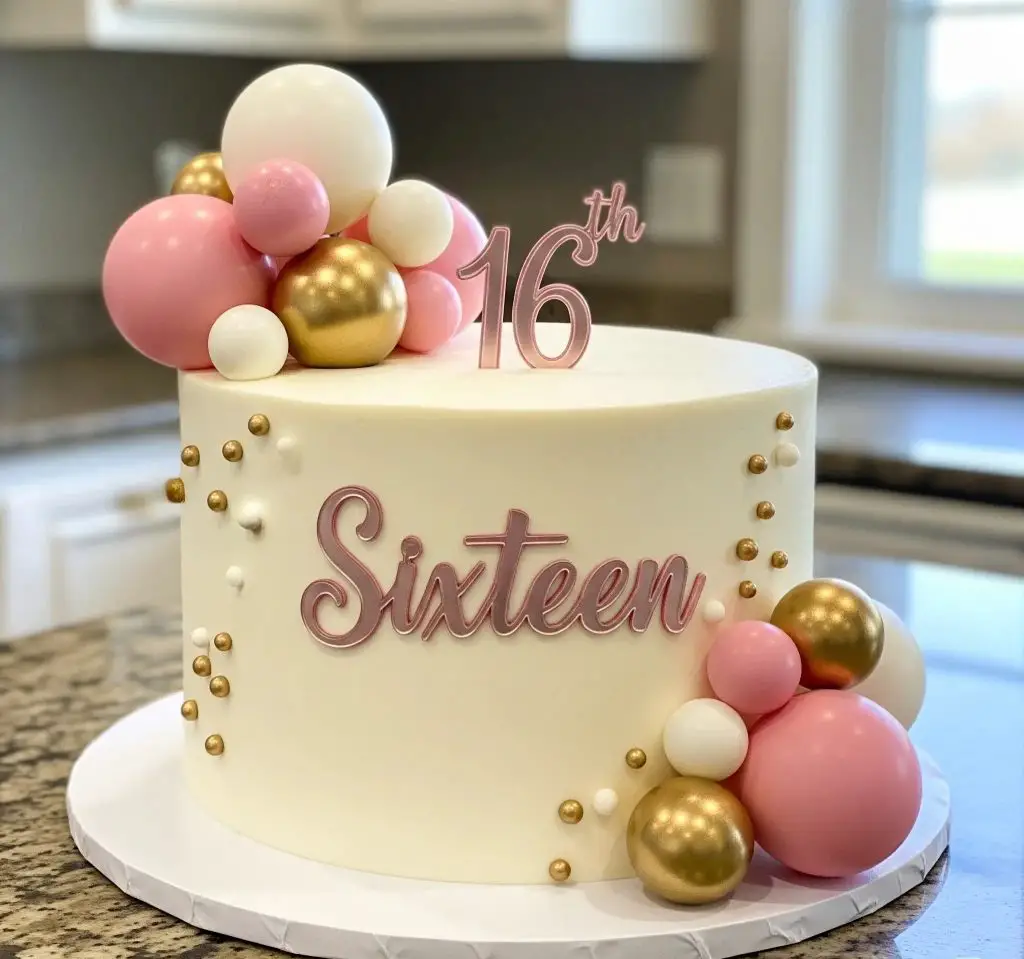
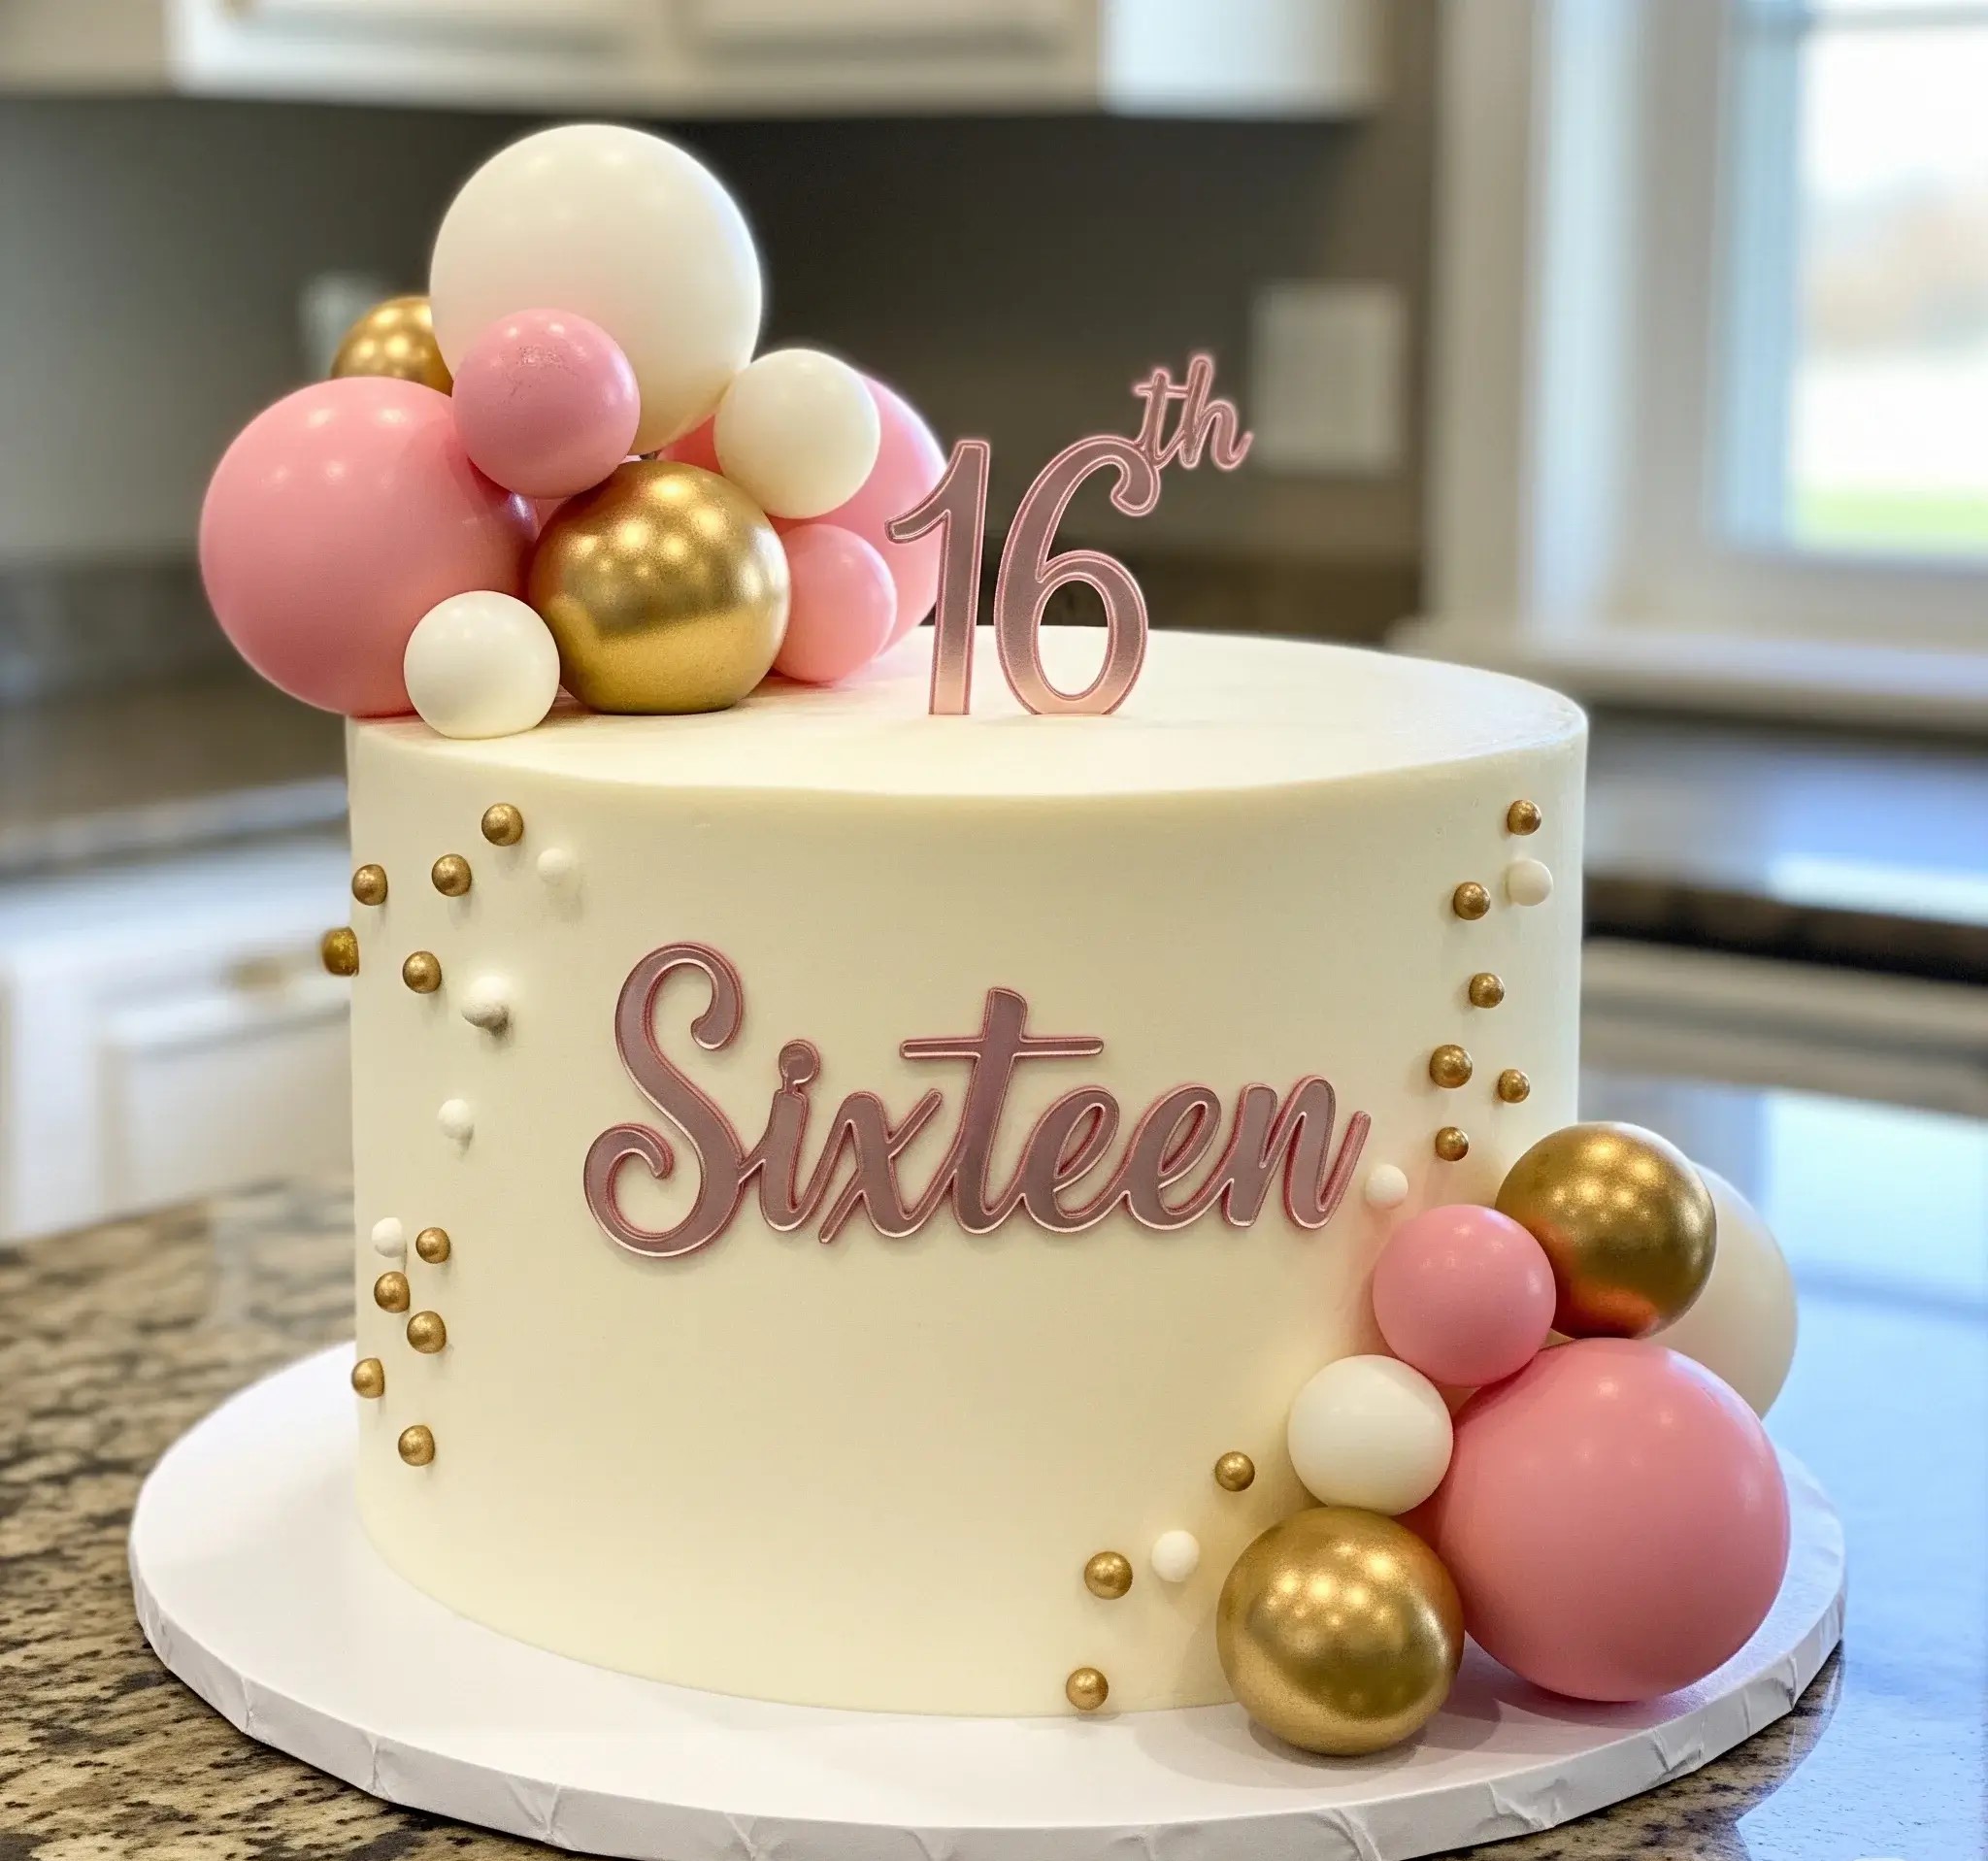
I made this cake for a sweet sixteen not too long ago—and I’m telling you, it stole the whole room. Everyone had their phones out before I even cut the first slice.
It was simple, soft, and elegant… but still playful. Smooth white sides, soft pink letters, tiny gold details, and those balloon-like toppers that look like magic but are actually super easy once you know how.
I didn’t want to fuss with a hundred steps or complicated ingredients, so I kept it honest. This cake is all about gentle flavors, clean finishes, and details that feel thoughtful—not over-the-top.
Every part is doable at home, even if you’ve never decorated a cake before. You don’t need fancy tools, and you definitely don’t need to stress.
So if you’re planning a 16th and want a cake that feels beautiful without being loud—one that actually means something—I’d love to show you how I did it.
I wrote down every step, every trick, and every little detail that made this cake turn out just right.
16th Birthday Cake Recipe
Ingredients
For the Vanilla Cake (Three 7-inch layers):
- 3 ¾ cups all-purpose flour
- 2 ½ tsp baking powder
- ½ tsp baking soda
- ½ tsp fine salt
- 1 ¾ cups unsalted butter, room temperature
- 2 ½ cups granulated sugar
- 5 large eggs, room temperature
- 1 tbsp vanilla extract
- 1 ½ cups full-fat yogurt (plain)
- ½ cup whole milk
For the Vanilla Buttercream Frosting (for frosting and crumb coat):
- 2 cups unsalted butter, room temperature
- 6 cups powdered sugar, sifted
- 1 tbsp vanilla extract
- 2–3 tbsp milk
- Pinch of salt
For the White Fondant Covering:
- 2 lbs ready-to-roll white fondant
- Cornstarch for dusting
For the Decorative Balloon Toppers
Use Edible Fondant or Modeling Chocolate:
- White fondant
- Pink fondant (soft blush tone)
- Gold fondant (painted with edible gold luster dust mixed with lemon extract or a halal-friendly clear extract)
For Balloon Assembly:
- Small balloon mold or shape by hand
- Edible glue or a thick paste made from fondant and water
- Toothpicks or skewers
- Gold, pink, and white edible sugar pearls in various sizes
For the Cake Topper and Lettering:
- Edible paper or gum paste
- Light pink edible food color for brushing or airbrushing
- “16th” topper and “Sixteen” text: can be cut using stencils or purchased as edible fondant toppers
- Edible glue
Instructions
Step 1: Prepare the Cake Layers
- Preheat oven to 340°F (170°C). Grease and line three 7-inch round cake pans with parchment paper.
- In a medium bowl, sift together flour, baking powder, baking soda, and salt. Set aside.
- In a large mixing bowl, cream the butter and sugar using a stand mixer or hand mixer until light and fluffy (about 4–5 minutes).
- Add eggs one at a time, beating well after each. Stir in the vanilla extract.
- Mix yogurt and milk together in a small jug.
- Add the flour mixture to the butter mixture in three parts, alternating with the yogurt-milk mixture. Start and end with the dry ingredients.
- Divide batter equally among the pans. Bake for 35–38 minutes or until a toothpick inserted in the center comes out clean.
- Let cakes cool in pans for 10 minutes, then turn out onto wire racks and cool completely.
Step 2: Make the Buttercream
- Beat the butter for 3–4 minutes until pale and fluffy.
- Gradually add the sifted powdered sugar. Mix on low until combined, then beat on medium-high.
- Add vanilla, salt, and milk as needed for spreadable consistency. Beat until smooth and silky (2–3 minutes more).
Step 3: Fill and Crumb Coat
- Level each cake layer using a serrated knife.
- Place the first layer on a cake board. Spread a generous amount of buttercream. Repeat with remaining layers.
- Apply a thin crumb coat around the entire cake. Chill for 30 minutes.
Step 4: Apply the Final Coat and Cover with Fondant
- After chilling, apply a smooth, even coat of buttercream all over the cake.
- Roll out white fondant to about ¼ inch thickness on a cornstarch-dusted surface.
- Carefully lift and drape over the cake. Smooth the top and sides using fondant smoothers. Trim the base neatly.
Step 5: Make the Balloon Clusters
- Roll fondant into balls of varying sizes in pink, white, and gold.
- For the gold ones, after shaping in white fondant, brush with edible gold luster dust mixed with extract. Let dry.
- Use a balloon mold or your hands to shape. Insert toothpicks for assembly if needed.
- Arrange and attach clusters to the top left and bottom right of the cake using edible glue.
Step 6: Add Decorative Pearls
- Press white, pink, and gold edible pearls into the sides of the cake as shown. Use edible glue to secure larger pearls.
Step 7: Add the Topper and Text
- Create the “16th” topper and “Sixteen” text using gum paste or edible paper. Paint or airbrush them in soft pink. Let dry.
- Attach “Sixteen” onto the front using edible glue. Insert the “16th” topper at the top using a skewer or cake pick.
8. Final Touches
- Clean the cake board edges.
- Optional: spray a light mist of edible pearl spray for an elegant shimmer.

How Many Layers Should a 16th Birthday Cake Have?
A 16th birthday feels like a big deal, and the cake should match that feeling. Here’s how many layers usually work best:
- For a small gathering (under 10 people): 2 layers are enough.
- For a medium party (10–20 guests): Go for 3 layers.
- For a larger crowd (20–35 guests): 4 layers look more impressive and serve more.
- For tall designs or stacked cakes: You can also make a two-tier cake, each tier with 2 or 3 layers.
Can I Make a 16th Birthday Cake Without Fondant?
Yes, you definitely can! Not everyone likes fondant, and the good news is—you don’t need it to make a beautiful cake.
Popular fondant-free options include:
- Buttercream-frosted cakes
- Semi-naked cakes
- Whipped cream cakes
- Ganache-covered cakes
- Textured buttercream with piping decorations
Tips:
- Smooth finish with buttercream: Chill between layers and use a bench scraper.
- For cleaner edges: Use a hot spatula to smooth the sides.
- Add shine or texture: Use edible gold dust or simple stencils.
What Kind Of Cake Topper Should I Use For a 16th Birthday?
Toppers bring the whole cake together, especially when you’re not using a lot of text or busy decorations.
Best cake topper ideas for a 16th birthday:
- “Sixteen” or “Sweet 16” written in script
- A glittery number 16 topper
- Mini crown or tiara
- Custom name topper
- Floral toppers (real or edible)
- Mini balloon toppers
- Simple heart or star shapes
Tips:
- Match with cake colors: Pick toppers in gold, silver, or pastel tones.
- Use lightweight material: So it doesn’t sink into the cake.
- Place carefully: Stick it in just before the event so it stays neat.

How Early Can I Make a Birthday Cake Before The Party?
You don’t have to bake everything the night before. You can easily plan ahead without losing freshness.
Best timeline for prepping a 16th birthday cake:
- Cake layers: Bake 2–3 days before. Wrap tightly and refrigerate.
- Buttercream: Make 3–4 days in advance. Keep in an airtight container in the fridge.
- Decorating: Assemble and frost the day before the party.
- Final touches: Add toppers, balloons, and pearls on the same day of the party.
Tips:
- Keep layers wrapped: This stops them from drying out.
- Chill before decorating: It helps get smoother edges.
- Avoid fresh fruits inside: Unless you’re serving the same day.
How Do I Transport a Tall Birthday Cake Safely?
Moving a tall cake can be scary—but it’s doable with some smart steps. Here’s how to get it to the party safely:
- Use a strong base: A thick cake board or drum works best.
- Chill the cake first: A cold cake holds its shape better.
- Place on a flat surface in your car: Like the trunk or floor, not a seat.
- Non-slip mat under the box: Stops it from sliding.
- Use a cake box with height room: Or cover lightly with a large container.
- Drive slow and brake gently: Sudden stops can shift layers.
Can I Freeze Cake Layers Ahead Of a Sweet 16?
Yes, and it actually makes things easier. Freezing keeps the layers moist and helps you stay stress-free on the party day.
- Cool completely: Never freeze warm cake.
- Wrap tightly: Use plastic wrap, then foil.
- Label and date: So you don’t forget what’s what.
- Freeze up to 2 weeks: They’ll stay fresh and soft.
- Thaw correctly: Leave at room temp (still wrapped) for 2–3 hours.

